GenAuth DocsDocuments
Concepts
User Guide
Development Integration
AgentAuth
Metadata
Development Integration
Multi-tenant (beta)
Console Documentation
Multi-tenant Console
Tenant Console
Saas Application Demo
Concepts
User Guide
Development Integration
AgentAuth
Metadata
Development Integration
Multi-tenant (beta)
Console Documentation
Multi-tenant Console
Tenant Console
Saas Application Demo
Old version
User Guide
  • Quick Start

  • Authentication

  • Access Control

  • Authorization

  • Adaptive MFA

  • User Account Management

  • User Directory Management

  • Applications

  • Become a Federation Authentication Identity Provider

  • Connect External Identity Providers (IdP)

  • WeChat Ecosystem Full Scenario Capabilities

  • Migrate Users to GenAuth

  • Security Settings

  • Branding

  • Automation

    • Pipeline

      • Create Your First Pipeline Function
      • Pipeline API Reference
      • Pipeline Use Cases
      • Pipeline User Object
      • Pipeline Context Object
      • Use Environment Variables in Pipeline
      • Available Node Modules
      • How to Debug
      • Private Deployment
    • Webhooks
  • Audit Logs

  • Setting

  • FAQ

  1. User Guide
  2. /
  3. Automation
  4. /
  5. Pipeline
  6. /
  7. Create Your First Pipeline Function

¶ Create your first Pipeline function

Update time: 2025-07-23 07:34:21
Edit

Pipeline functions are custom JavaScript code executed during the GenAuth authentication process. With Pipeline, developers can easily customize and extend the capabilities of GenAuth.

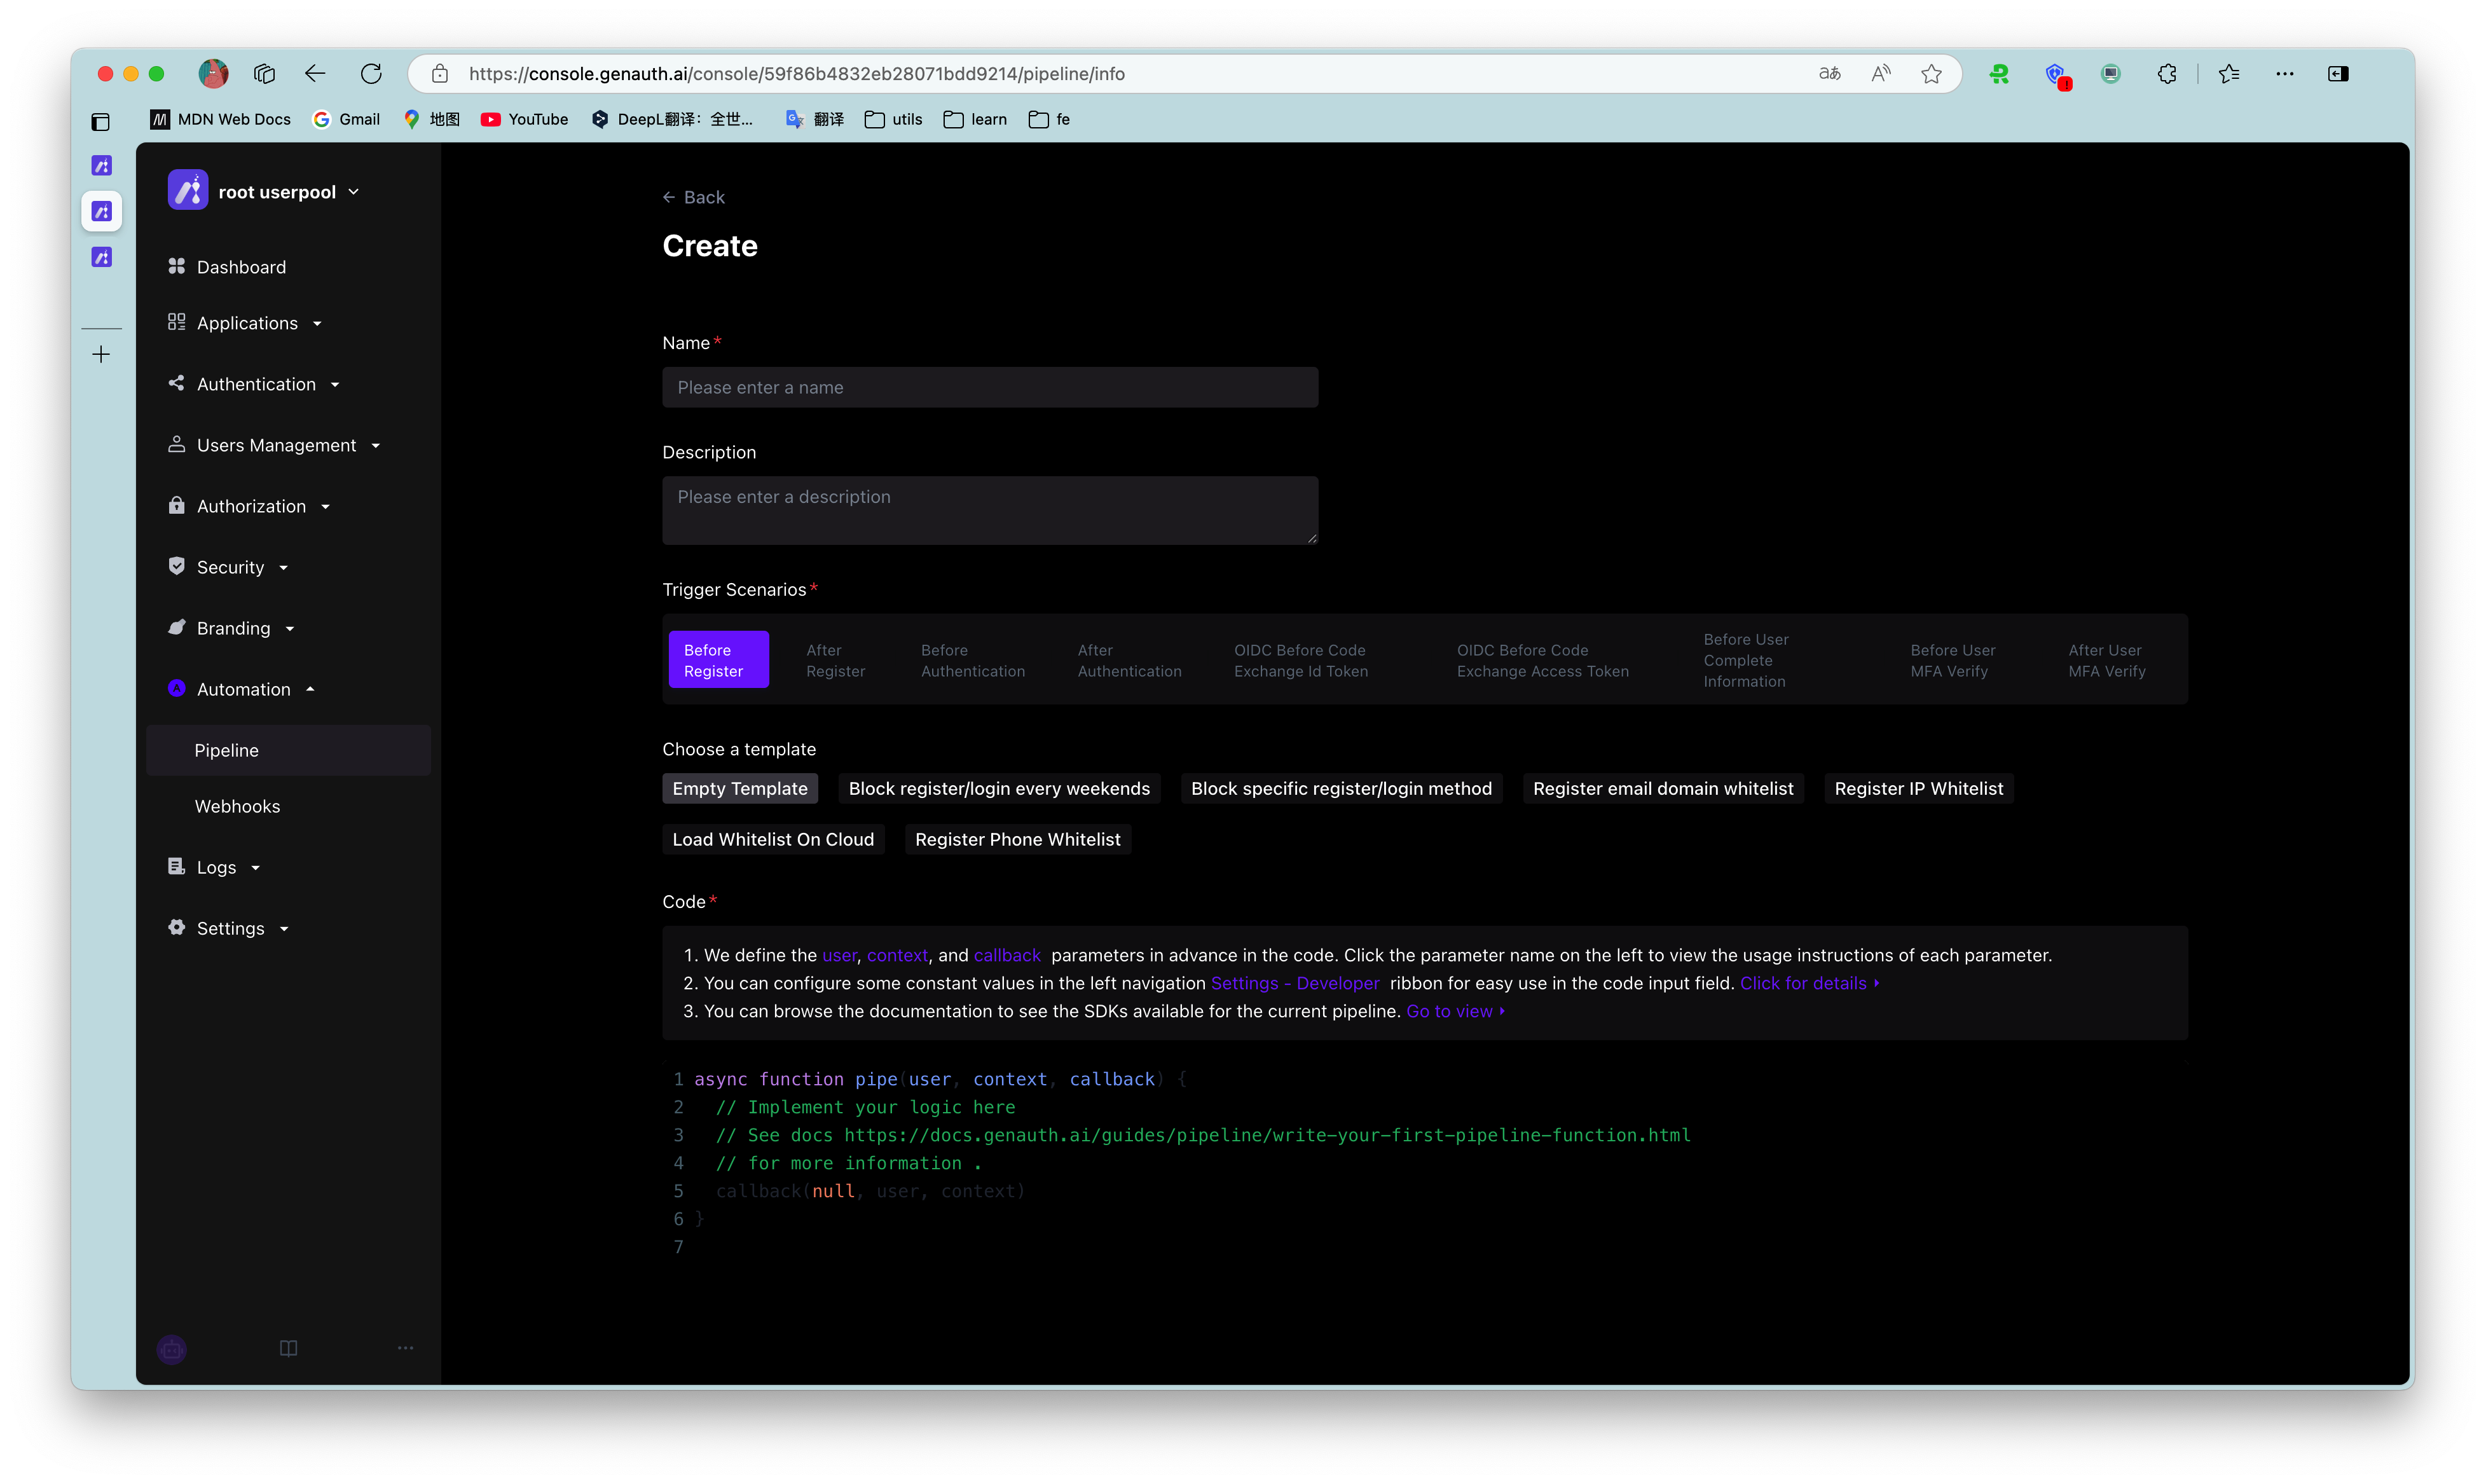
¶ Step 1: Choose a Pipeline template

GenAuth provides many out-of-the-box templates to help you get started quickly.

You can also view the list of Pipeline template functions here: https://github.com/authing/pipeline (opens new window). At the same time, you are welcome to use your talents and contribute Pipeline template functions to us.

  1. Select a trigger scene:

Select a trigger scene

  1. Select Register email suffix whitelist in access control.

¶ Step 2: Create a Pipeline function

  1. Here we set the domain name whitelist to example.com, you can also customize it.

  2. Click the Create button in the lower left corner. We will deploy this function to the cloud. It will take some time, please be patient.

The page returns to the Pipeline function list page, and you can see the Pipeline function we just added.

If you have multiple Pipeline functions, you can drag the leftmost button to sort them.

¶ Step 3: Verify whether the whitelist is valid

  1. First, register with an email address that does not have the suffix example.com. The system prompts "Access Denied." This is the prompt message we specified in the custom Pipeline function.

  2. Then register with an email address with the suffix example.com. Registration is successful!

¶ Step 4: You may also need to

  • Read the Pipeline Function Development Guide in detail.
  • Learn what request information you can get in the pipe function: user object and context object.
  • Learn how to use environment variables in Pipeline.
  • Learn about the available Node Modules in the Pipeline function. You can use Node.js/JavaScript directly!
  • We provide a lot of rich Pipeline function templates (opens new window).
  • We also provide convenient online debugging methods to facilitate developers to debug online.
Previous article: Pipeline Next article: Pipeline API Reference
  • Step 1: Choose a Pipeline template
  • Step 2: Create a Pipeline function
  • Step 3: Verify whether the whitelist is valid
  • Step 4: You may also need to

User identity management

Integrated third-party login
Customized authentication process

Enterprise internal management

Single sign-on
Multi-factor authentication
Permission management

Developer

Development Documentation
GitHub (opens new window)

Company

official@genauth.ai
16th Floor, Building B, Beichen Century Center, Chaoyang District, Beijing (Total)
Room 406, 4th Floor, Block B, No. 200, Tianfu Fifth Street, High-tech Zone, Chengdu (Branch)

© Beijing Steamory Technology Co., Ltd.