GenAuth DocsDocuments
Concepts
User Guide
Development Integration
AgentAuth
Metadata
Development Integration
Multi-tenant (beta)
Console Documentation
Multi-tenant Console
Tenant Console
Saas Application Demo
Concepts
User Guide
Development Integration
AgentAuth
Metadata
Development Integration
Multi-tenant (beta)
Console Documentation
Multi-tenant Console
Tenant Console
Saas Application Demo
Old version
User Guide
  • Quick Start

  • Authentication

  • Access Control

  • Authorization

  • Adaptive MFA

  • User Account Management

  • User Directory Management

  • Applications

    • Self-built Applications

    • Single Sign-On SSO

      • Application Panel
      • Self-built Application SSO Solutions
  • Become a Federation Authentication Identity Provider

  • Connect External Identity Providers (IdP)

  • WeChat Ecosystem Full Scenario Capabilities

  • Migrate Users to GenAuth

  • Security Settings

  • Branding

  • Automation

  • Audit Logs

  • Setting

  • FAQ

¶ Self-built application SSO solution

Update time: 2025-07-23 07:34:21
Edit

GenAuth provides self-built applications. The user pool stores all user data in the user system, while the self-built application corresponds to the business application created according to business needs in reality. A user pool may have multiple self-built applications. After enabling single sign-on between applications, the login status between different applications under the same user pool will be connected, and the end user only needs to log in once to travel between different applications.

¶ Configure single sign-on in the GenAuth console

¶ Step 1: Create two applications

First, you can create two applications according to the Guide.

¶ Step 2: Configure single sign-on

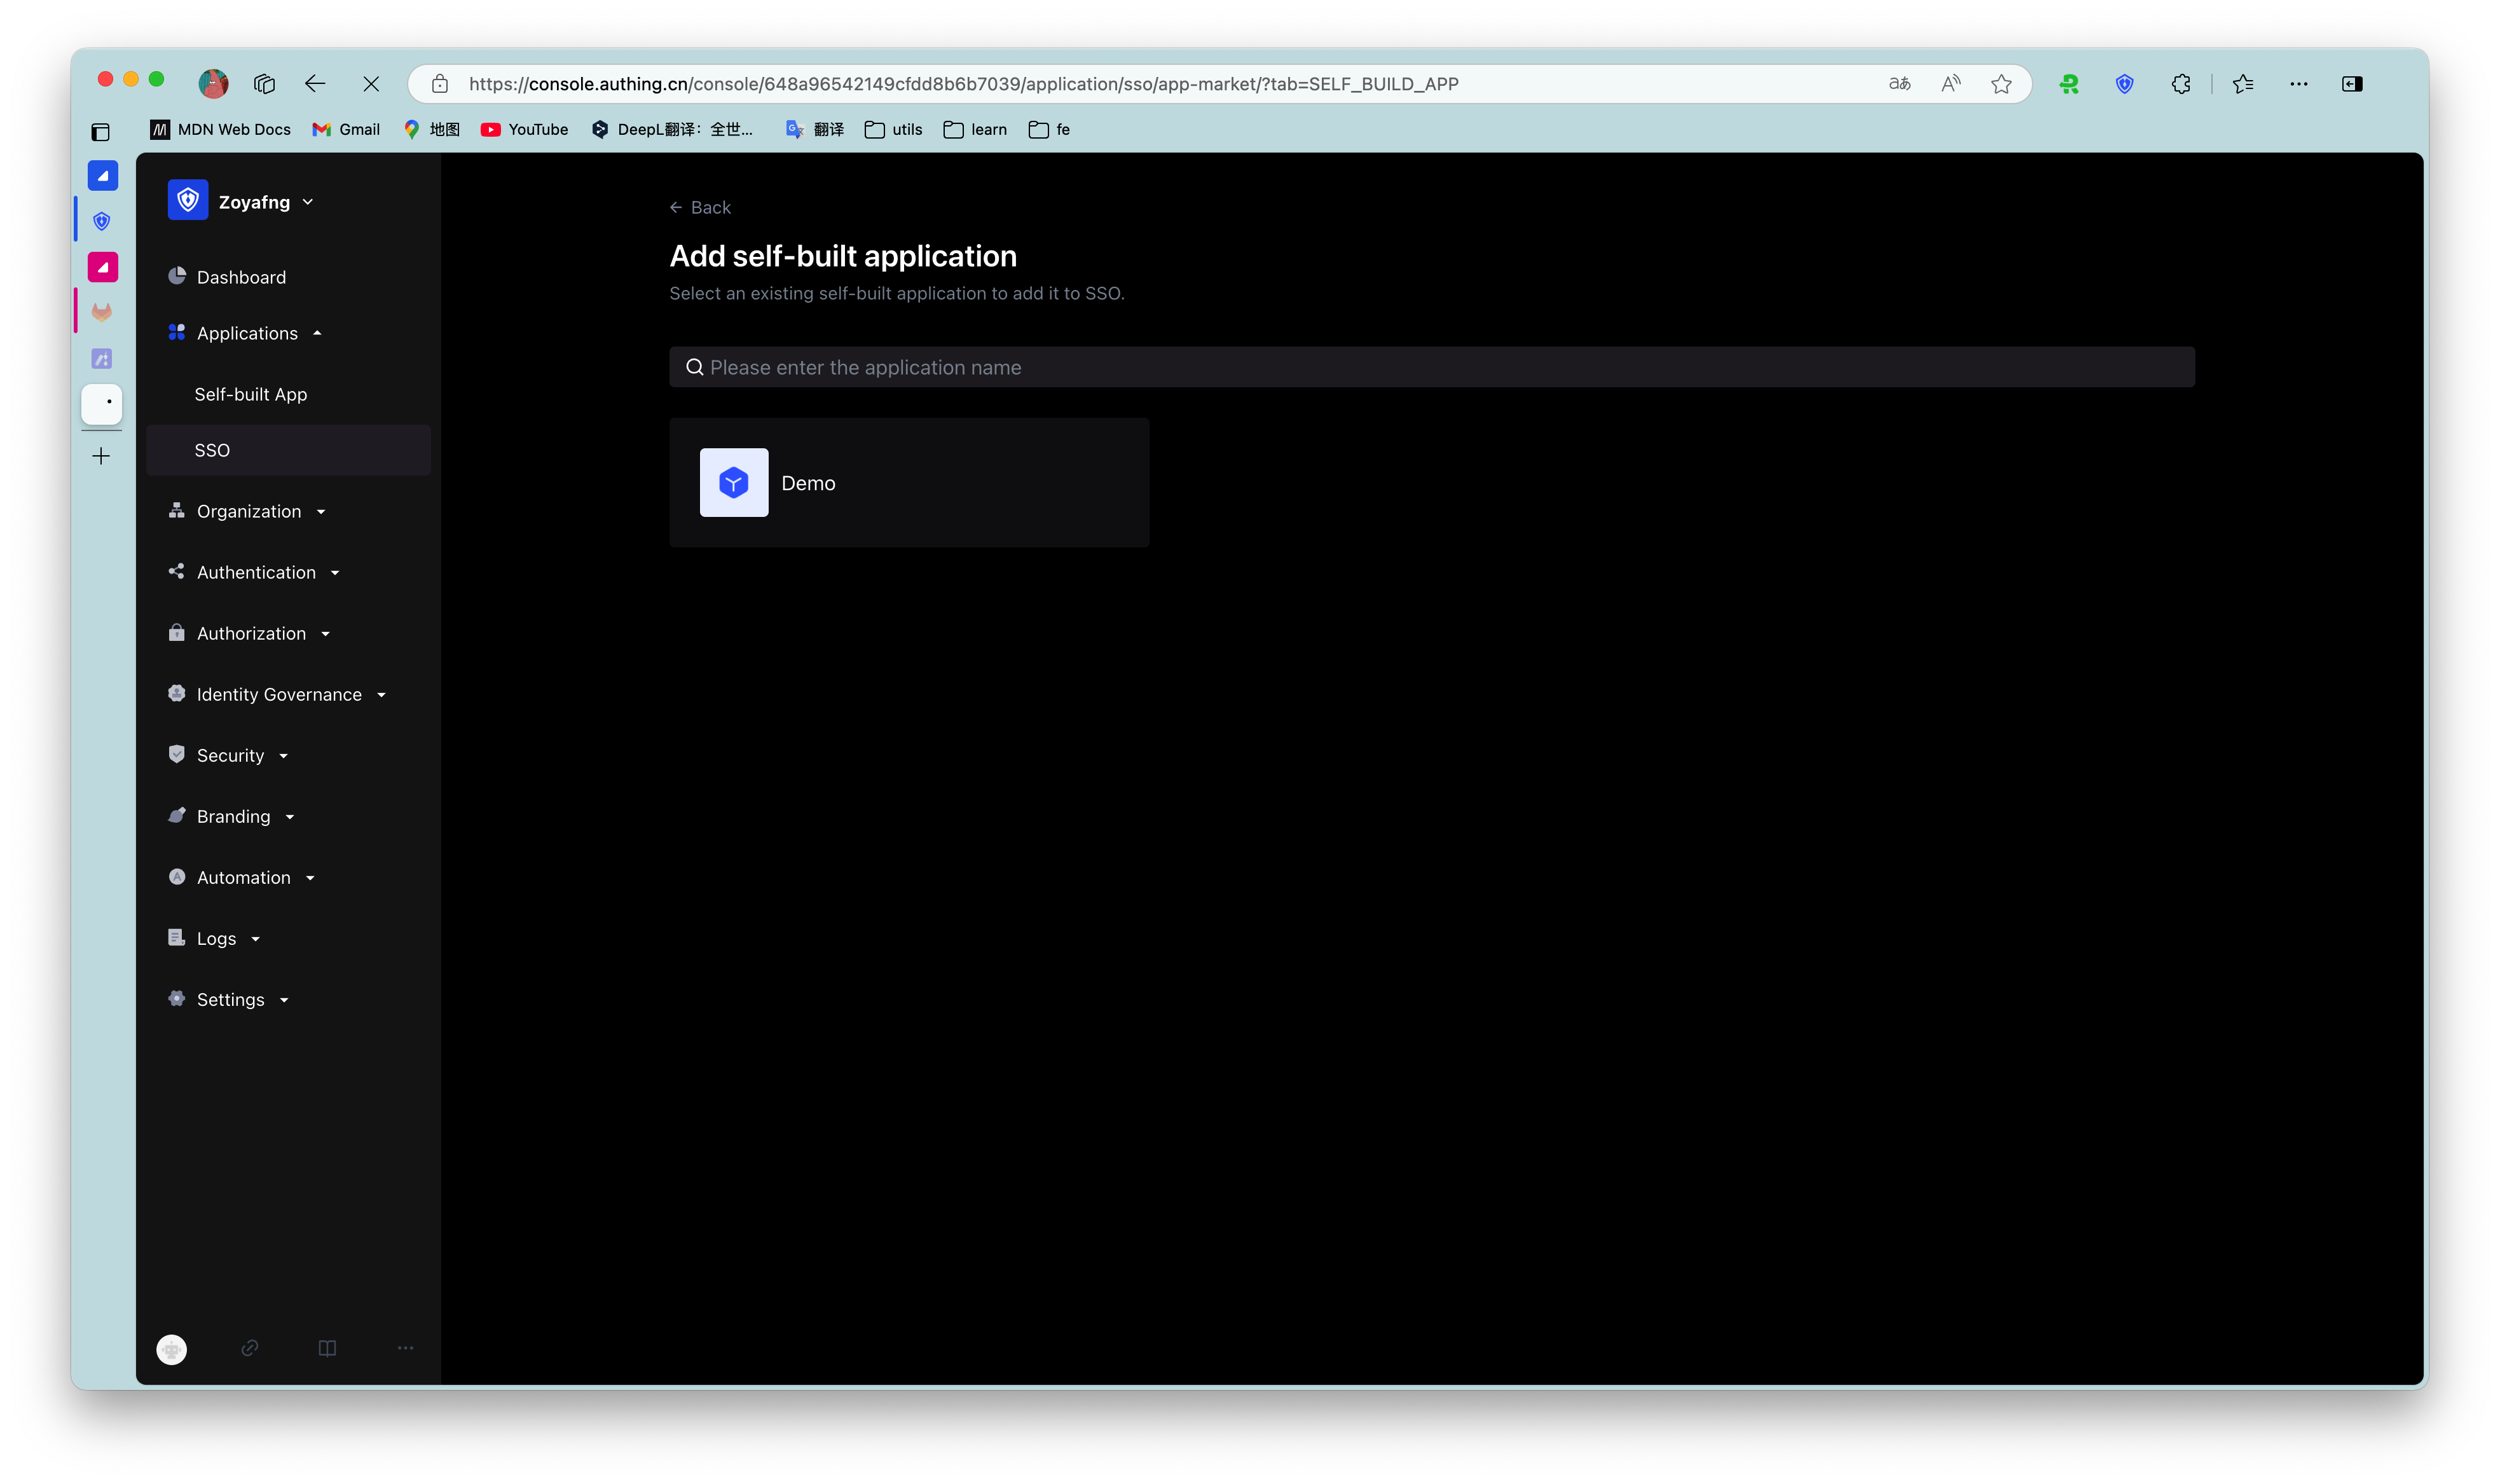
  1. Go to the menu Application->Single Sign-on SSO, and click Add self-built application in the upper right corner.

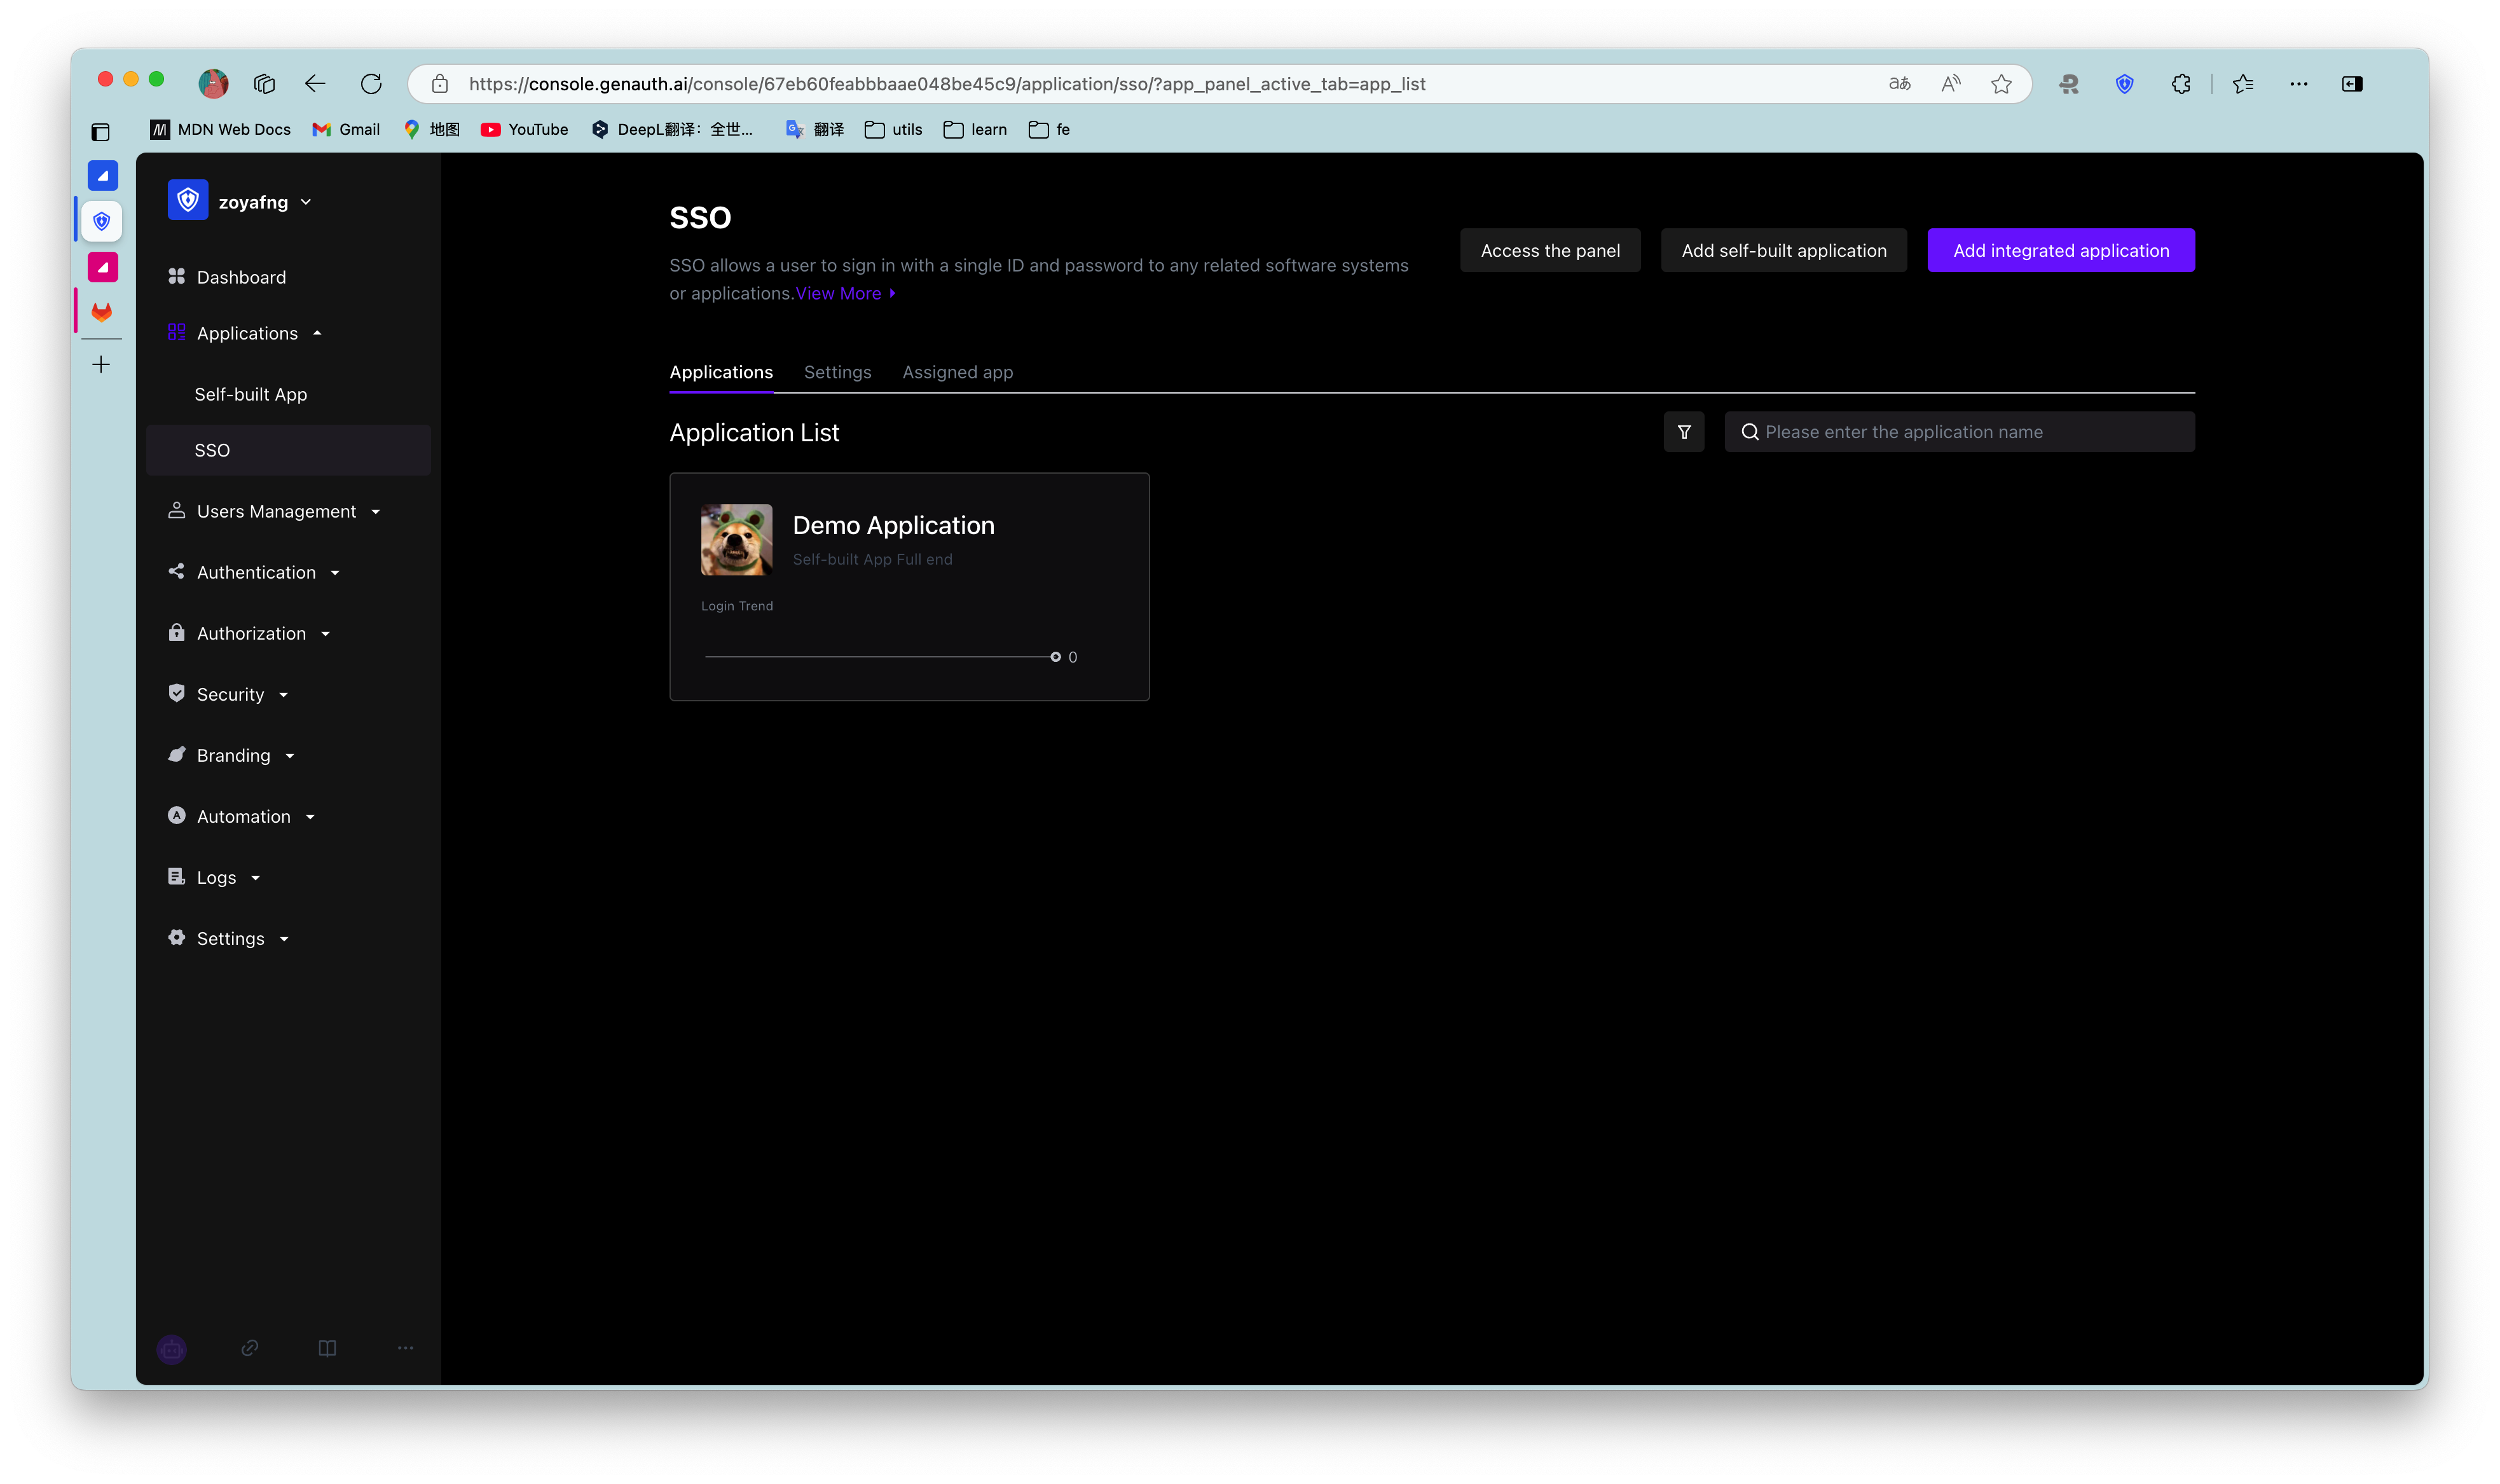
  1. Find and add the created application in the list.

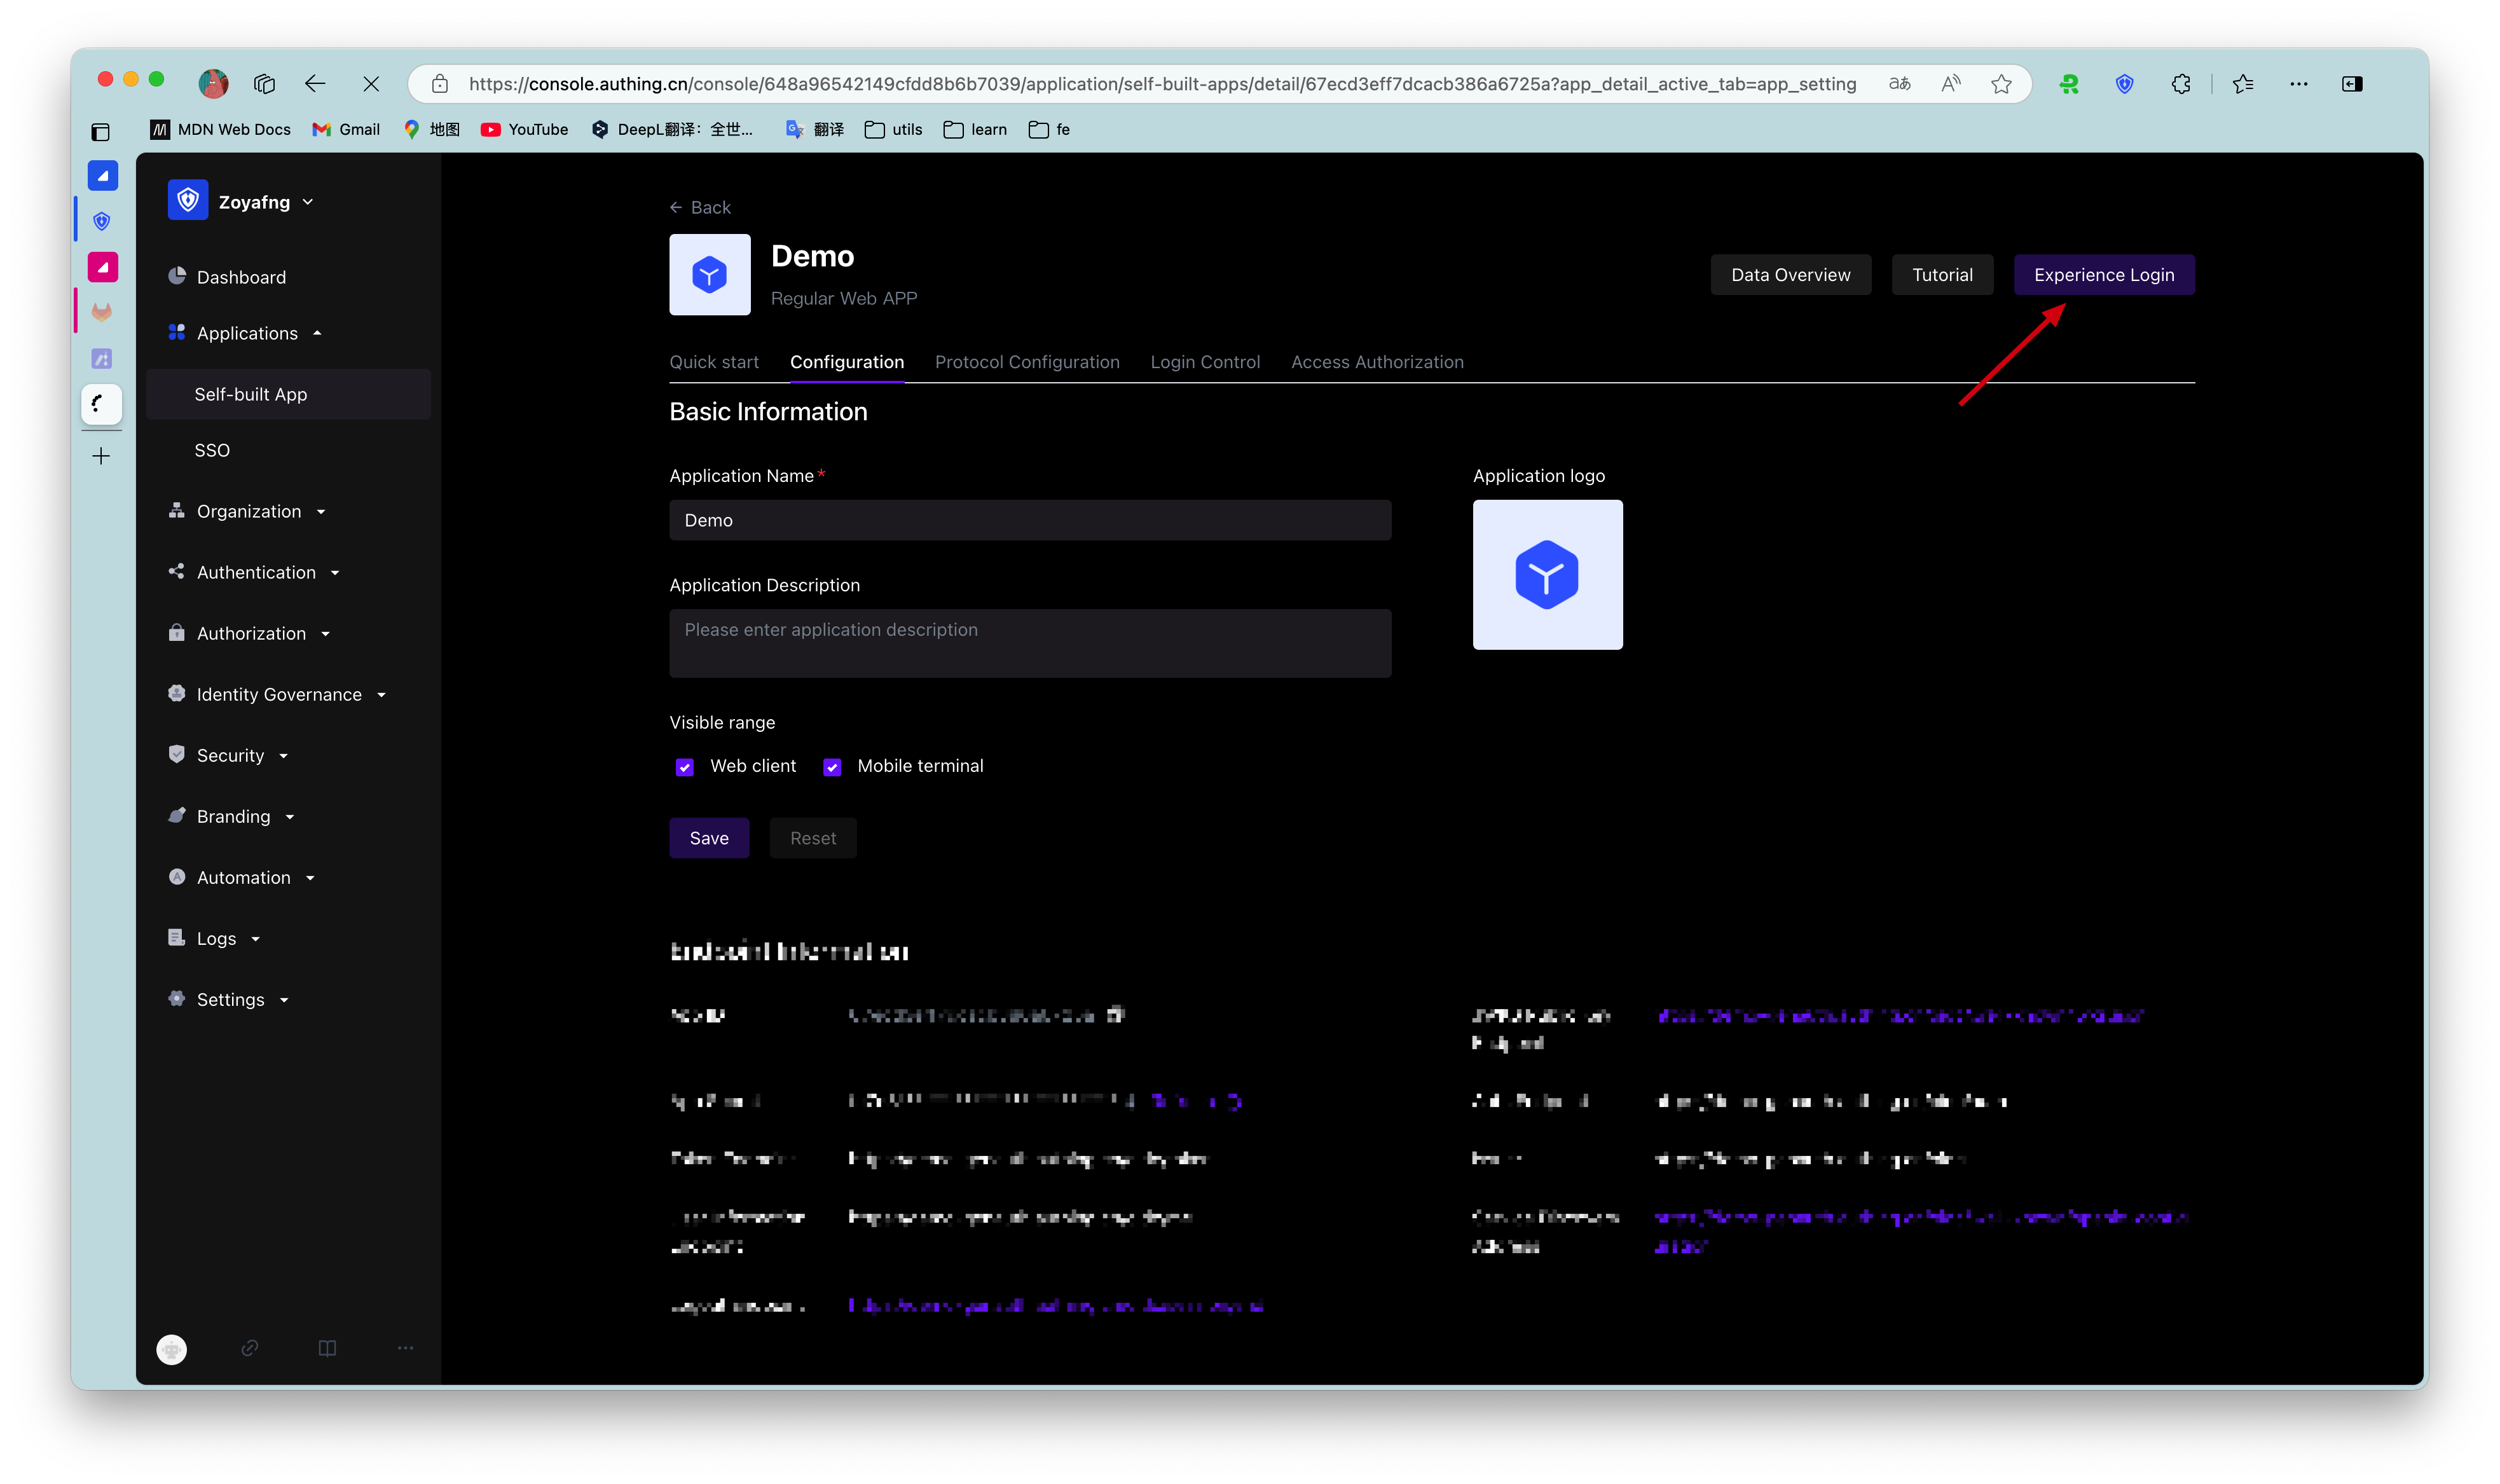
¶ Step 3: Experience application single sign-on

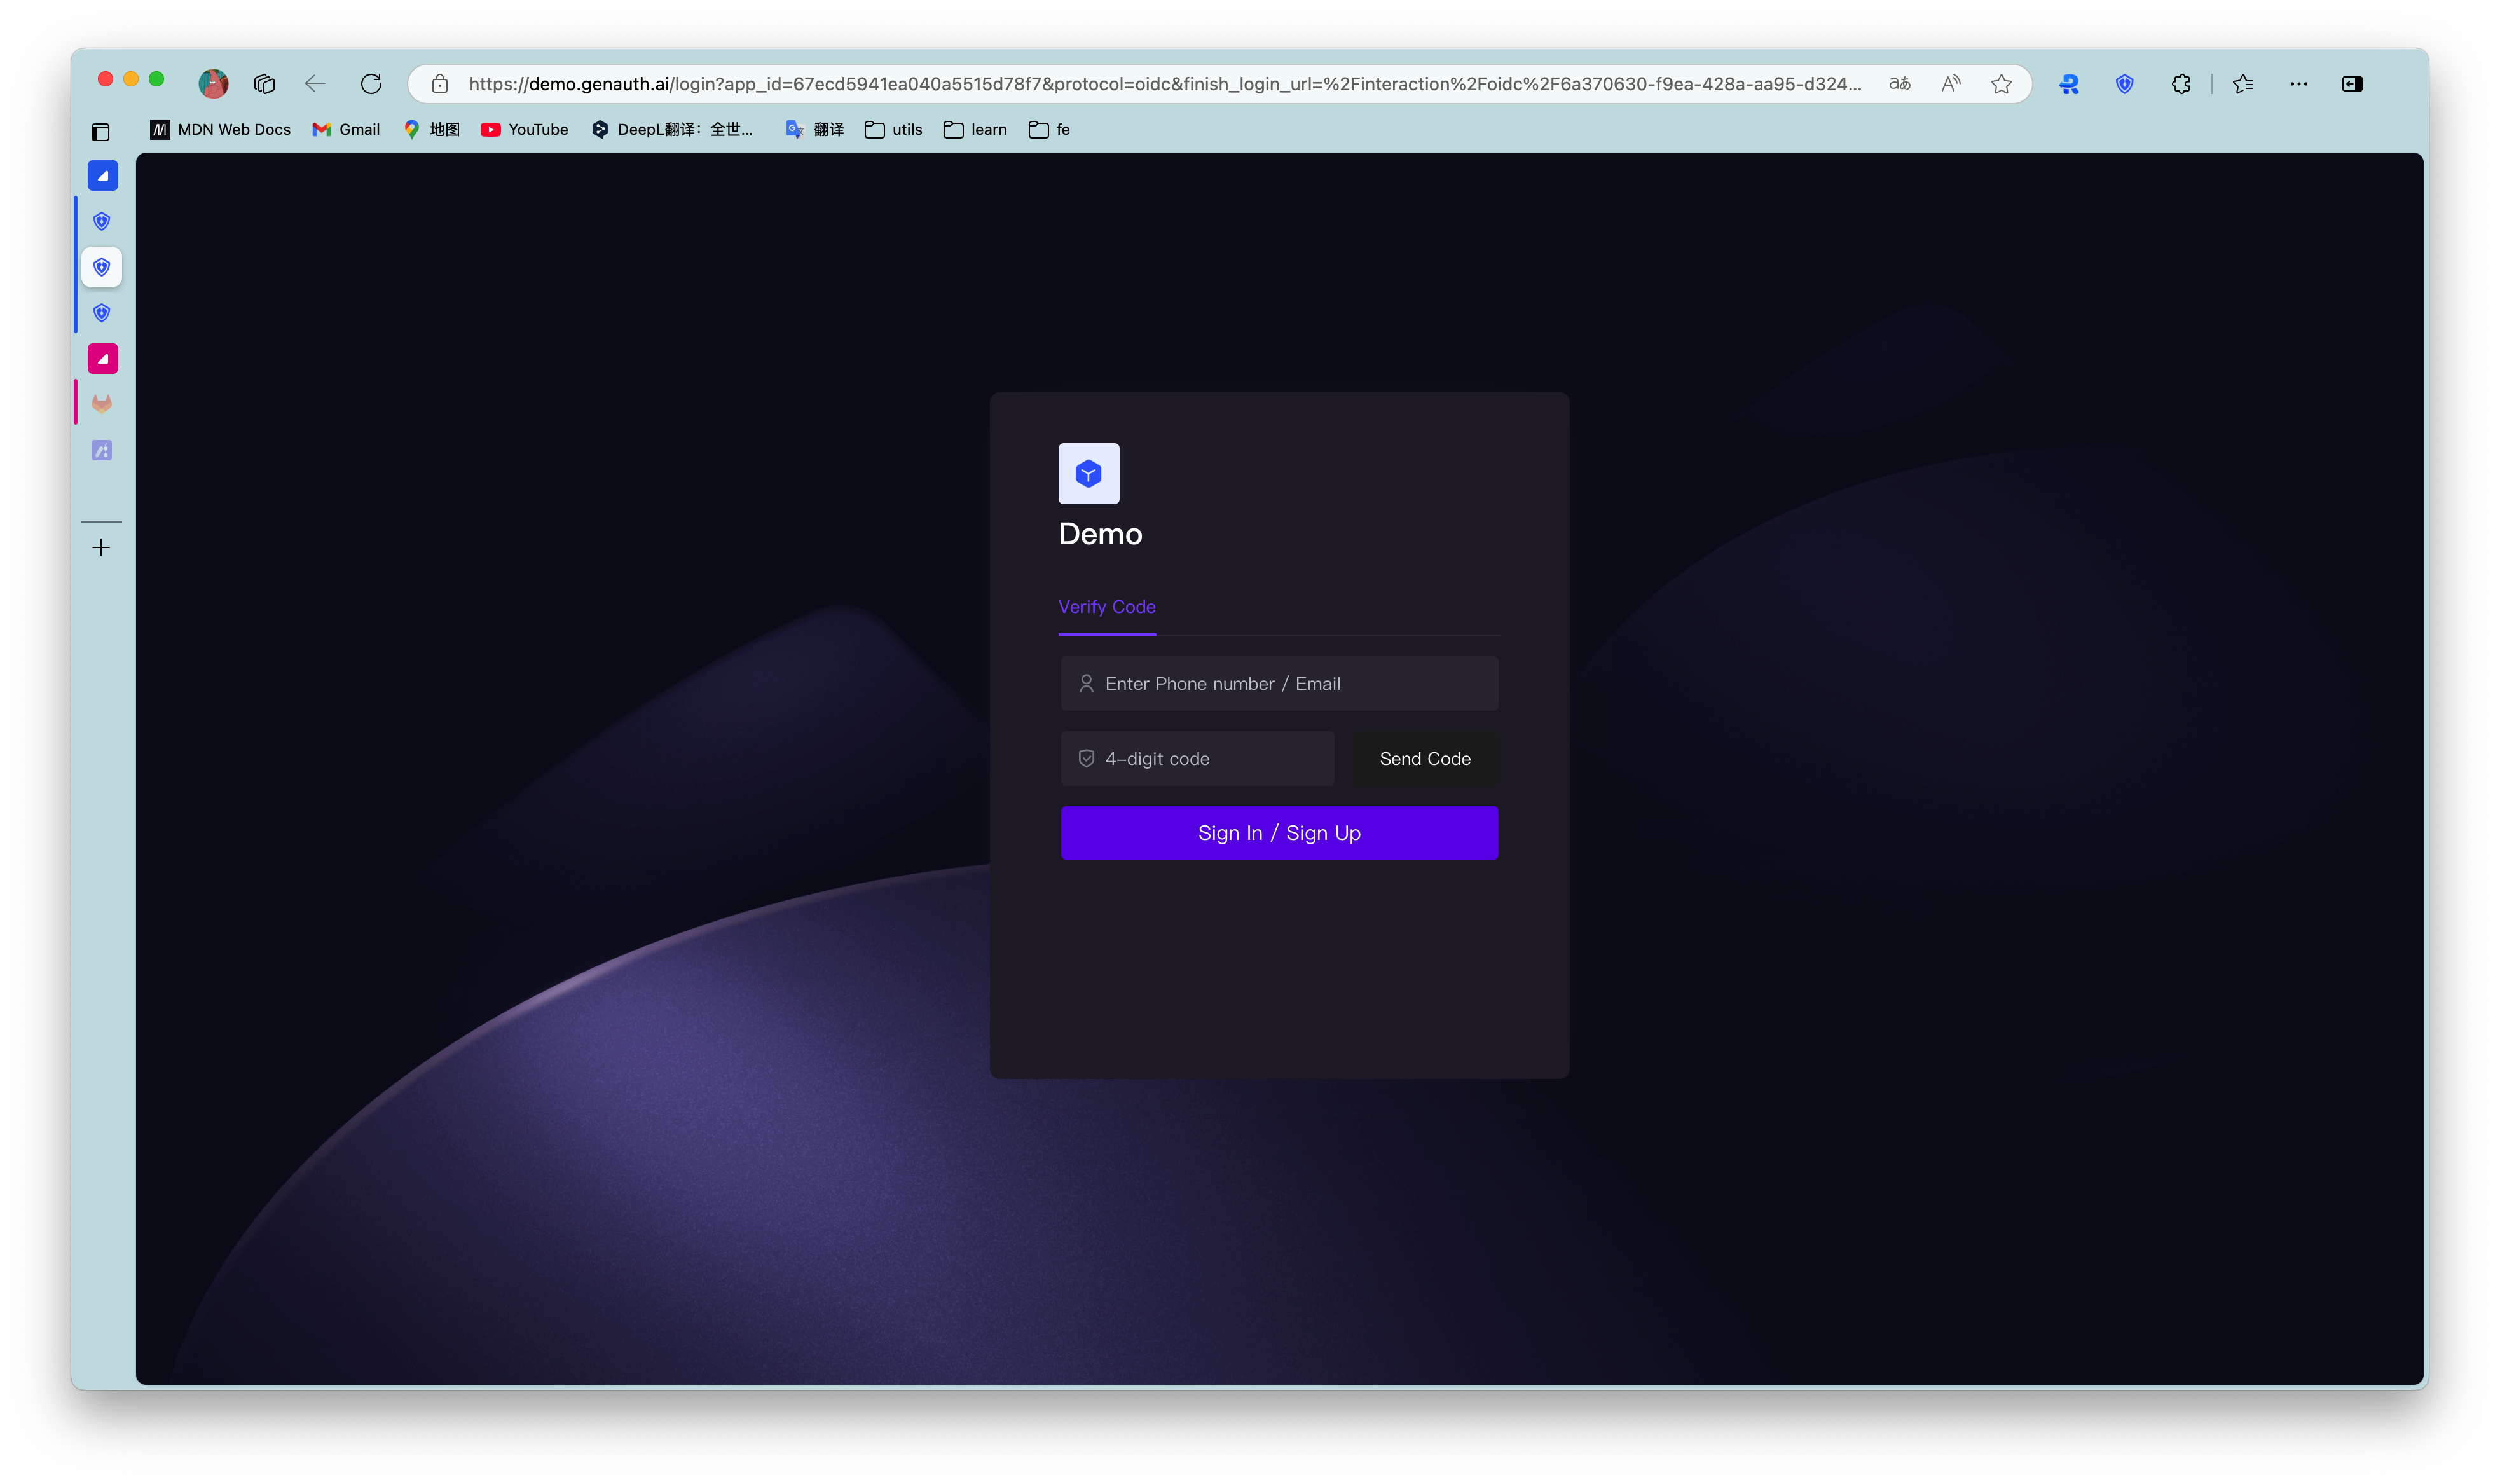
  1. Go to the Application List tab of Single Sign-On SSO, select an application, and click Experience Login.

  1. Complete the login on the login page.

After success, it will jump to the application callback address:

  1. Next, we click the experience button of another application.

The user does not need to enter the password again and directly enters the callback address of the application:

¶ Use SDK to access single sign-on

For detailed access process, please refer to the Single Sign-on SDK (opens new window) document.

Previous article: Application Panel Next article: Become a Federation Authentication Identity Provider
  • Configure single sign-on in the GenAuth console
  • Use SDK to access single sign-on

User identity management

Integrated third-party login
Customized authentication process

Enterprise internal management

Single sign-on
Multi-factor authentication
Permission management

Developer

Development Documentation
GitHub (opens new window)

Company

official@genauth.ai
16th Floor, Building B, Beichen Century Center, Chaoyang District, Beijing (Total)
Room 406, 4th Floor, Block B, No. 200, Tianfu Fifth Street, High-tech Zone, Chengdu (Branch)

© Beijing Steamory Technology Co., Ltd.