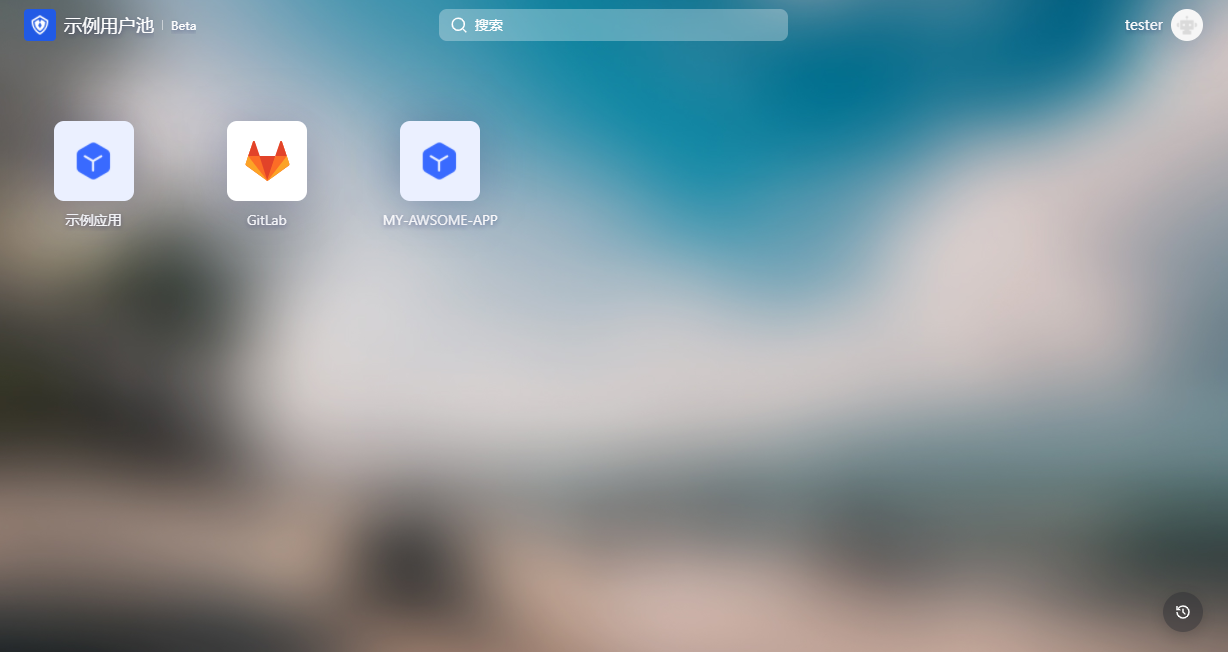
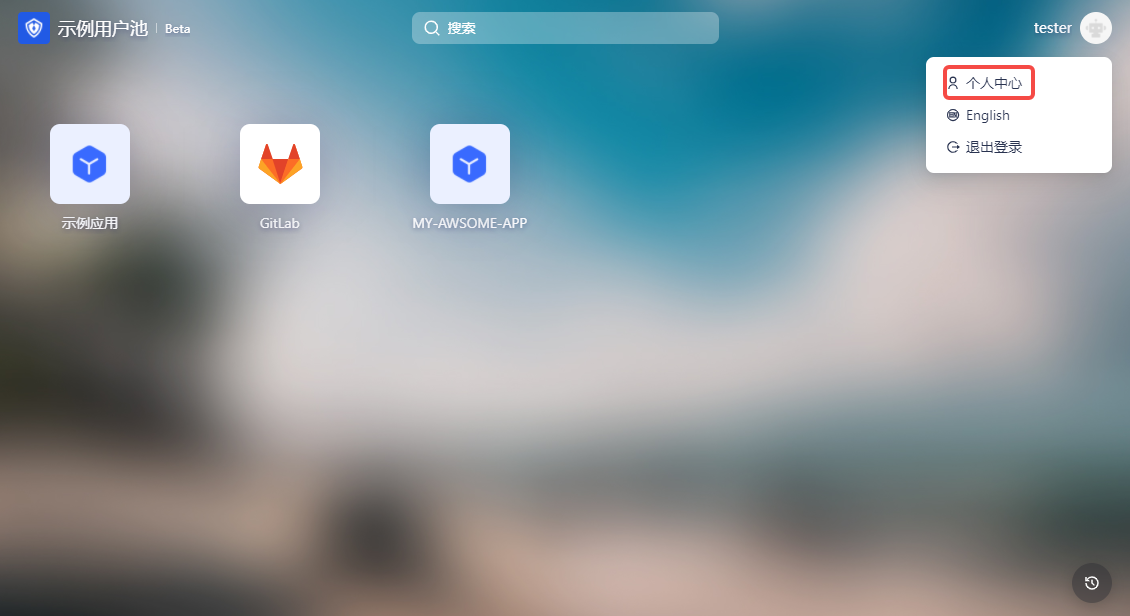
¶ Application Panel
The GenAuth application panel is used to display various applications required by the enterprise. It is a good place to provide employees with single sign-on, improve work efficiency, and ensure information security.
The single sign-on (SSO) of enterprise employees to various applications is based on Security Assertion Markup Language (SAML) or GenAuth self-developed secure authentication (GenAuth Secure Authentication).
¶ Operation Instructions for End Users
¶ Login to the Application Panel
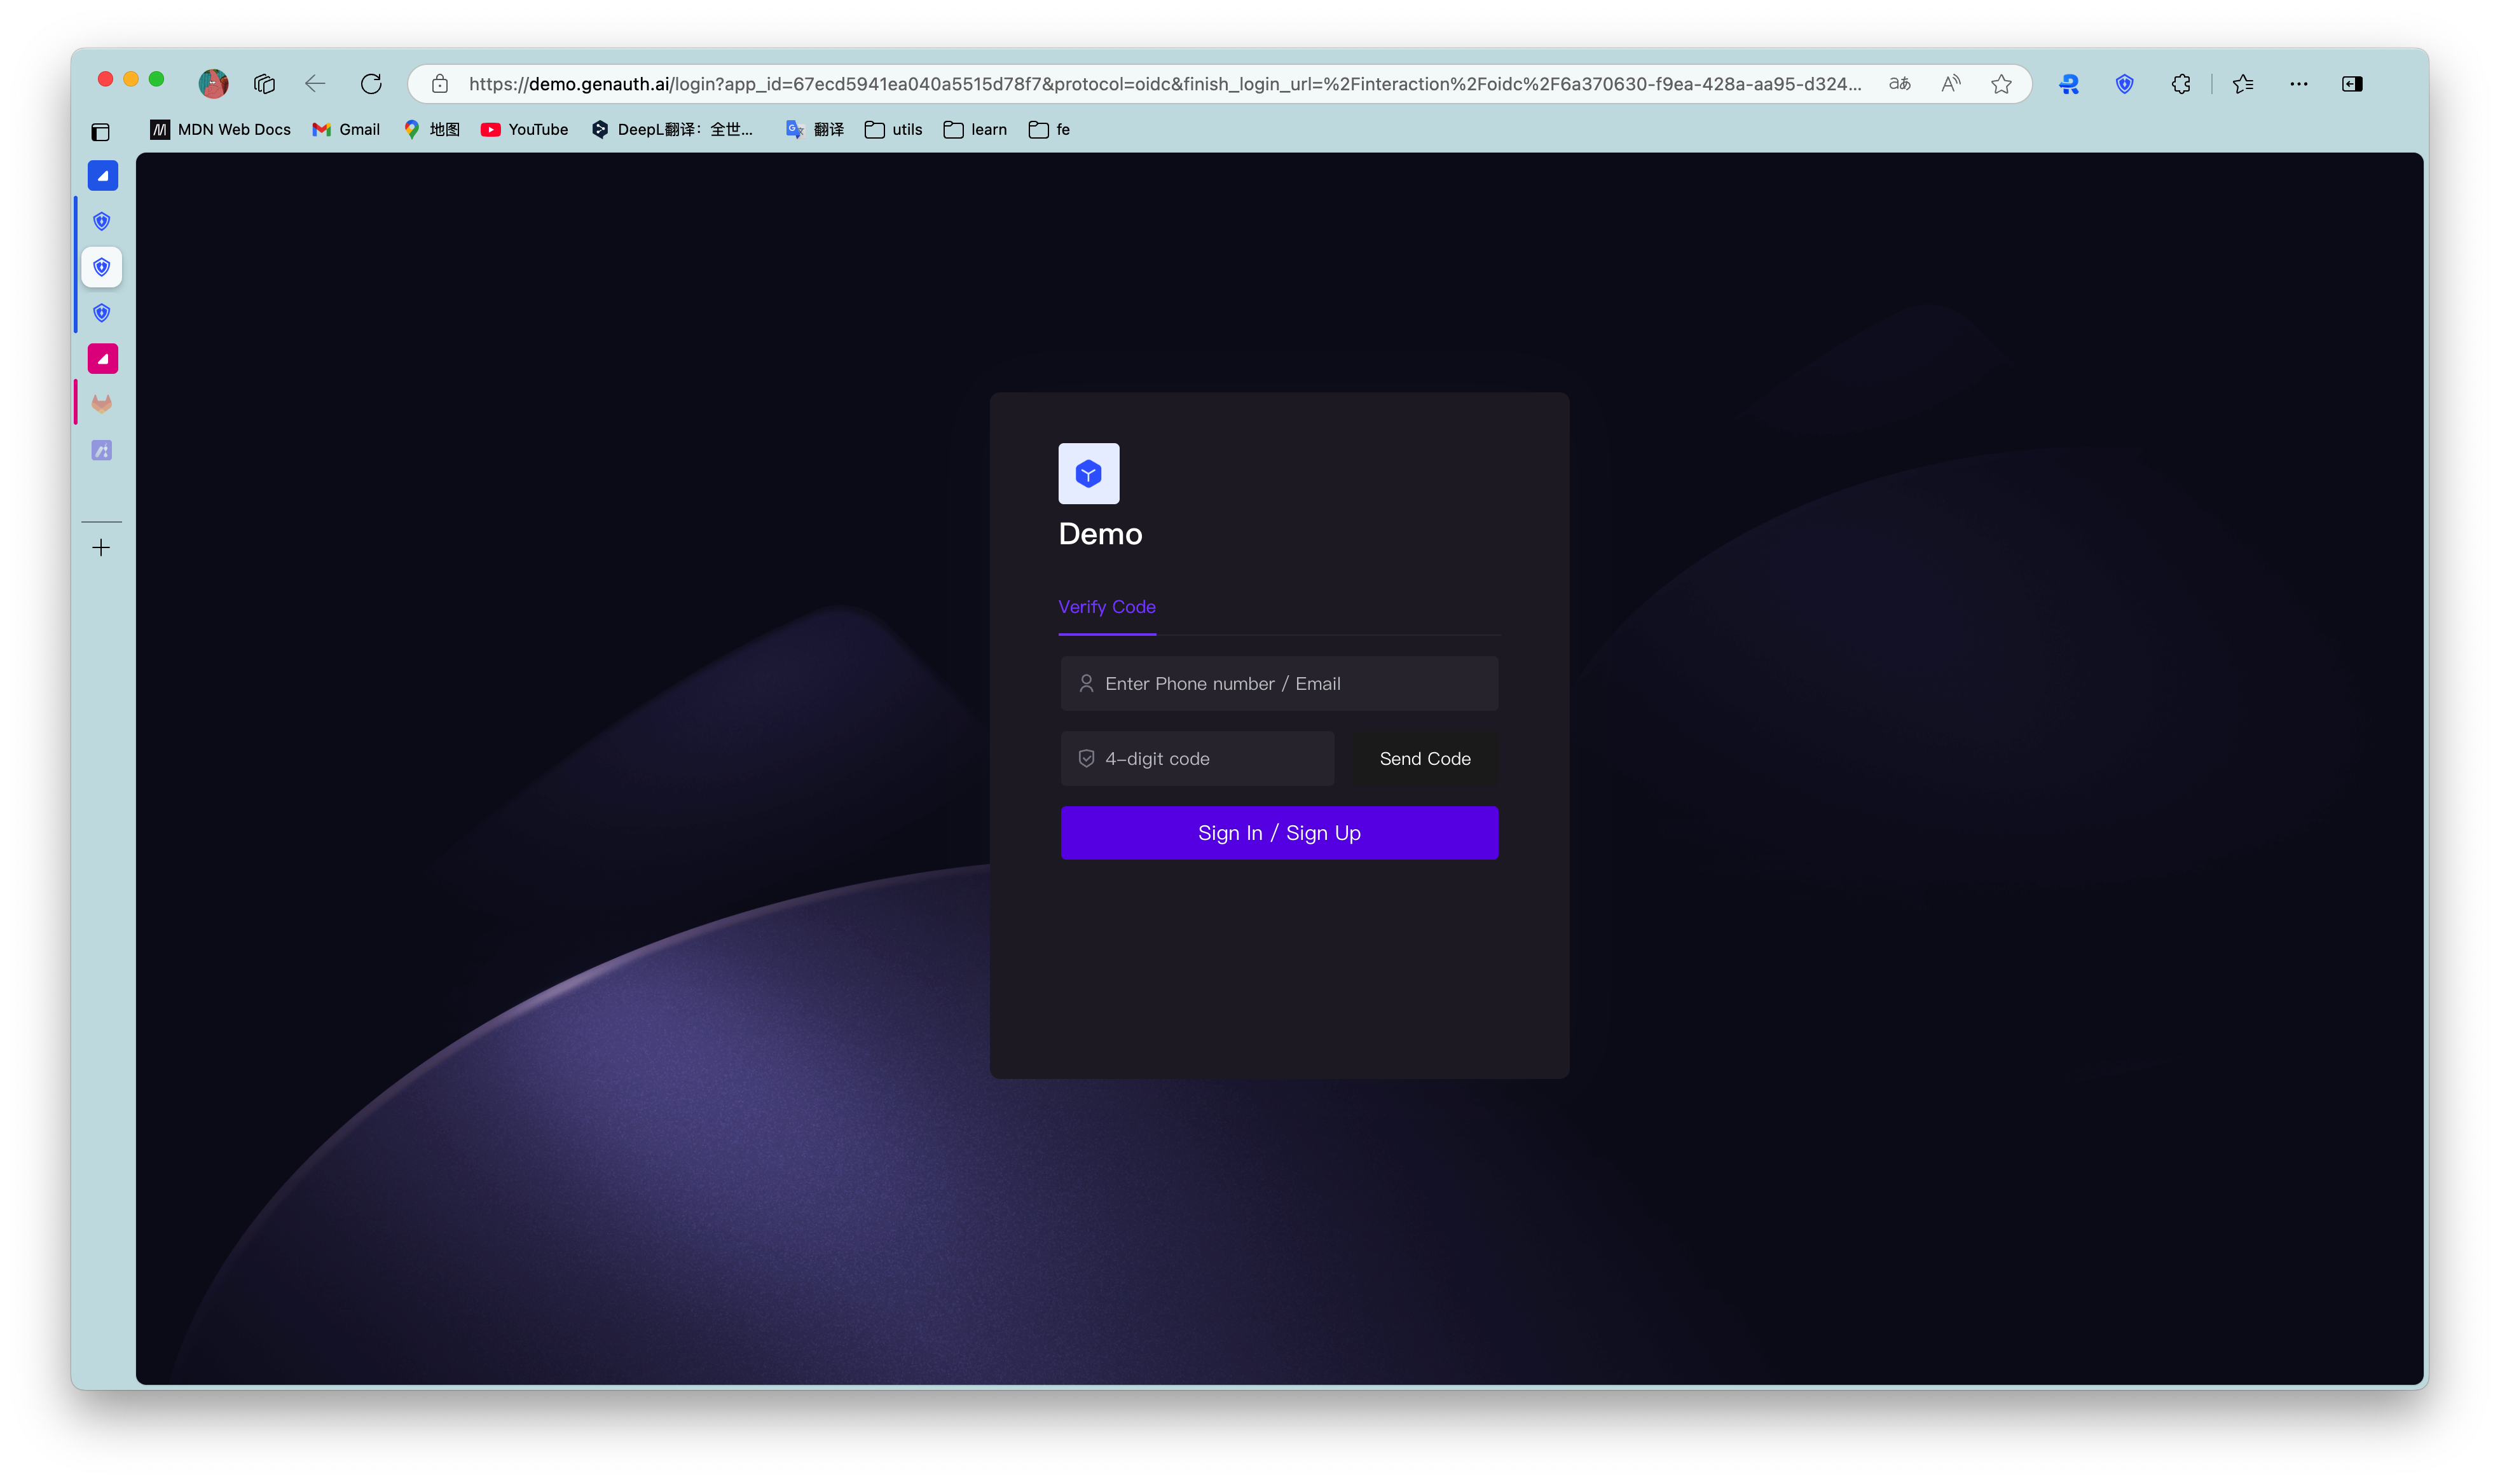
End users need to log in to GenAuth before accessing the application panel. First, the user needs to enter the login address URL of the application panel in the browser, such as "https://org-name.genauth.ai" (where "org-name" is the name of the company or organization). Next, the user needs to enter his username and password, or log in through a third-party account. If the user does not know his username or forgets his password, he needs to contact the IT department of his company, and the IT administrator will set up a GenAuth account or reset the password for him.
¶ Add or uninstall applications
The application panel will display all applications accessible to the user by default. Users can add or uninstall their frequently used applications at will to reduce the interference of unnecessary applications.
You can add self-built applications or third-party applications to the application panel.
To delete an application from the application panel, click the "..." button in the upper right corner of the application to be deleted in the application list and confirm it in the pop-up deletion window.

¶ Update personal information
In the upper right corner of the application panel, users can click the Personal Center button to enter the user's personal center to edit personal information.

¶ Instructions for enterprise administrators
¶ Step 1: Install the app for team members
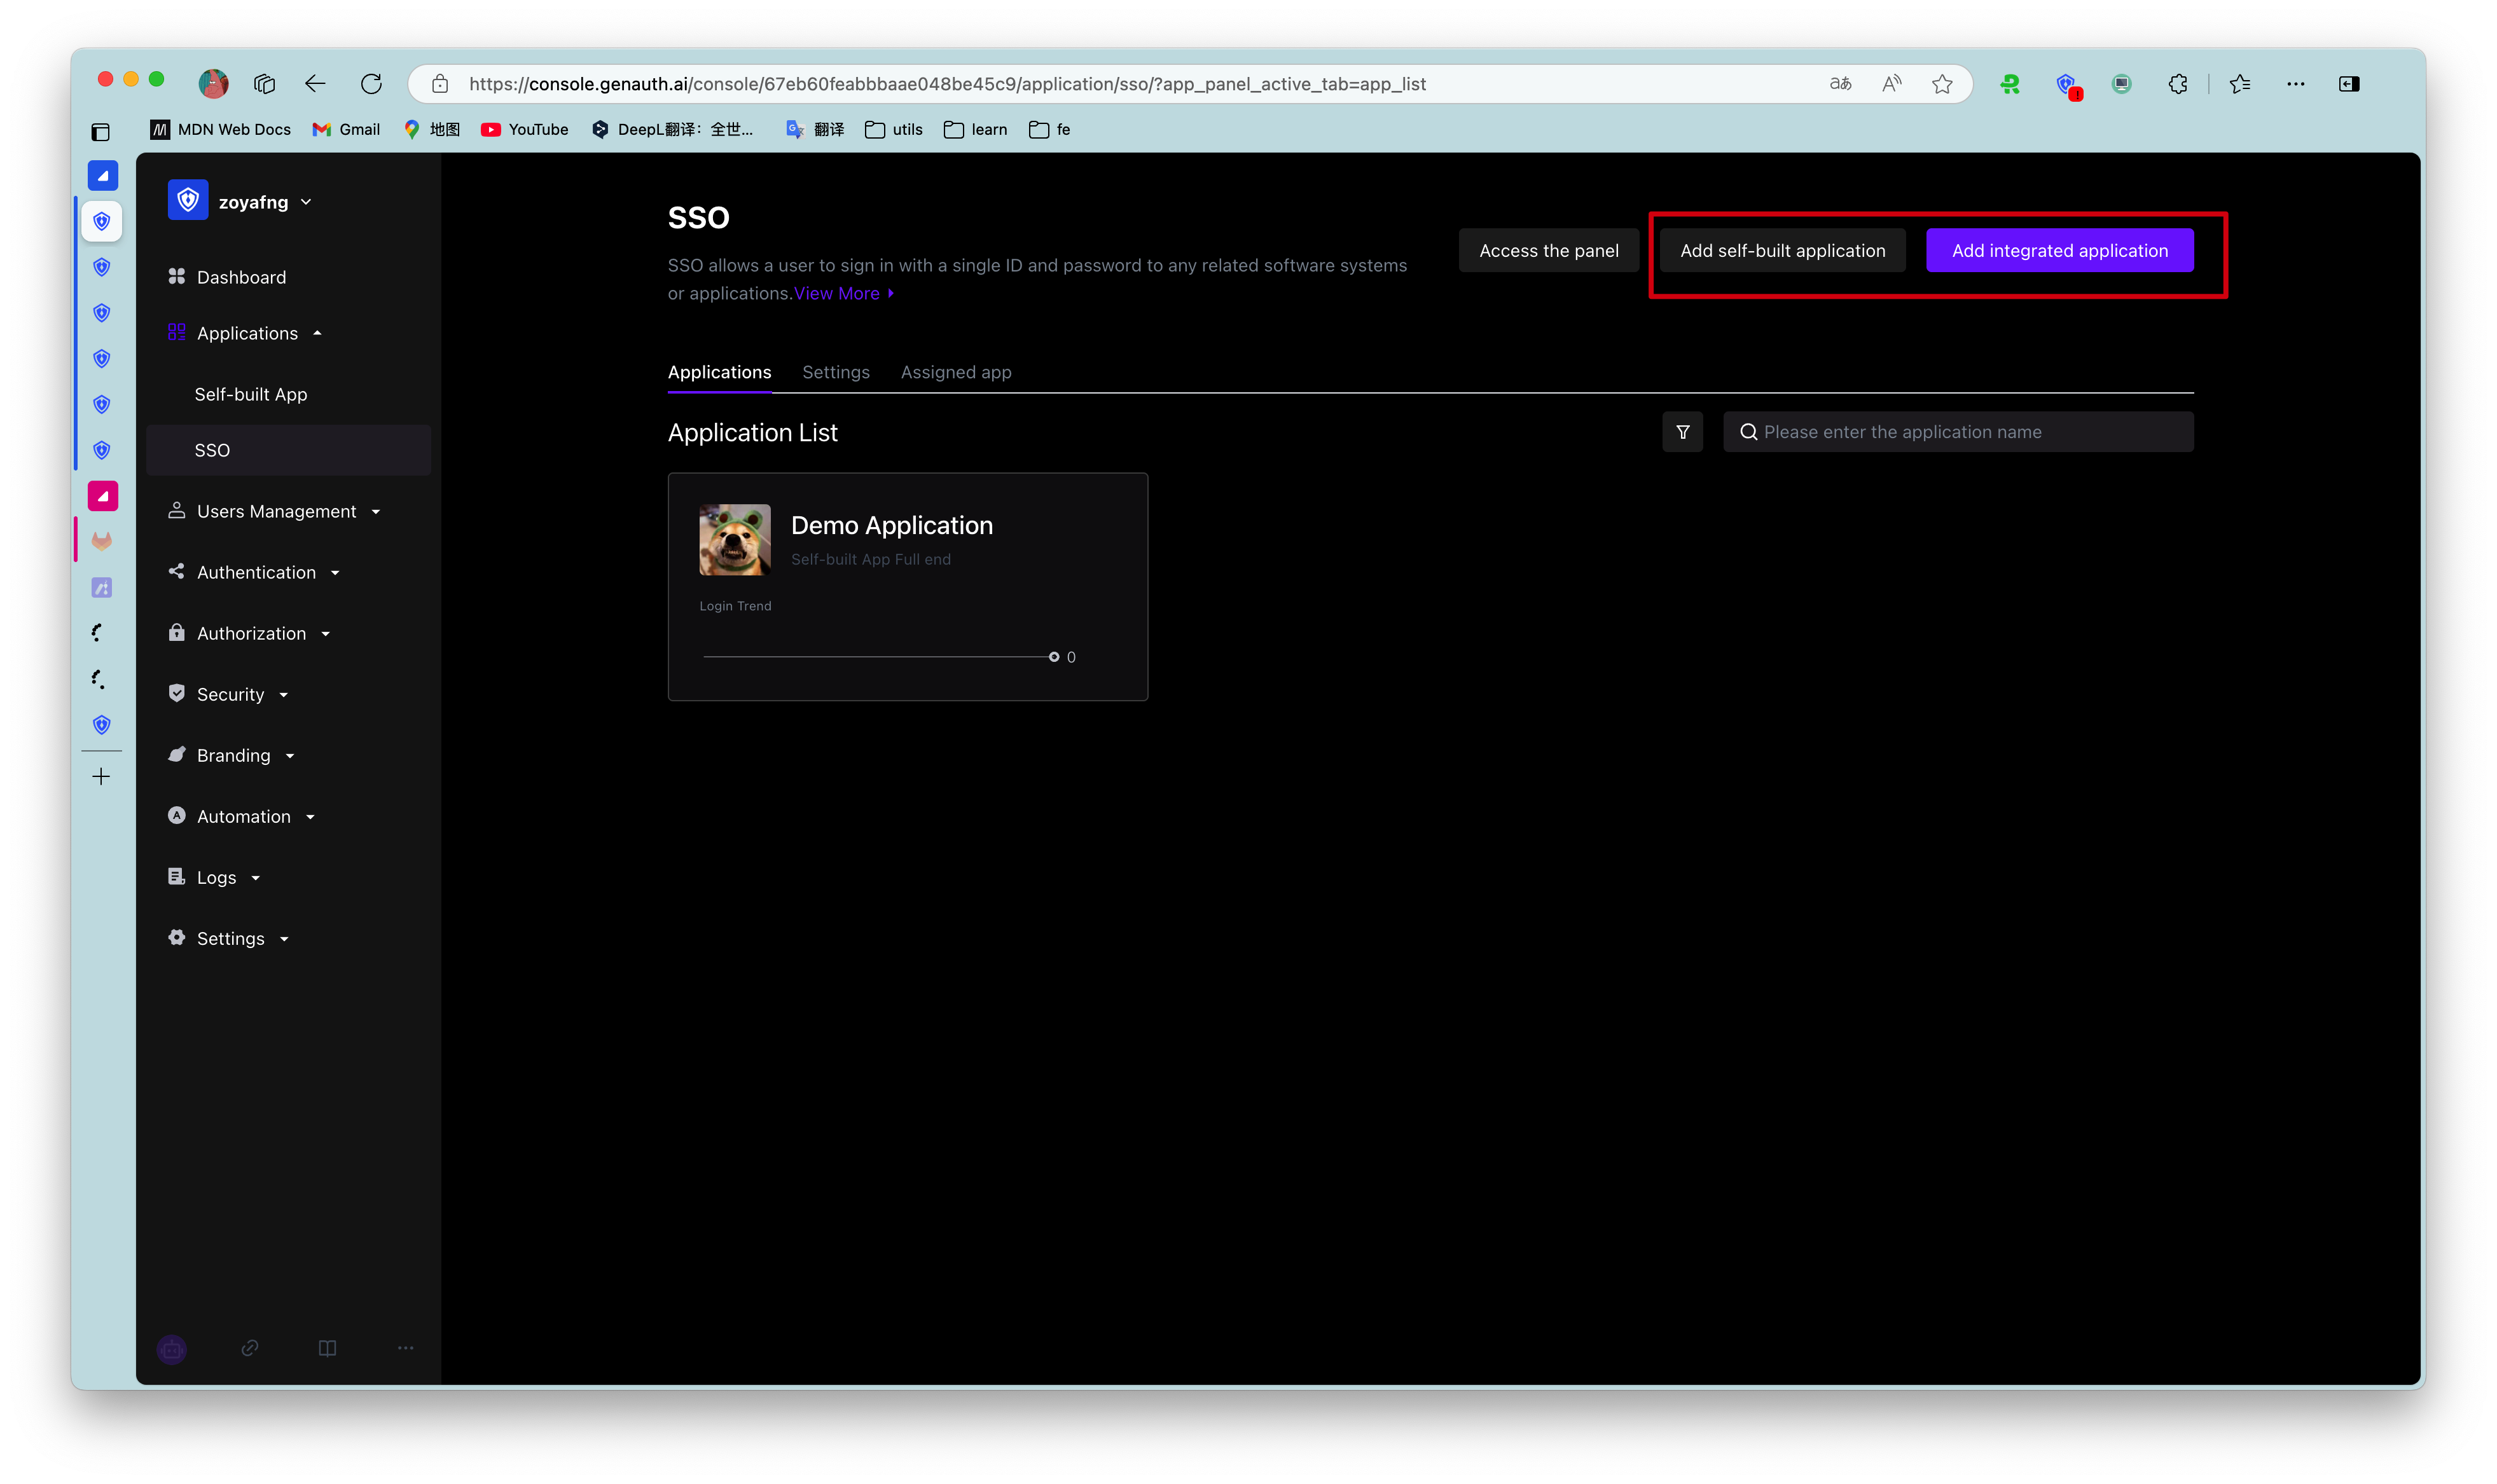
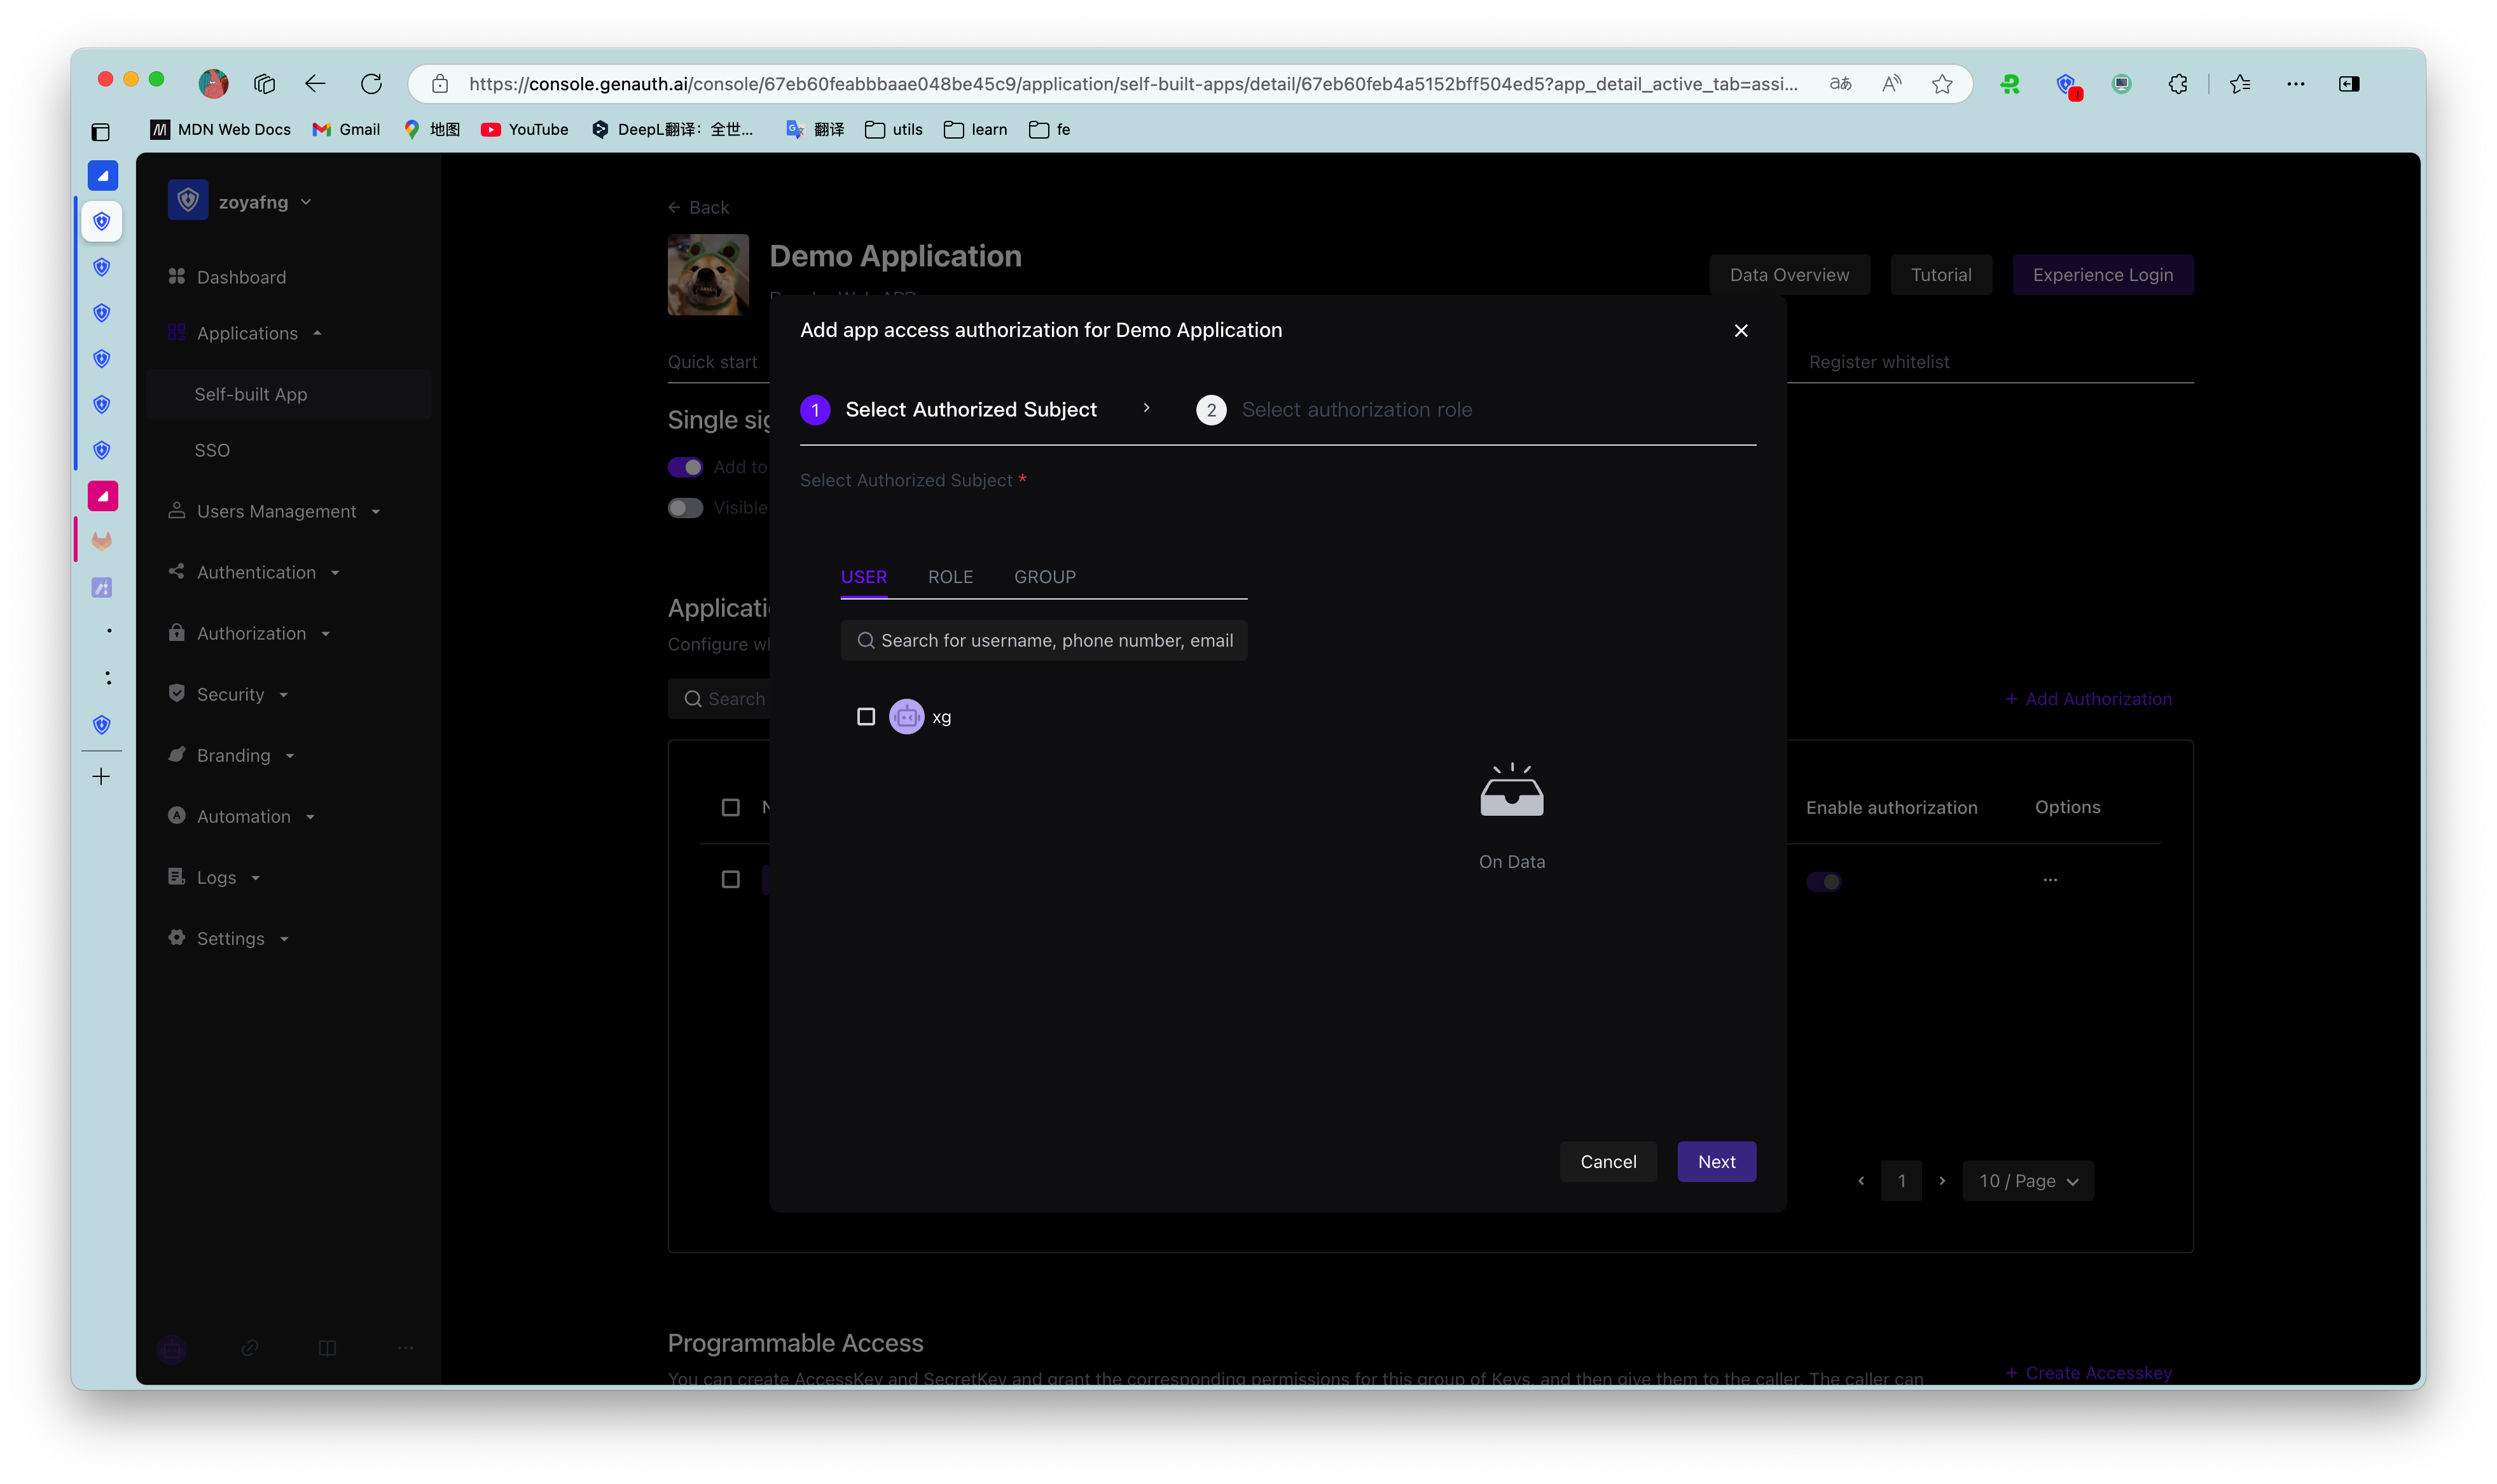
Enterprise administrators or administrators with GenAuth console permissions (for details on administrators and adding collaboration administrators, see Add User Pool Collaboration Administrator) log in to the GenAuth console Application->Single Sign-On SSO->Application List->App Details Page->Access Authorization, and set the permissions to access the app in the Application Access Control module.
¶ Step 2: Configure the application panel
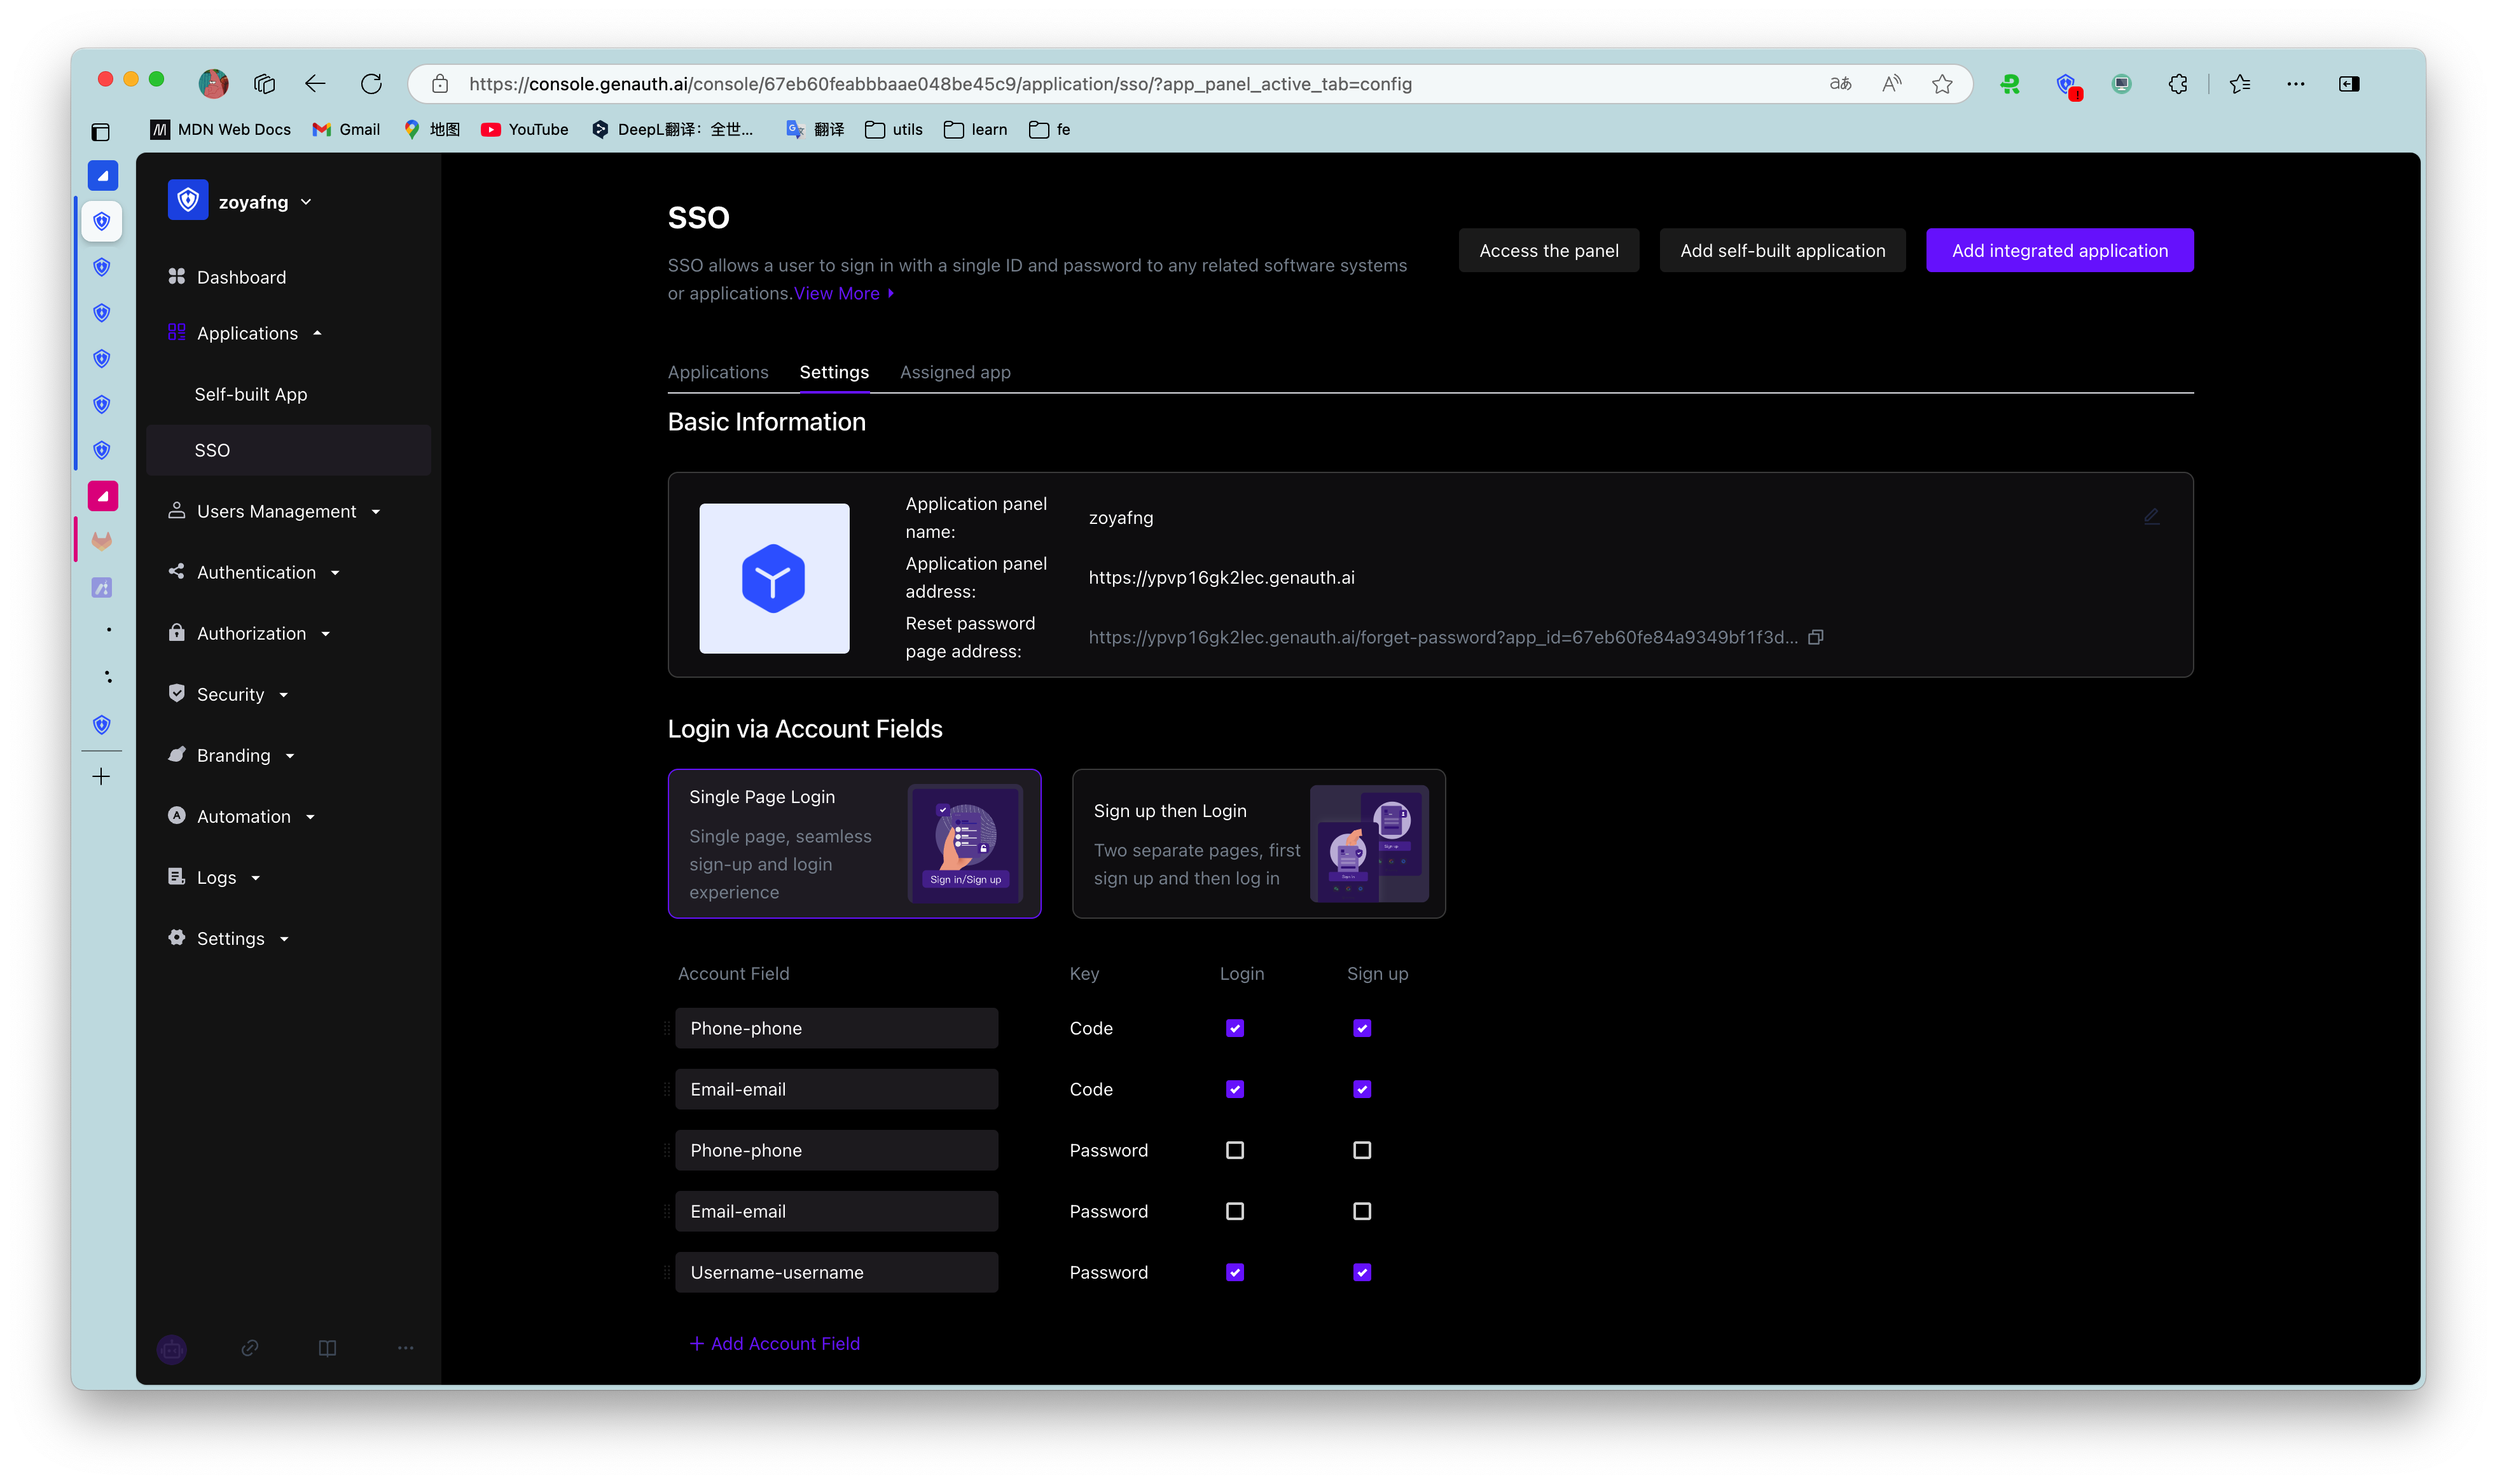
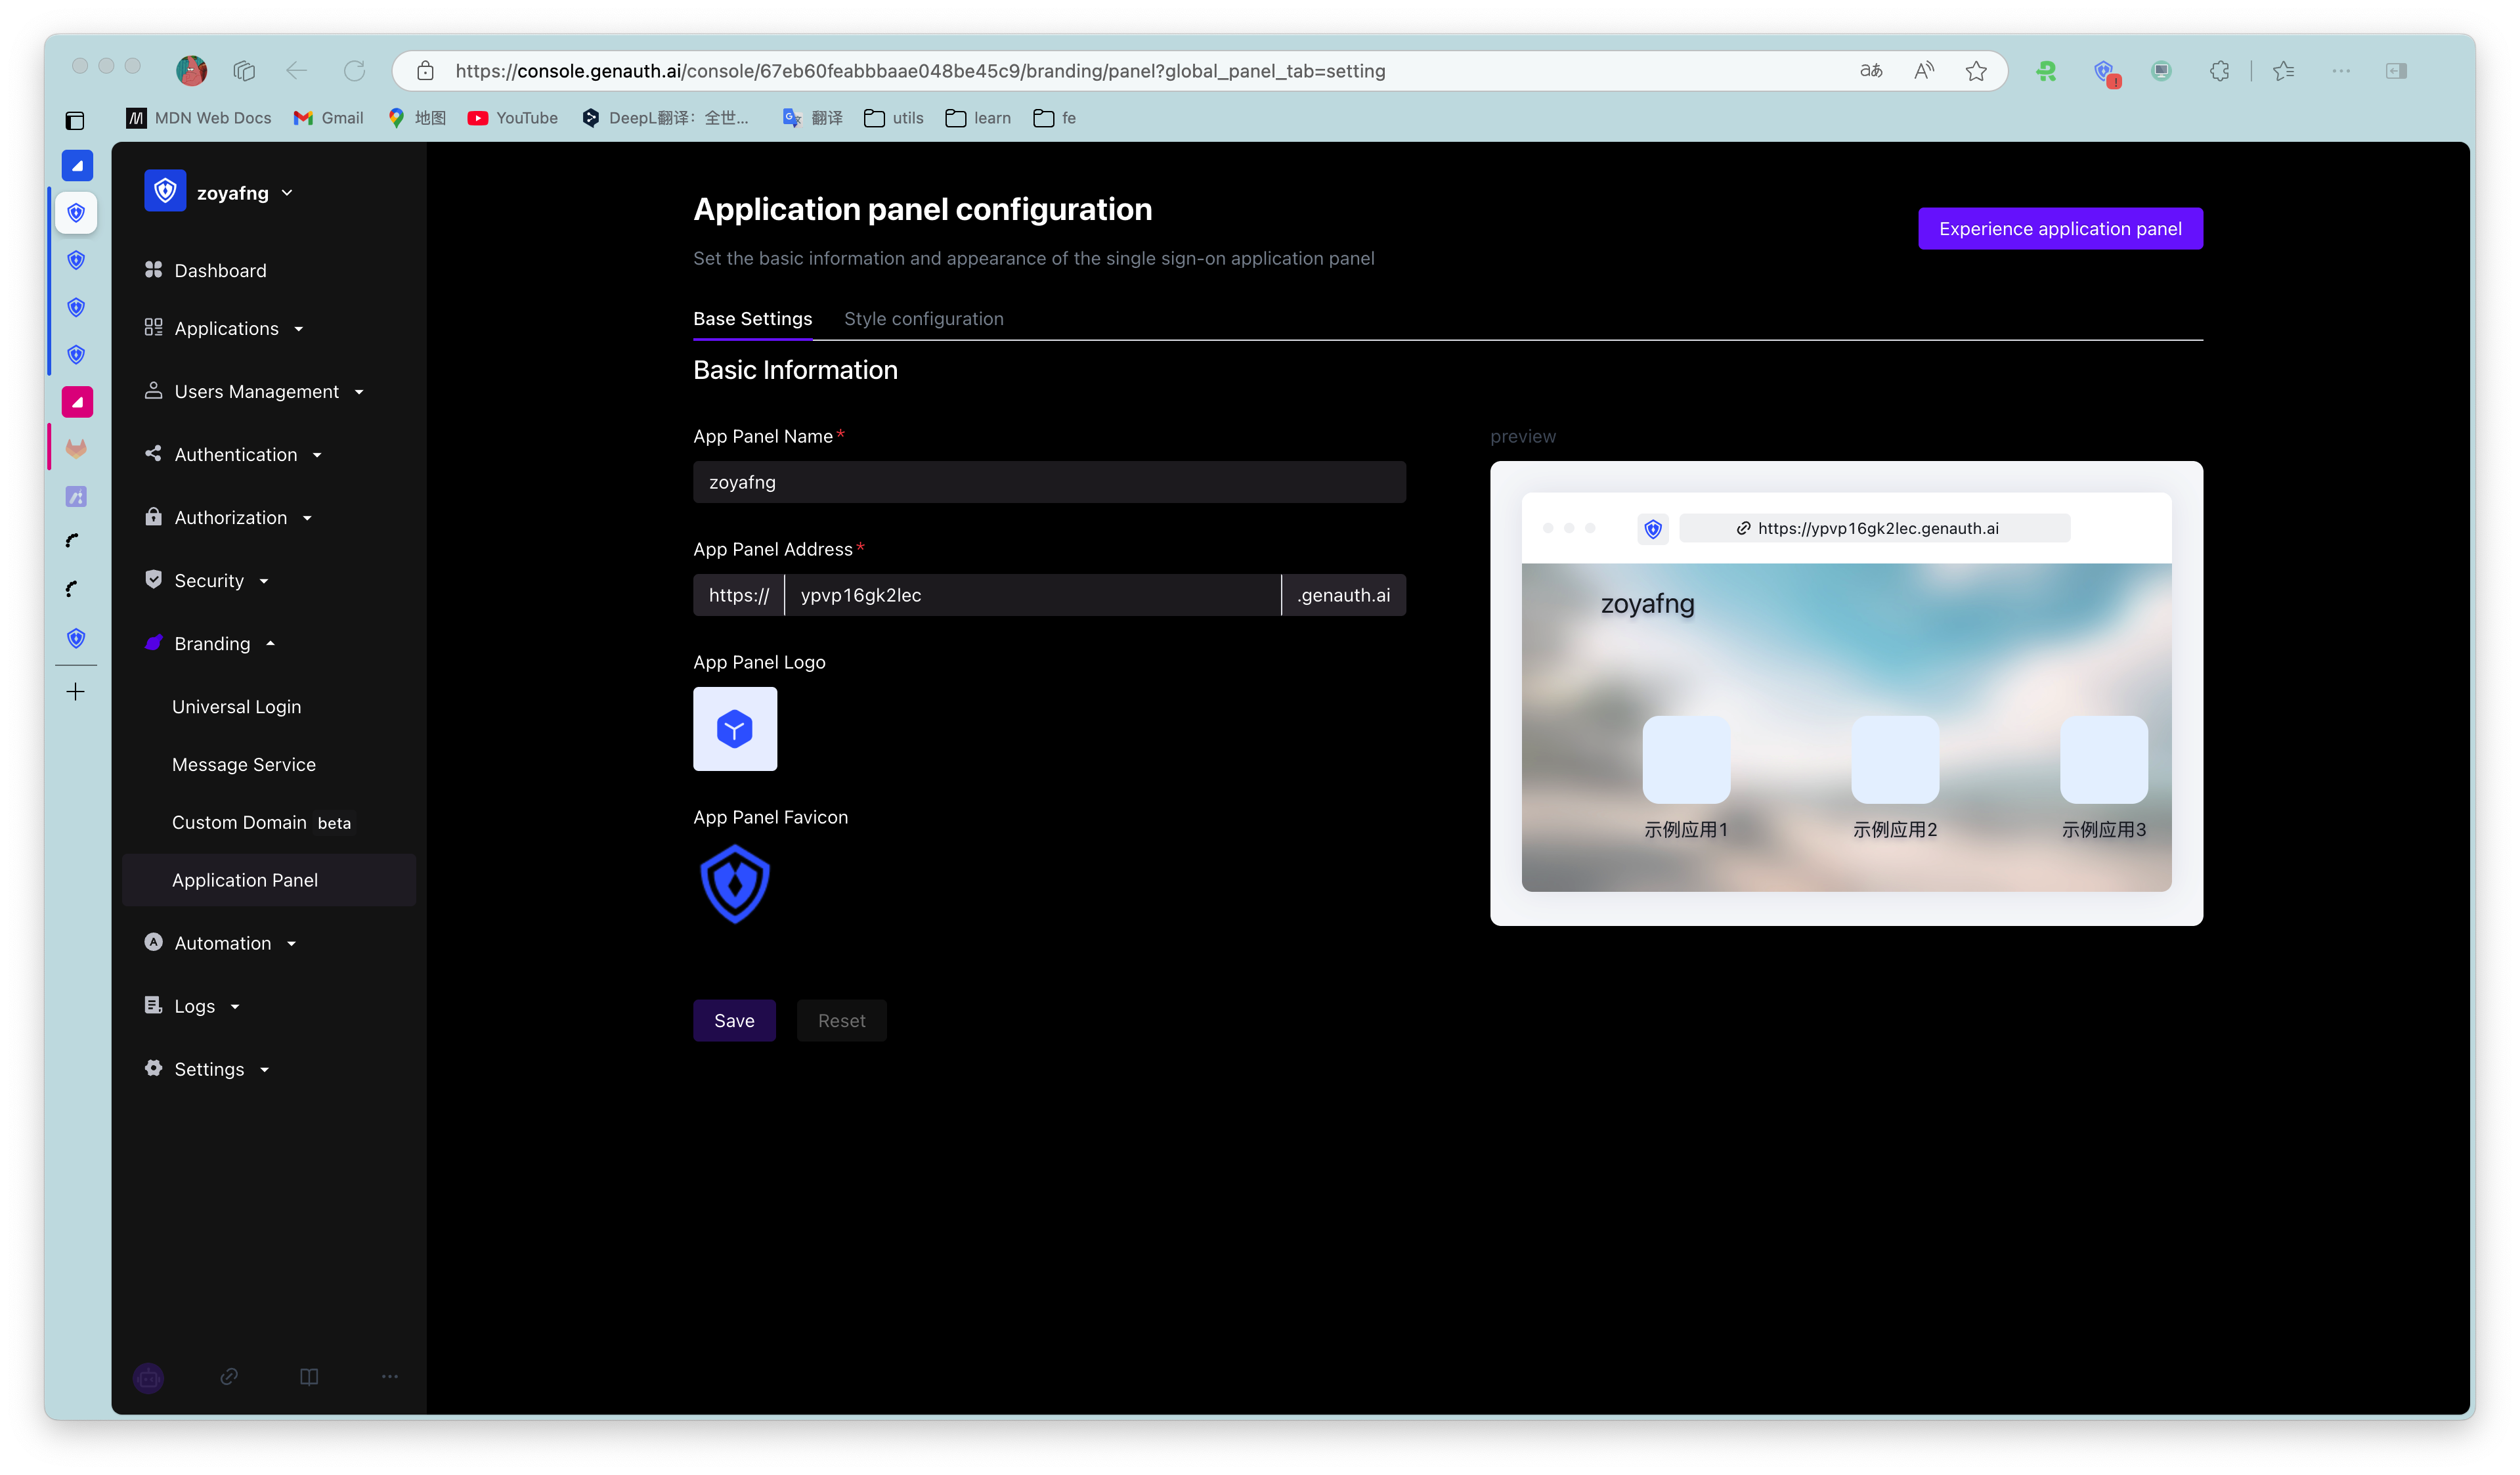
Enterprise administrators or administrators with GenAuth console permissions can go to the console Branding->App Panel->Basic Settings and App->Single Sign-On SSO->Configuration to configure the basic information of the application panel, login registration method, social login method, enterprise login method, etc. (For details, please refer to Login Control and Application Panel Configuration (opens new window)).
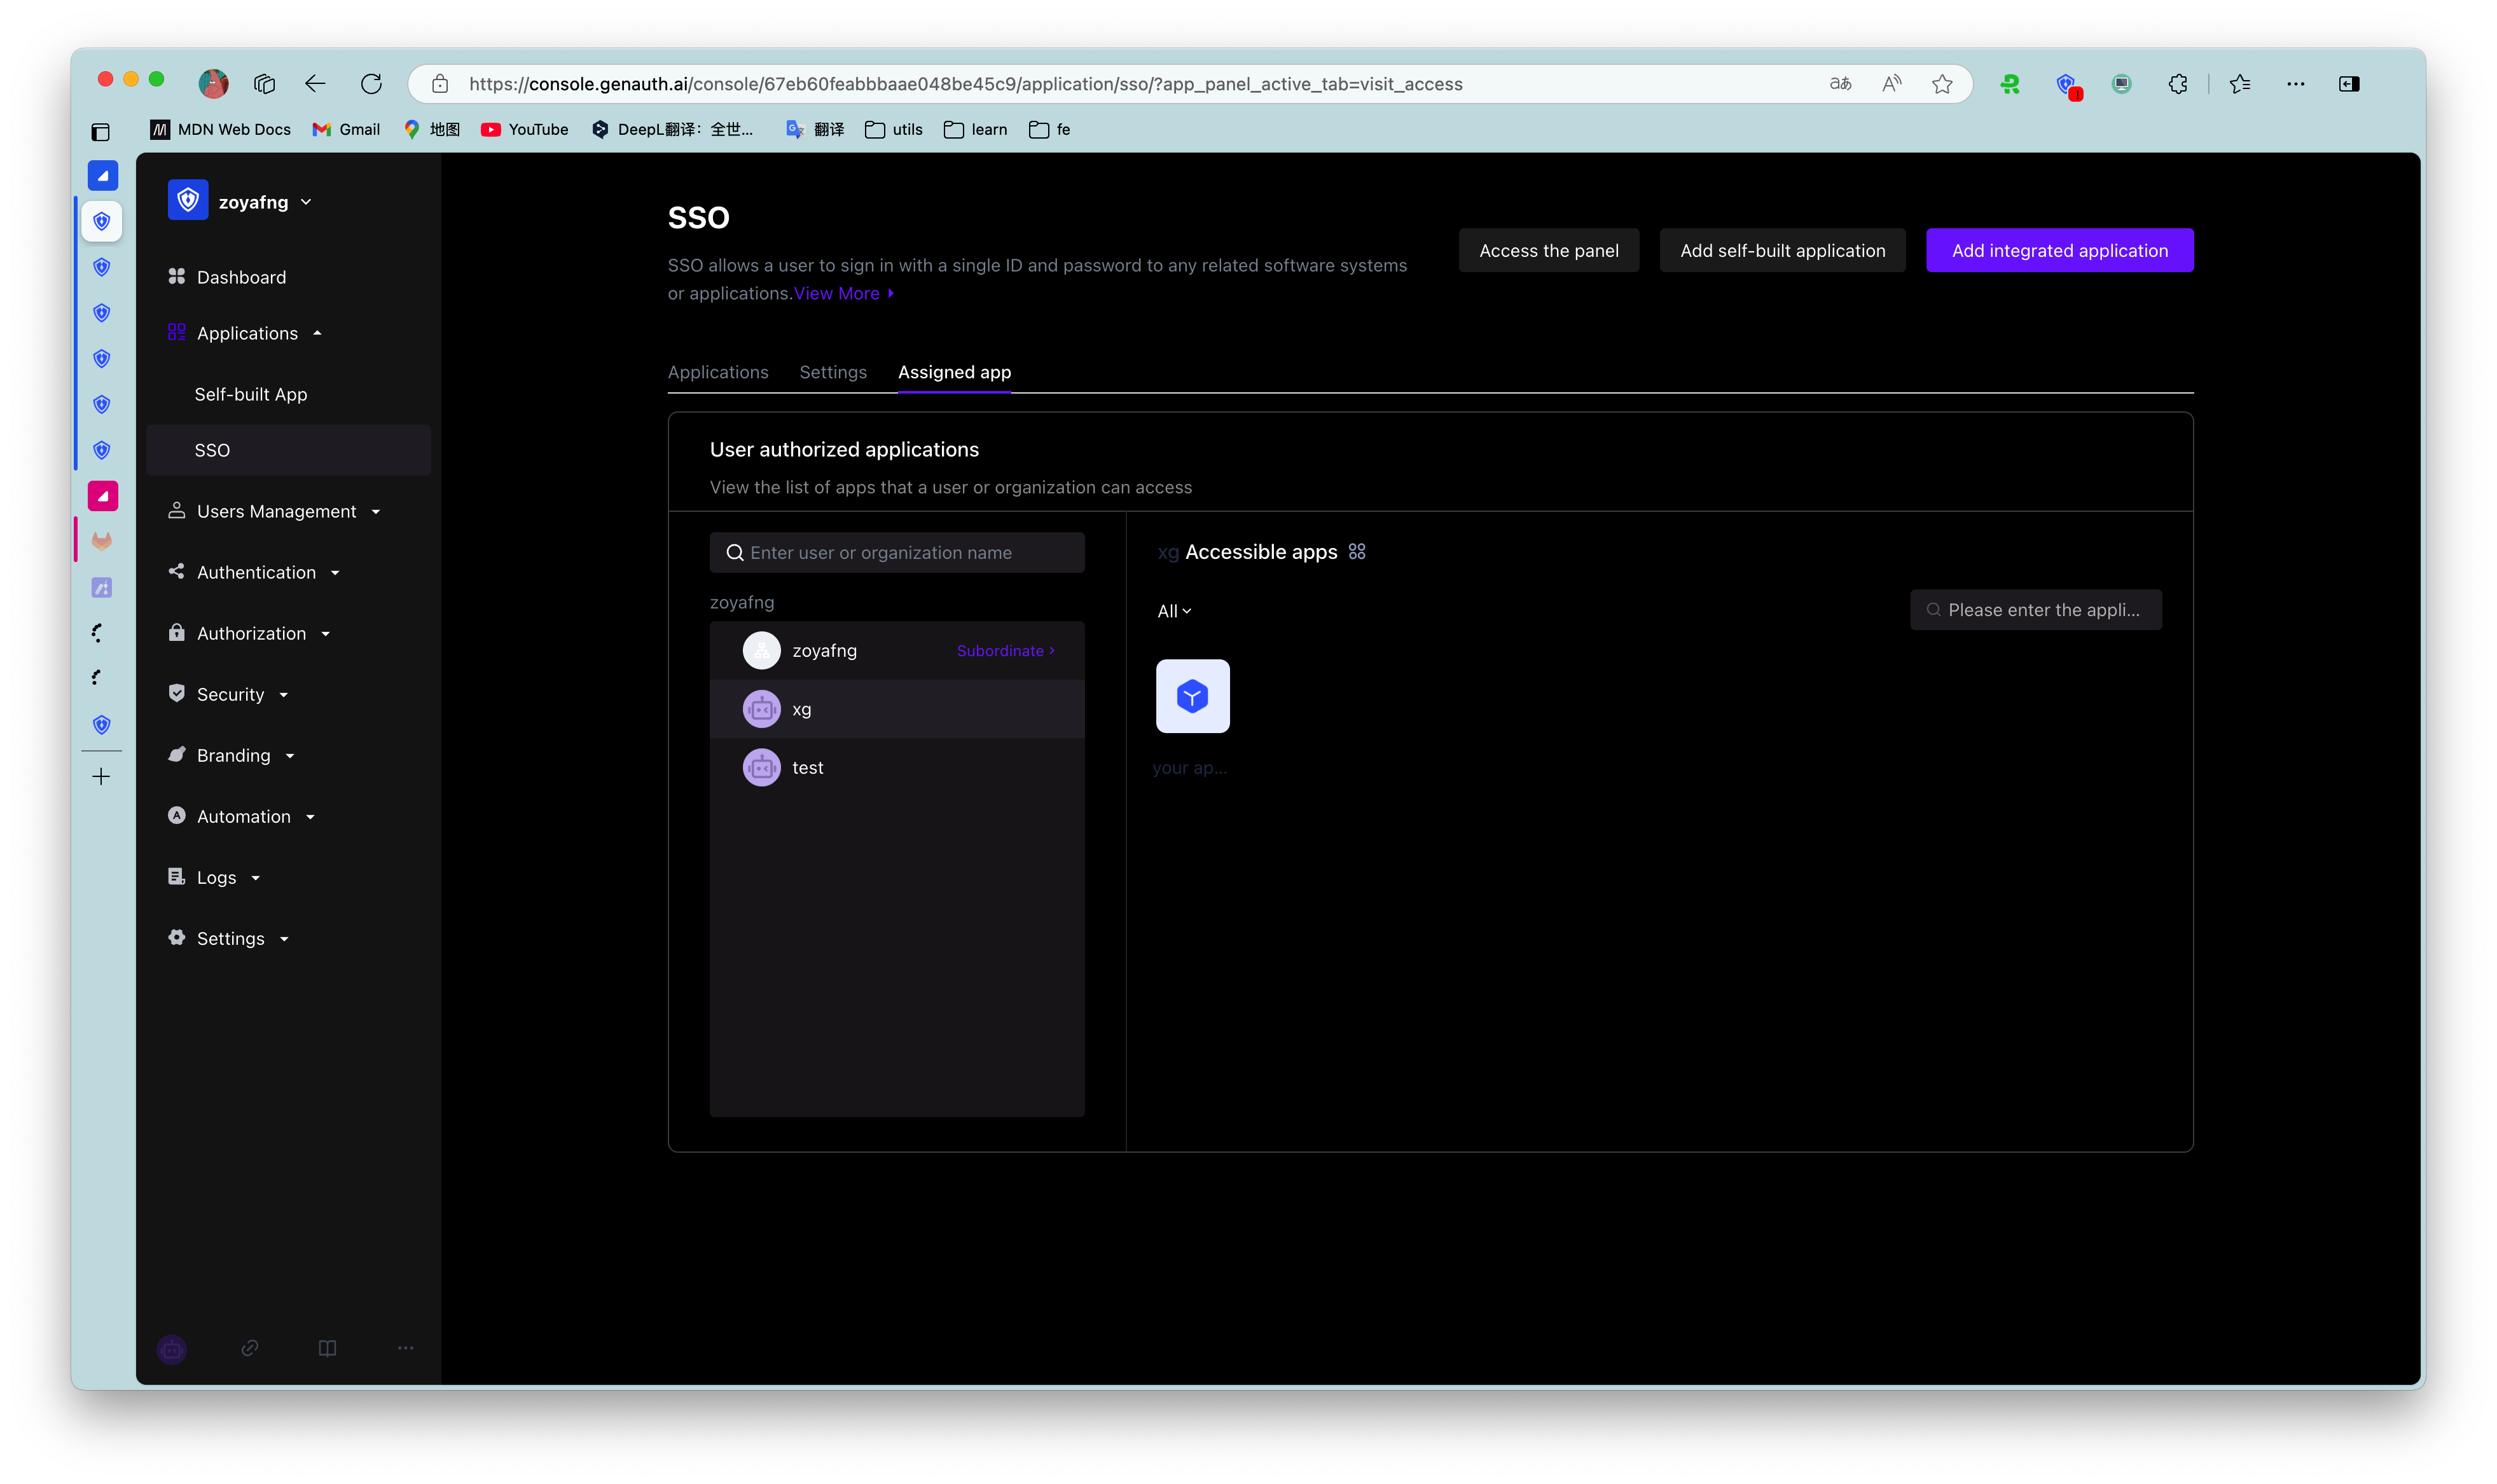
¶ Step 3: View the applications accessible to users or organizations
Administrators can enter the console Applications->Single Sign-On SSO->Assigned Applications to view the list of applications accessible to users or organizations. Clicking an application will enter the application details page.
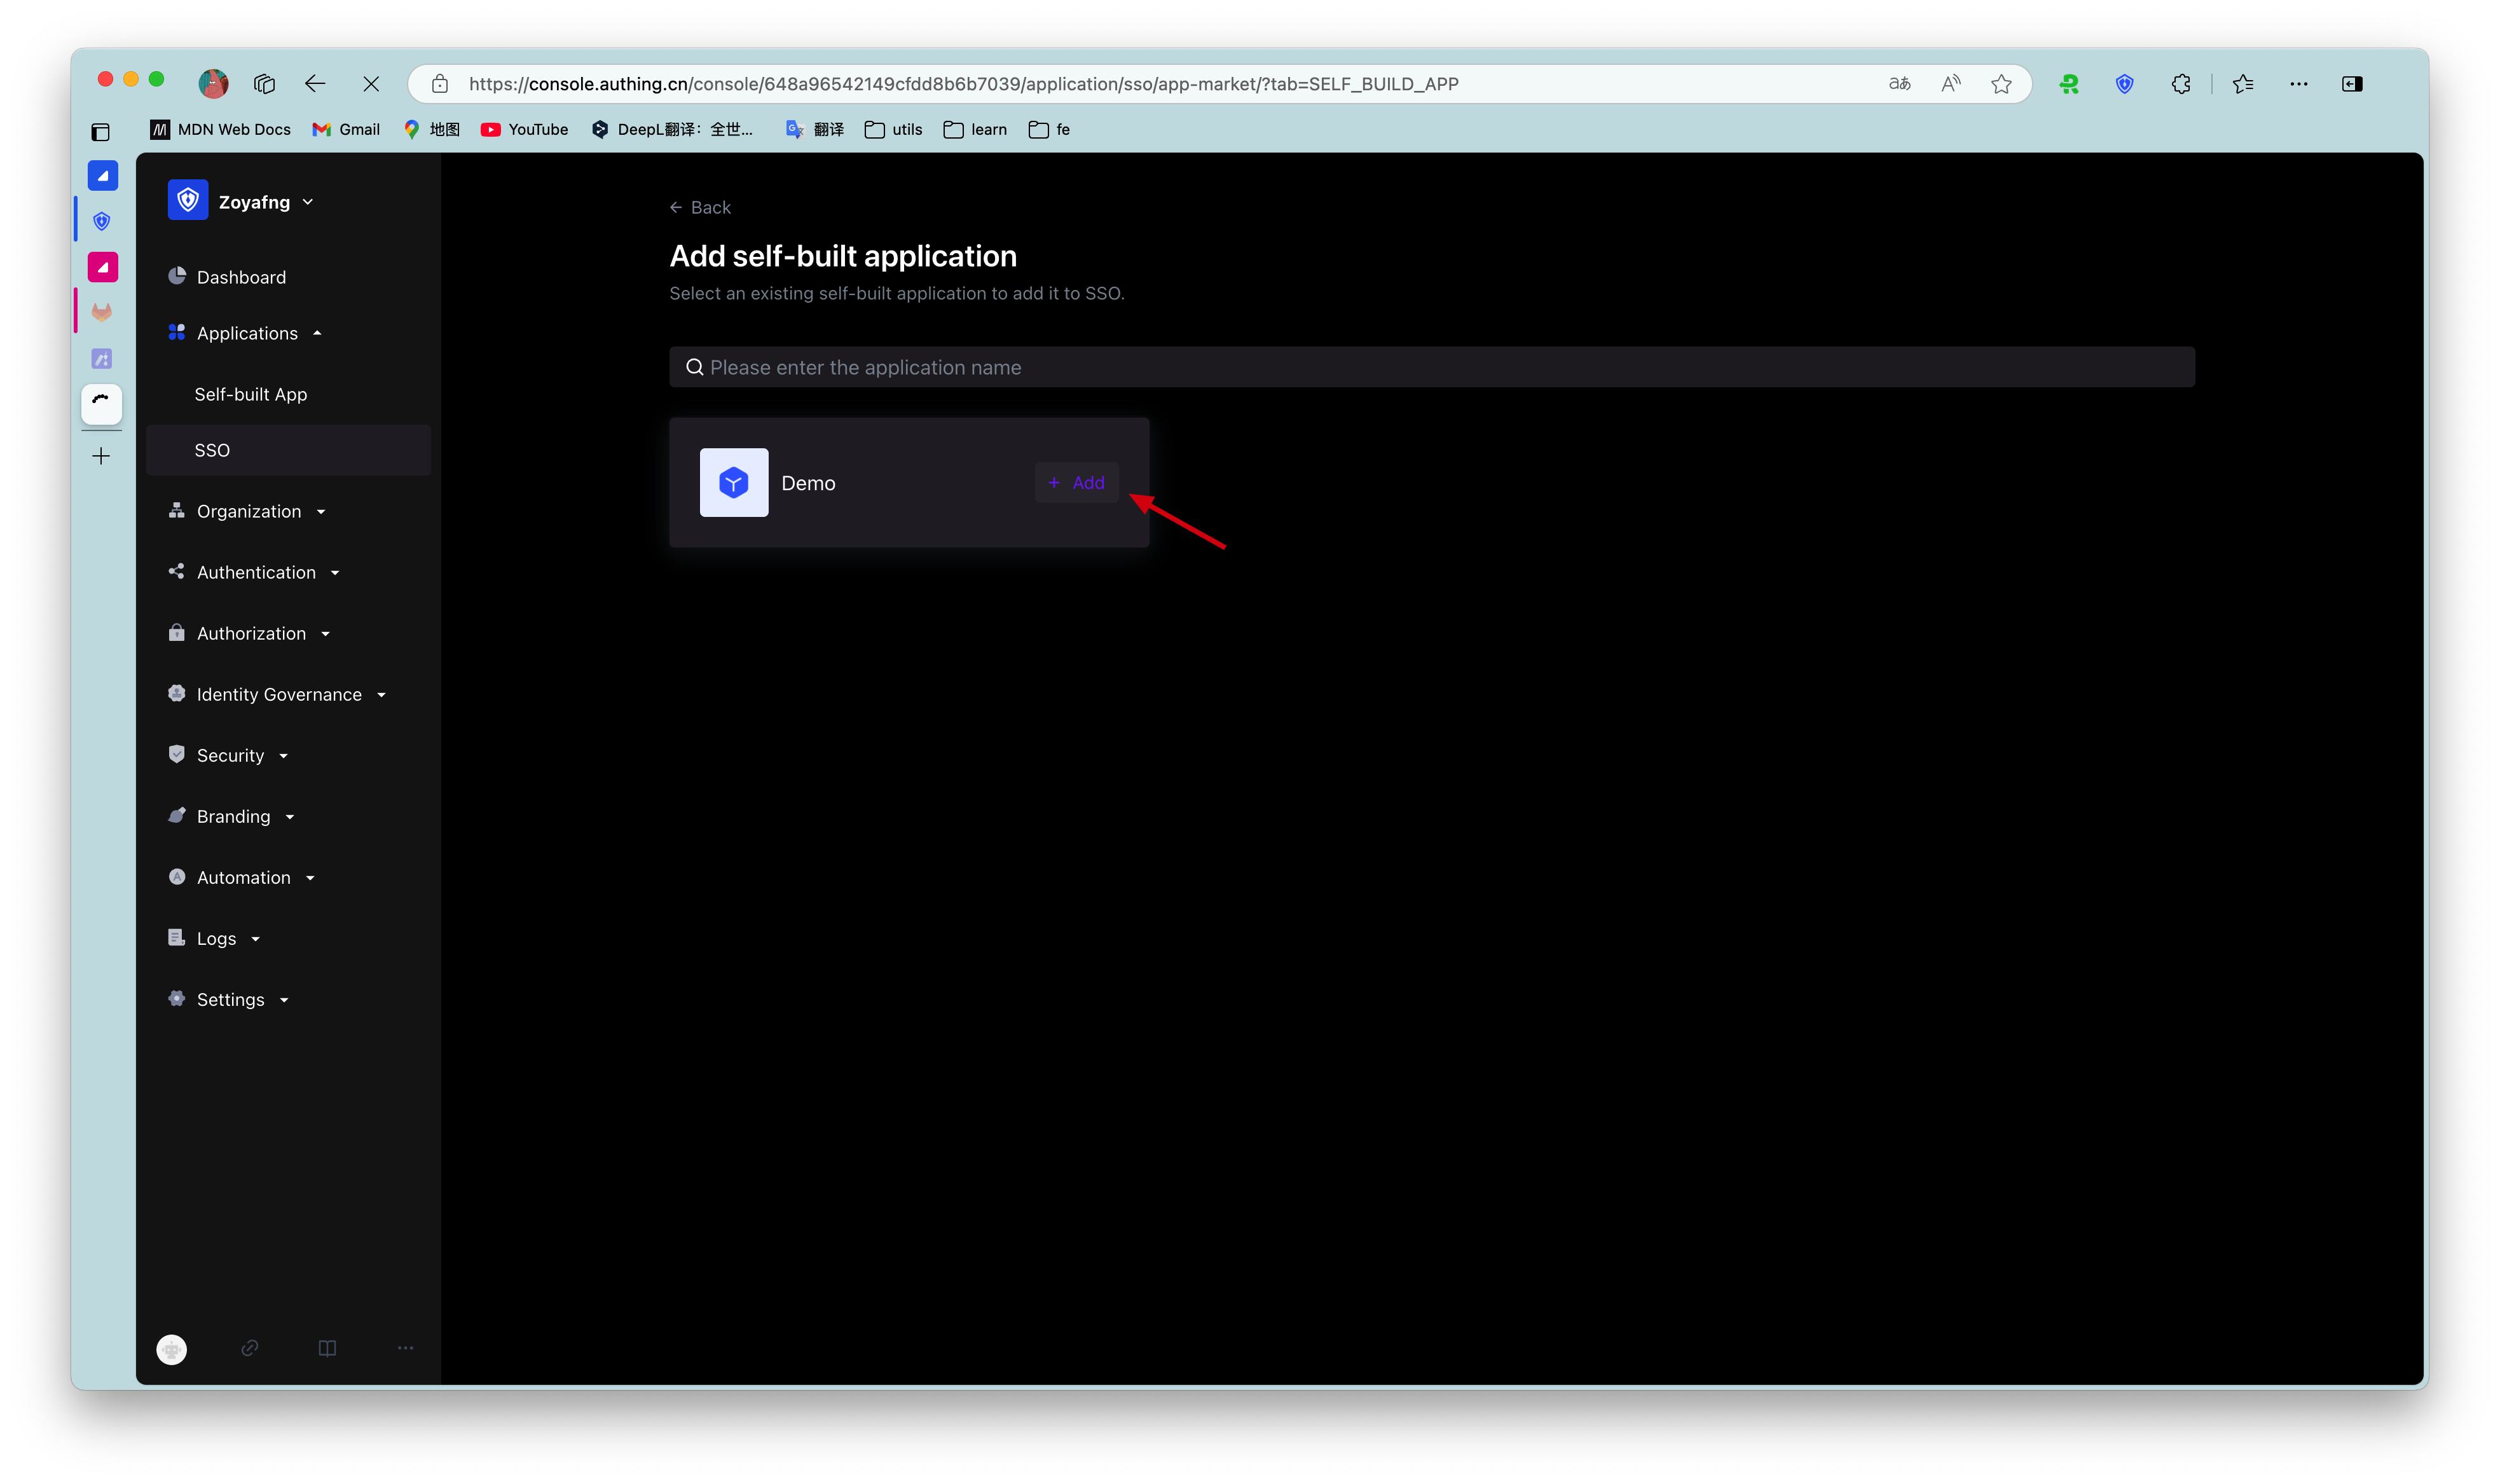
¶ Step 4: Configure application single sign-on SSO
Users enter the "Single Sign-On SSO" page and add the self-built application just now.
After adding, log in to any application (self-built or integrated application) in the SSO list page to single sign-on all applications on the panel.