¶ Complete authentication using a hosted login page
GenAuth hosted login page is the simplest and most secure way to integrate. This is because the login process is maintained by GenAuth and secured by GenAuth. For application integration, it is recommended to use the login process hosted by GenAuth. Your business system redirects users to the GenAuth login page, where the user authenticates and then redirects back to the application login callback URL configured in the console. This design is considered a security best practice. In terms of custom configuration, the hosted mode provides custom configuration of the login registration form, which can be customized through console configuration and CSS.
This document will introduce how to use the GenAuth hosted login page to quickly implement a complete user authentication process.
¶ Step 1: Create a user pool
User pool is the smallest unit of your user system isolation. You can divide users in different scenarios into different user pools. Each user pool can have users and applications, and the permissions, applications, and organizations between different user pools are completely isolated.
If you don't have a GenAuth developer account, you need to register a GenAuth developer account in the console (opens new window) first. After registration, you will be guided to create your own user pool.
If you already have an account and want to create another user pool, you can click the drop-down button at the top of the left navigation bar:
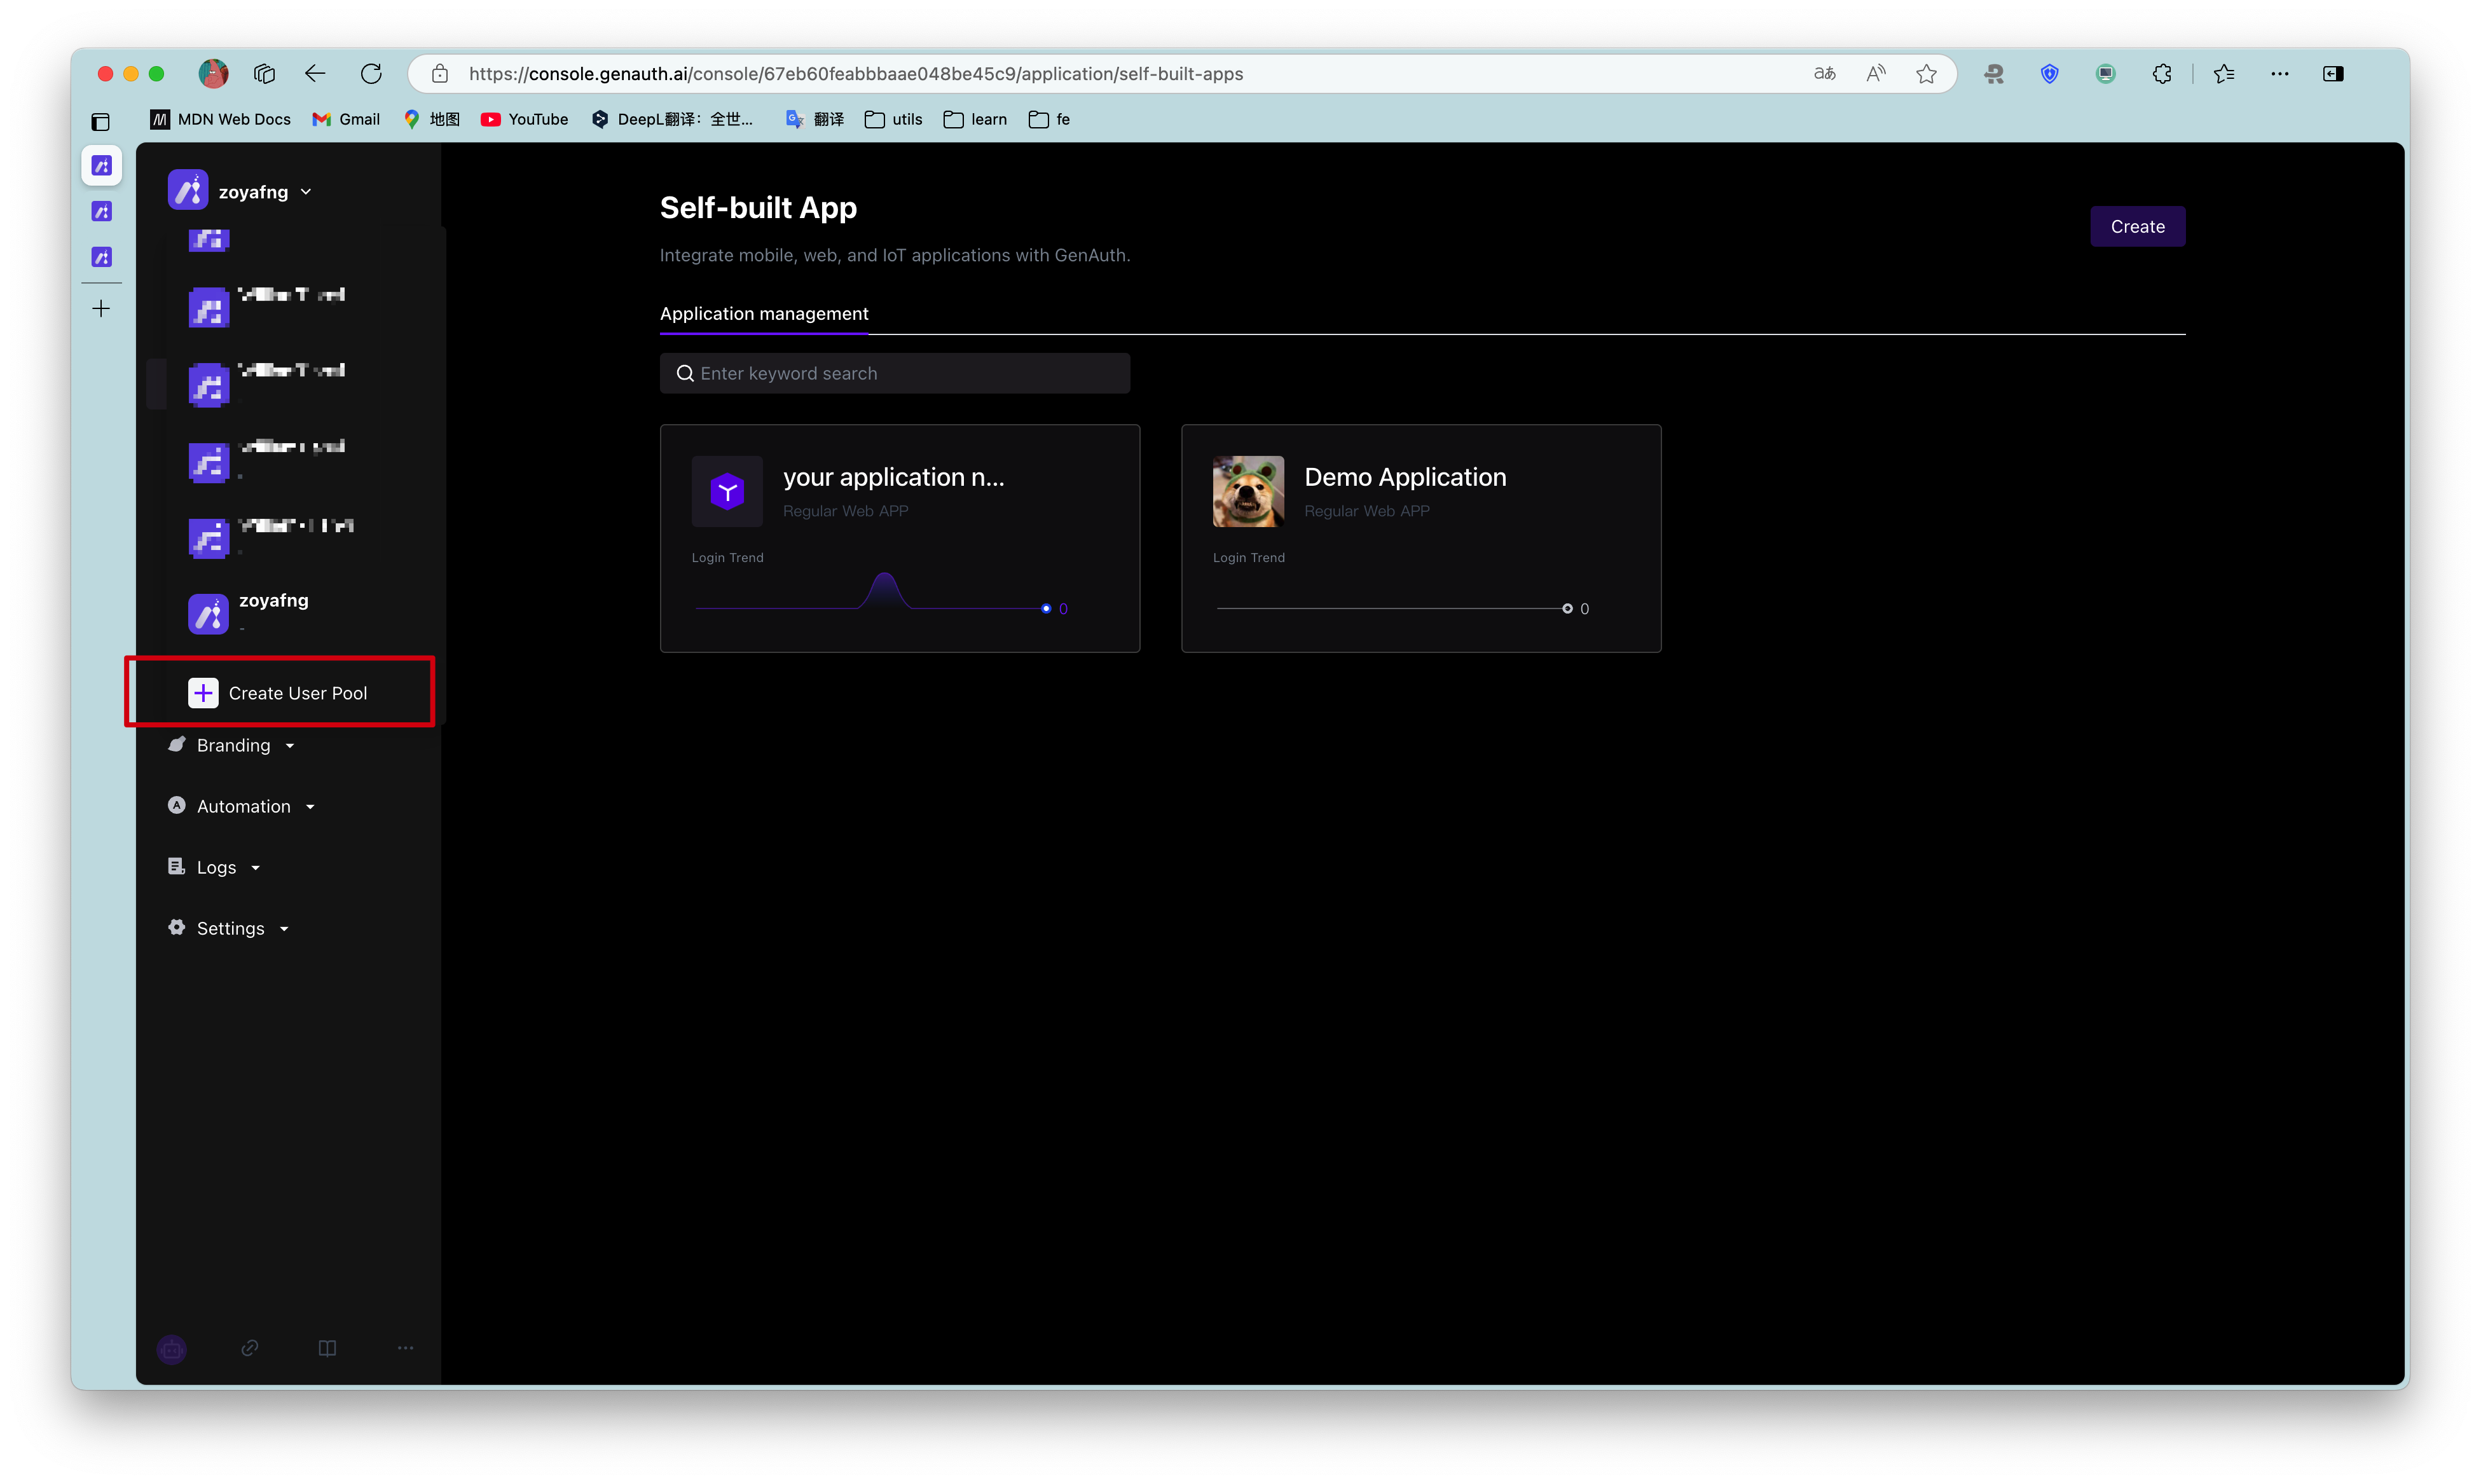
For details on creating a user pool, please refer to [How to create a user pool for new and old users](/guides/basics/trial/admin.md#New user opening trial period).
¶ Step 2: Create an application
On the console Application->Self-built application page, you can view your own application list:
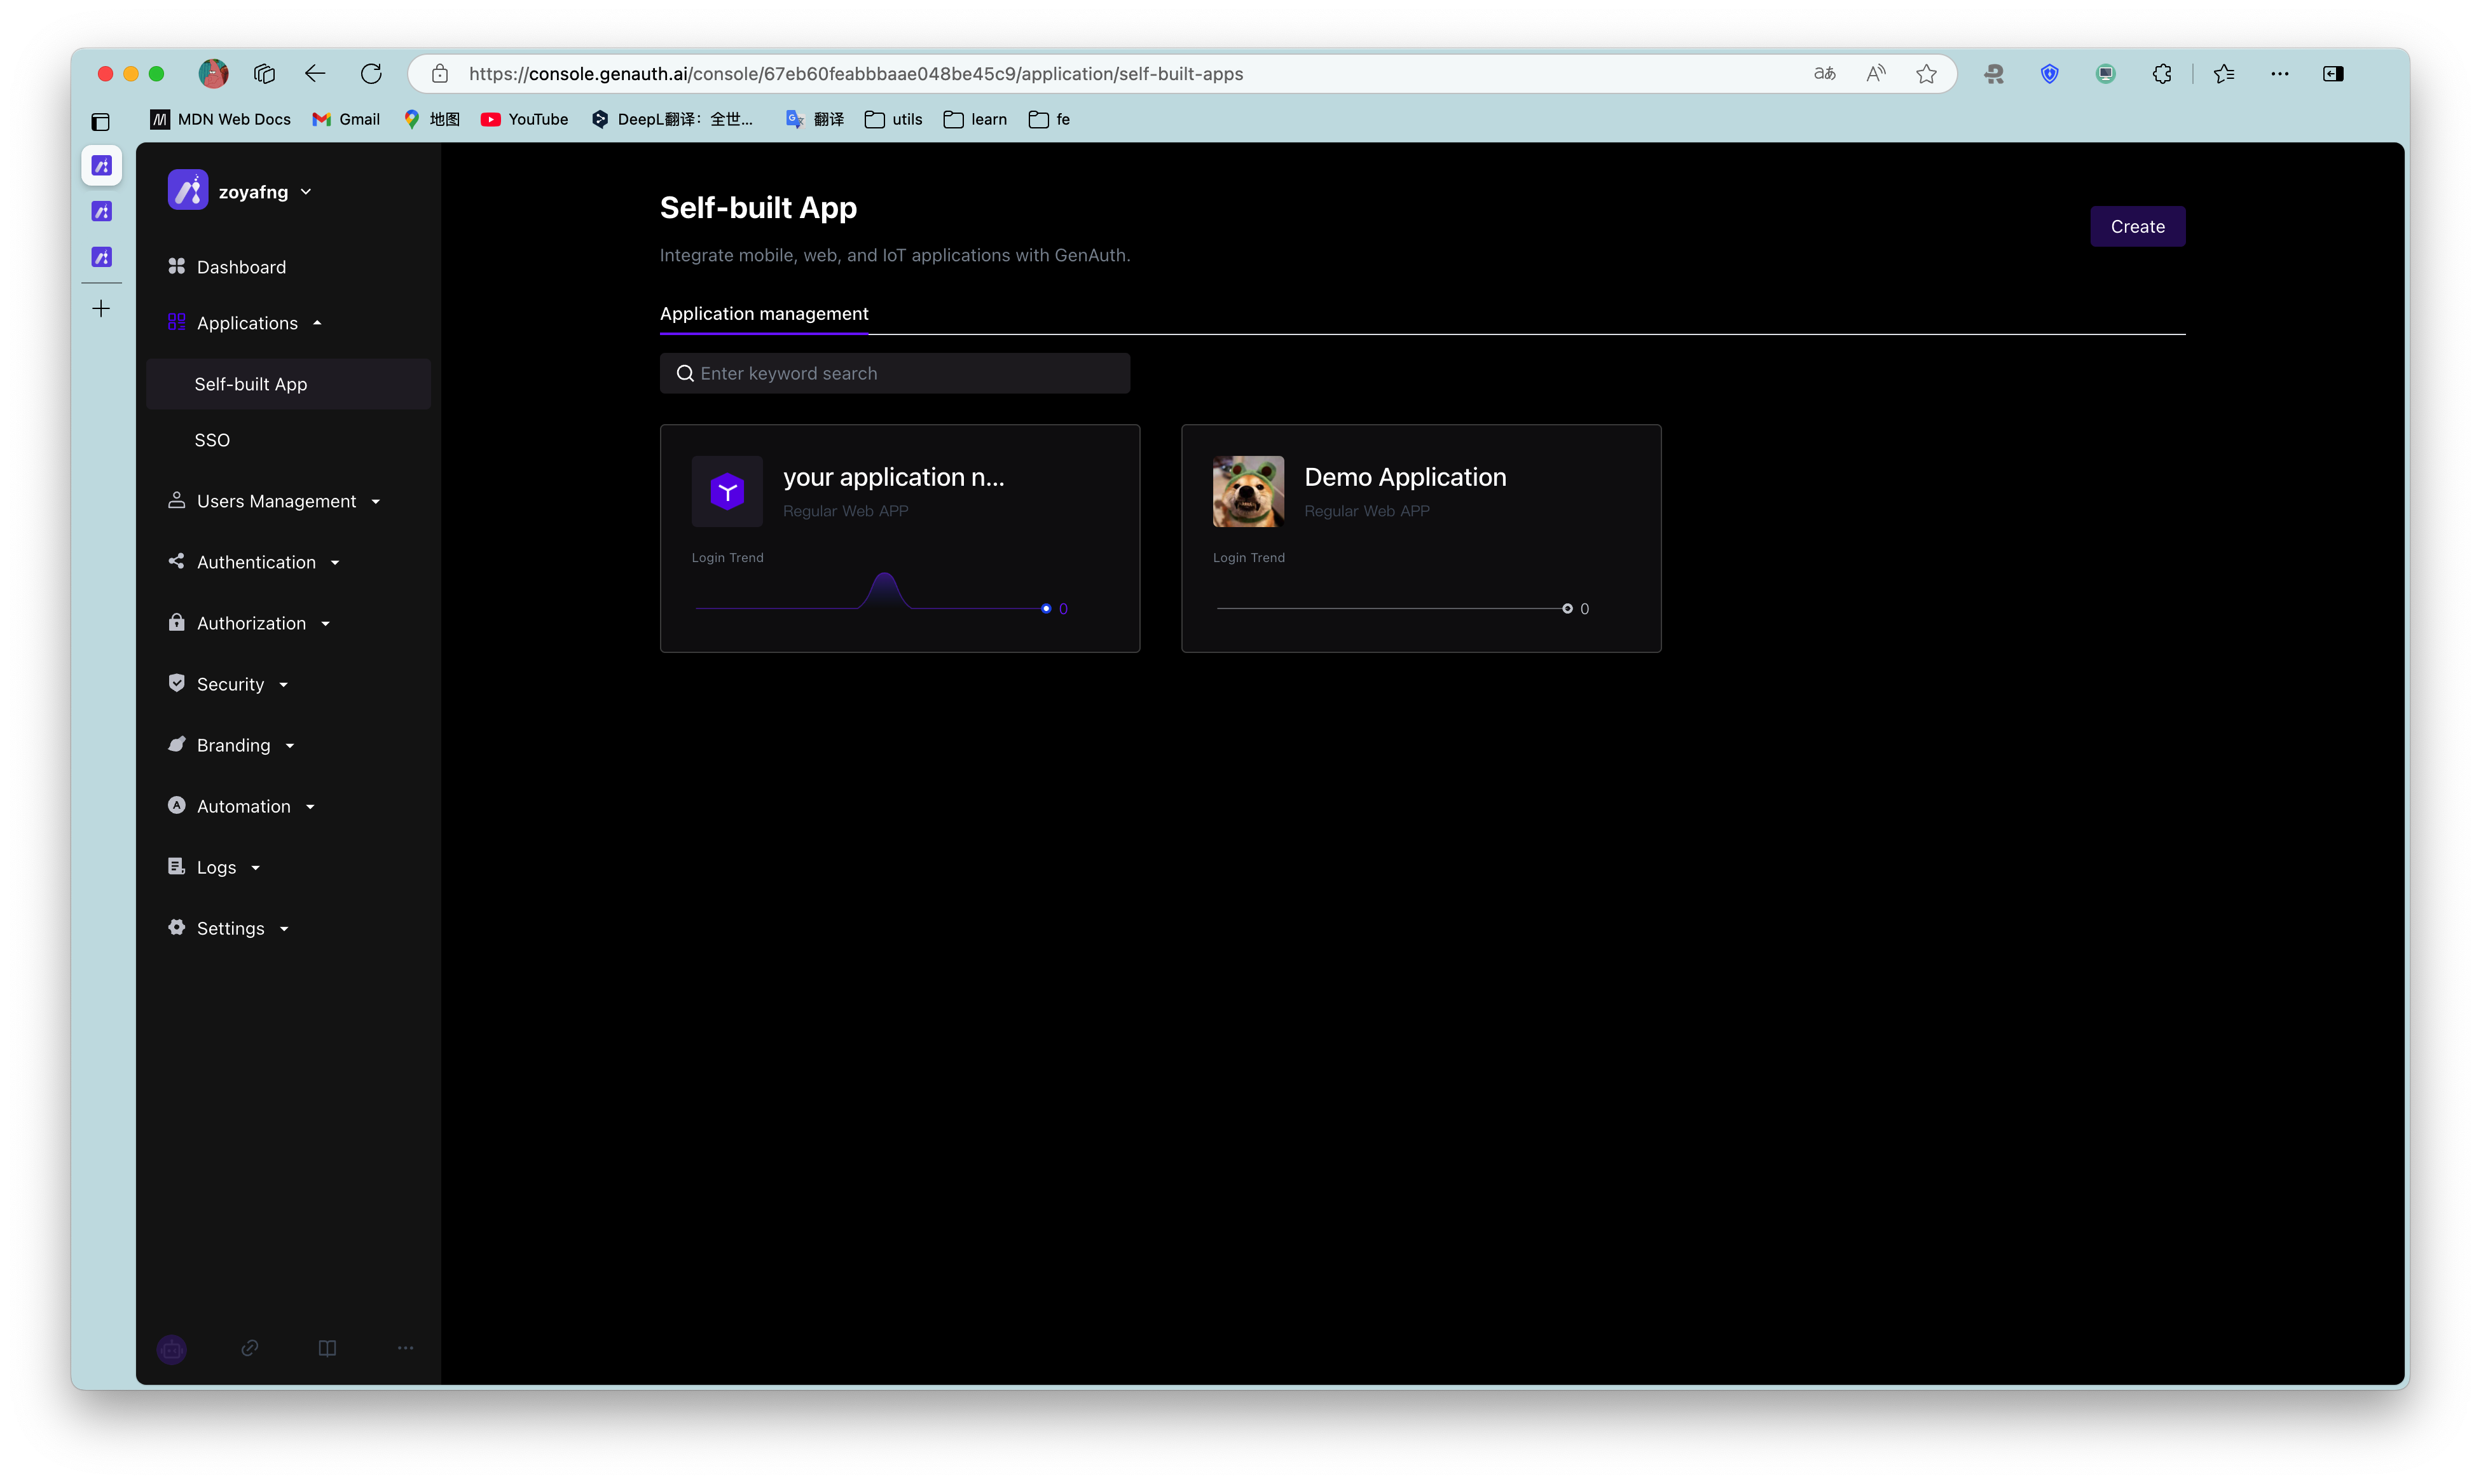
For details on creating and configuring self-built applications, please refer to Self-built application overview .
After the application is successfully created, click the Experience Login button on the right to experience logging into the application:
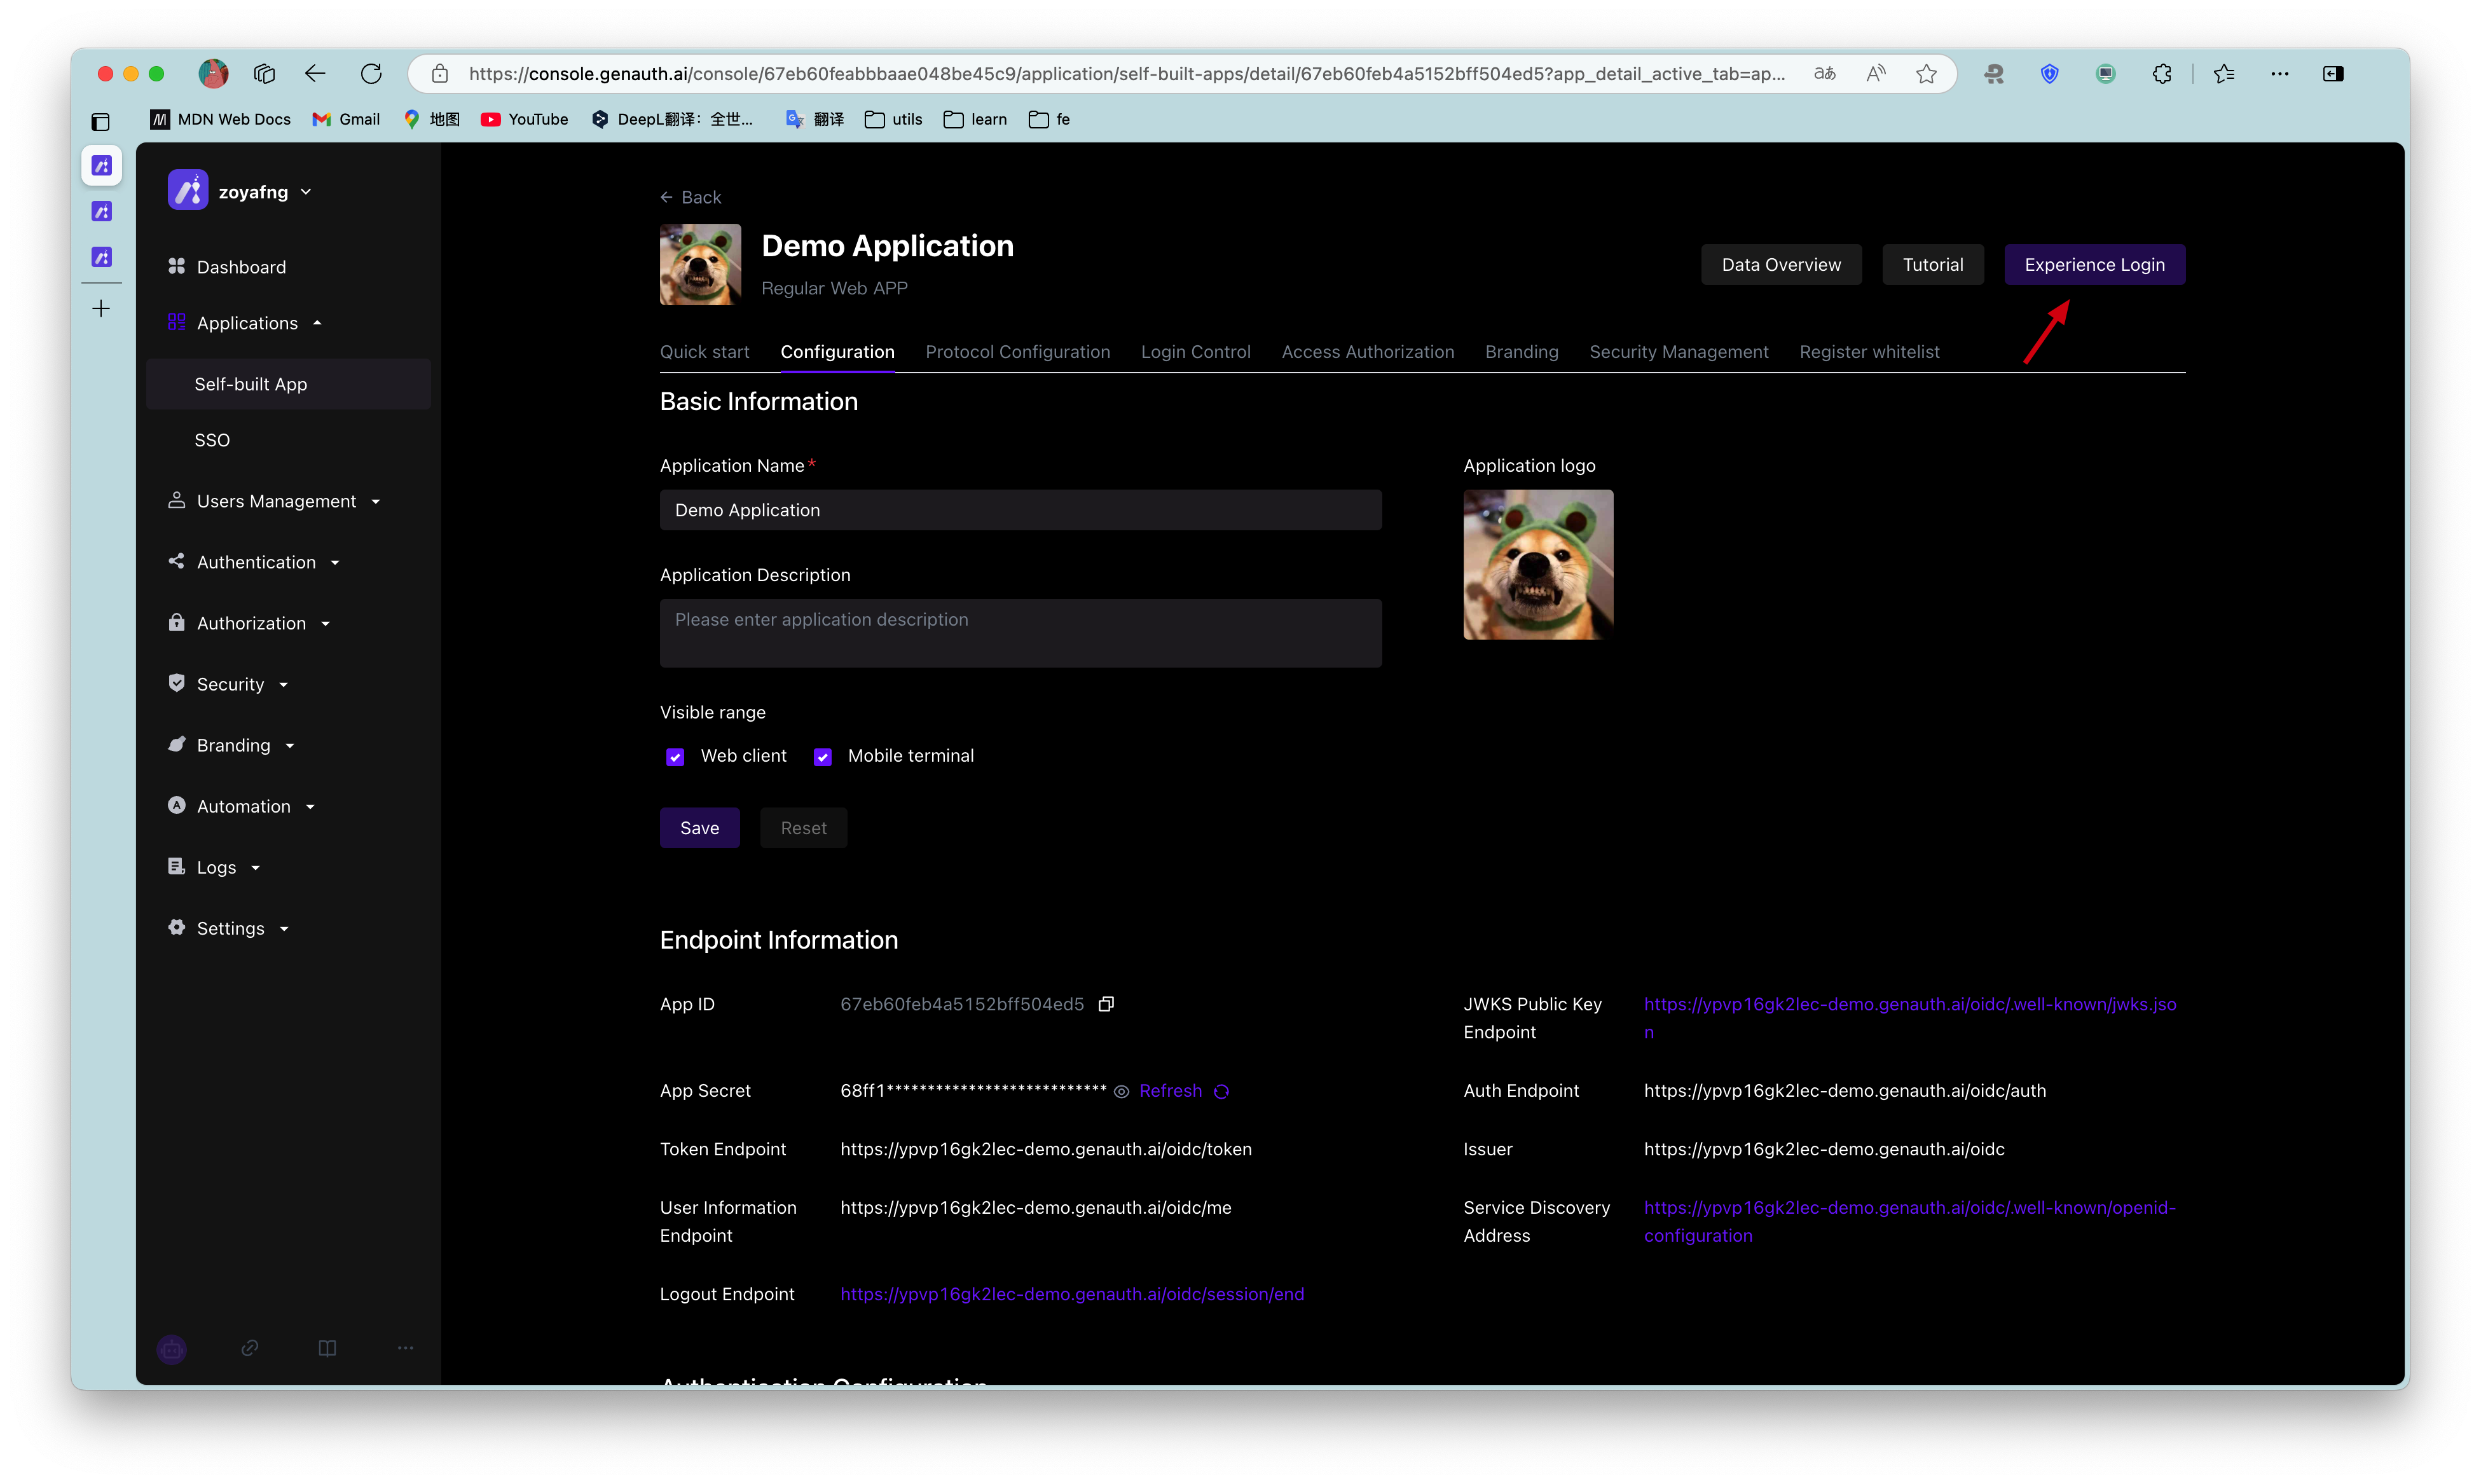
In the new window that pops up, you can see this GenAuth hosted online login page (opens new window), which integrates login, registration, forgotten password, social login, MFA and other functions:

For details on creating and configuring applications, please refer to Self-built application overview.
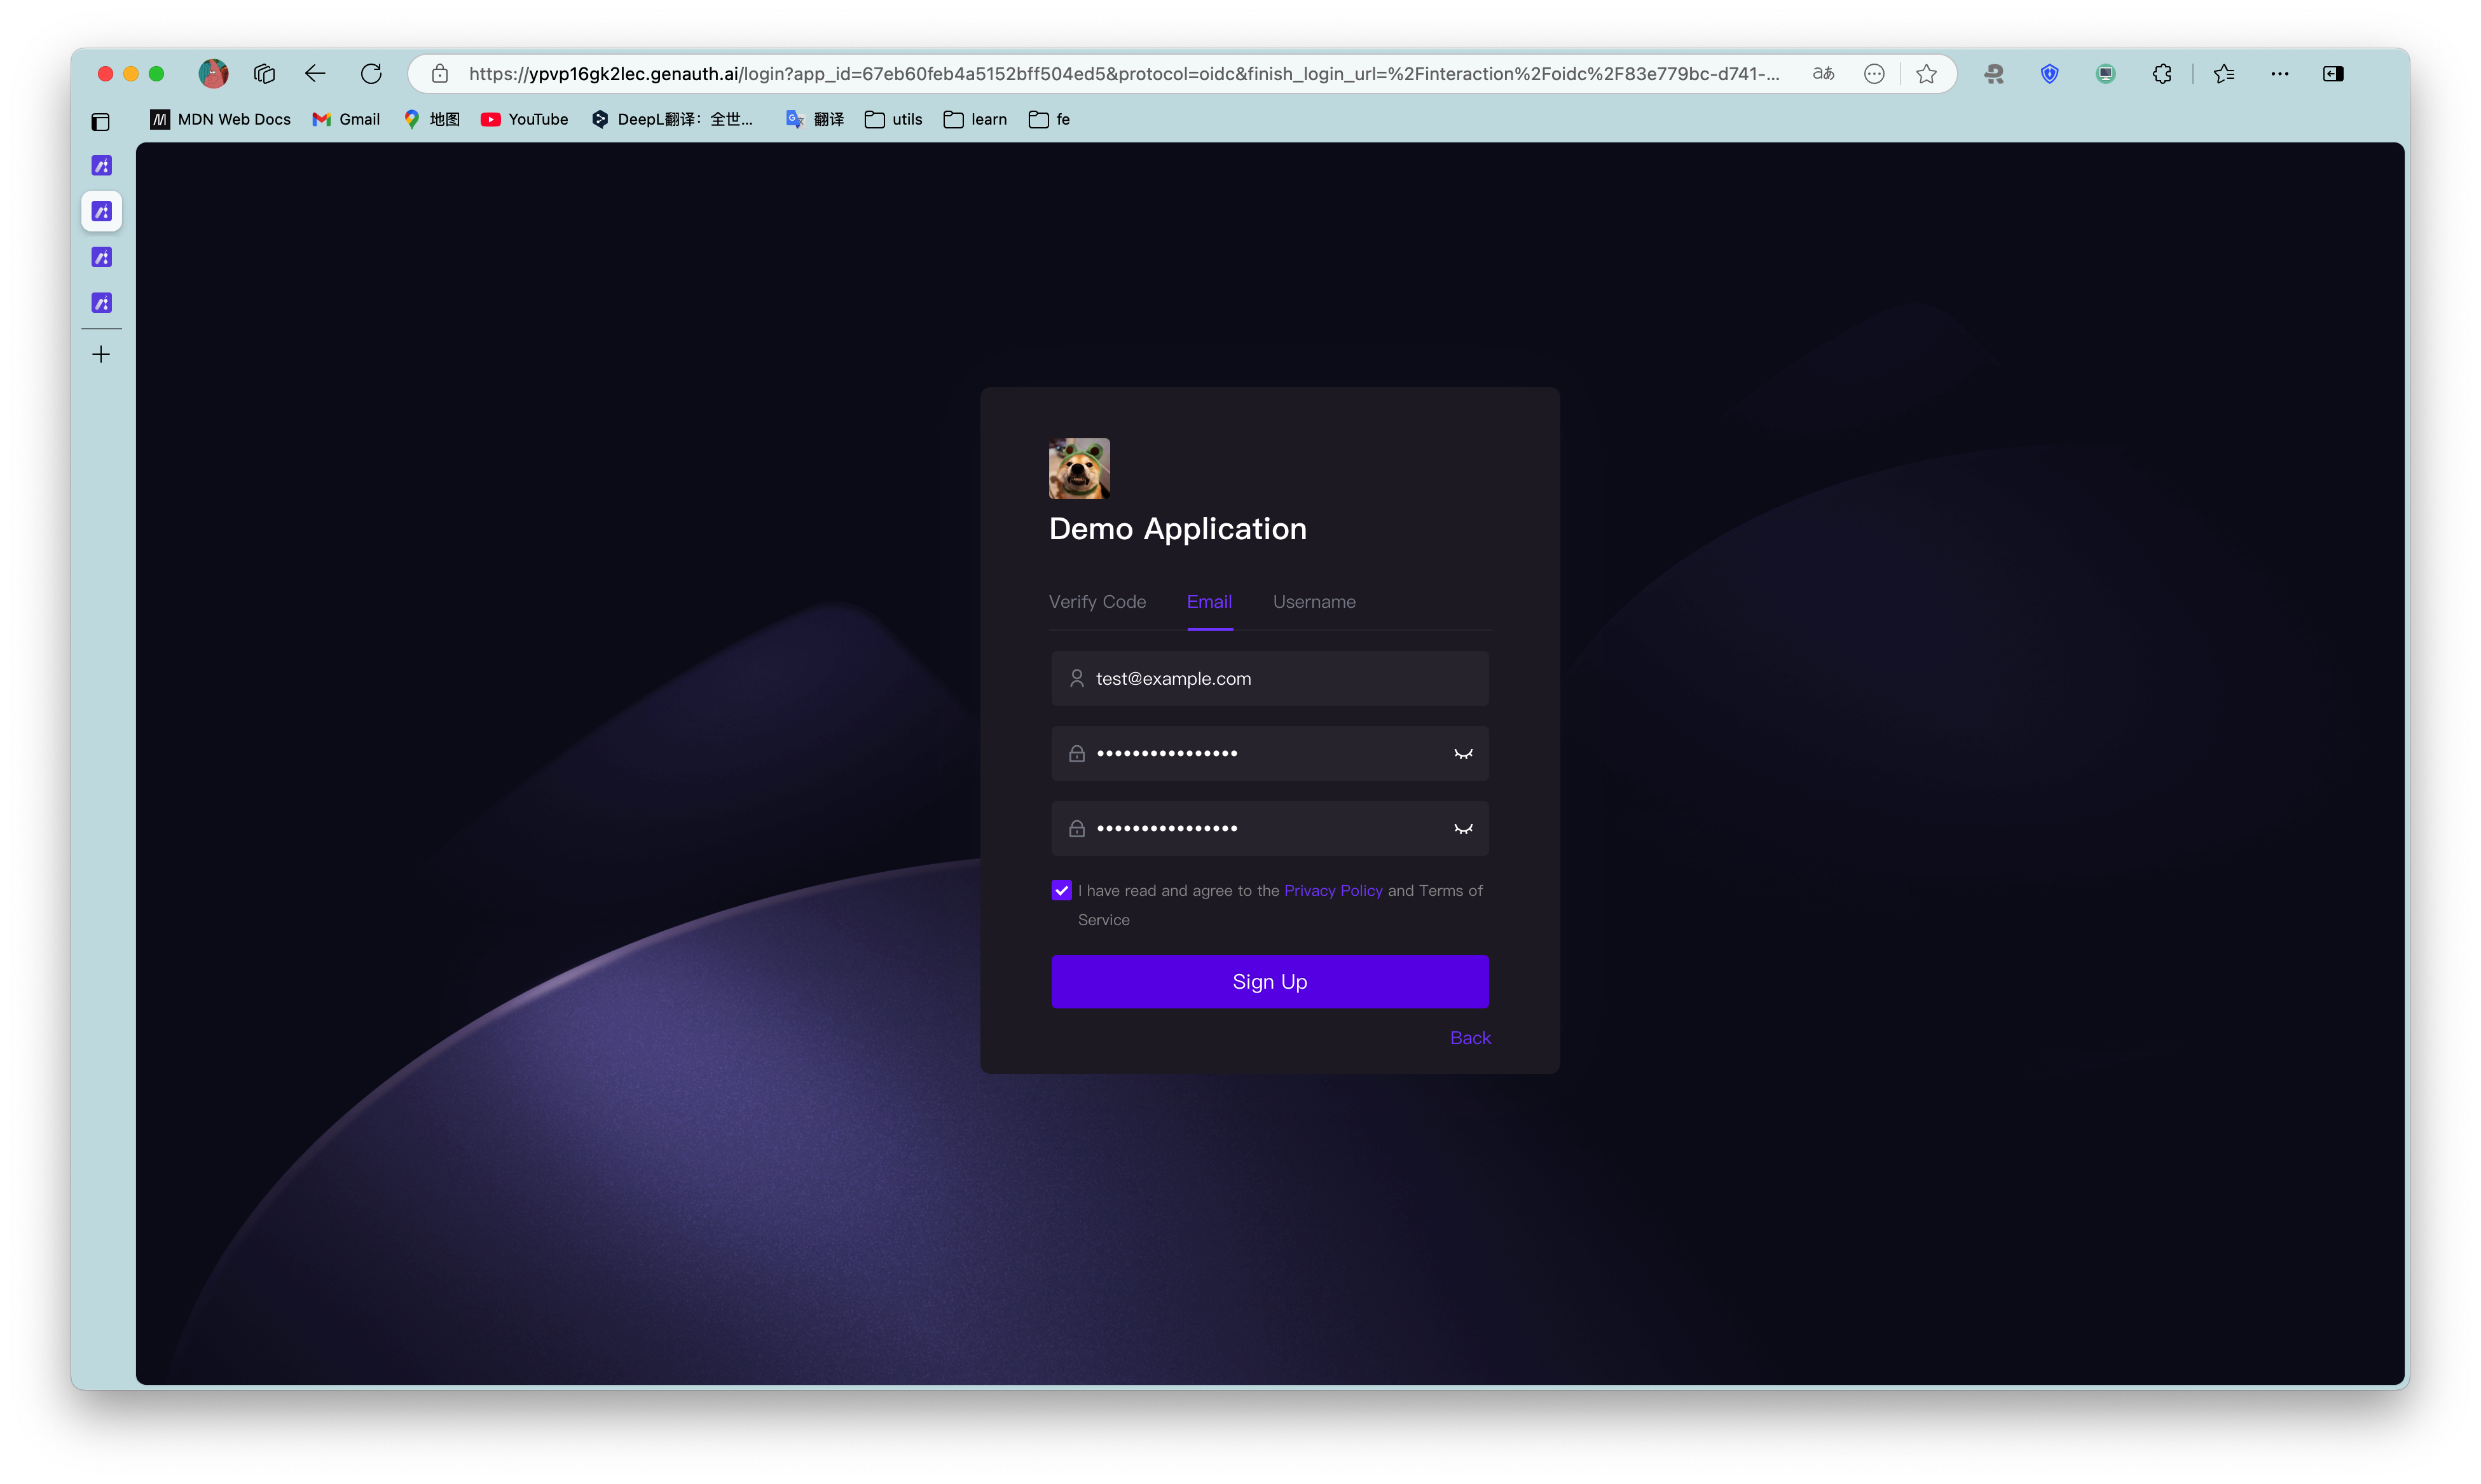
¶ Step 3: Create a user
Click Register now, select Password registration, enter your email address and password, confirm your password again, check the box to agree to the privacy and terms of service, and click the Register button.
After successful registration, you can see the user on the User List page of the console (under the User Management menu of the console).
¶ Step 4: Experience Login
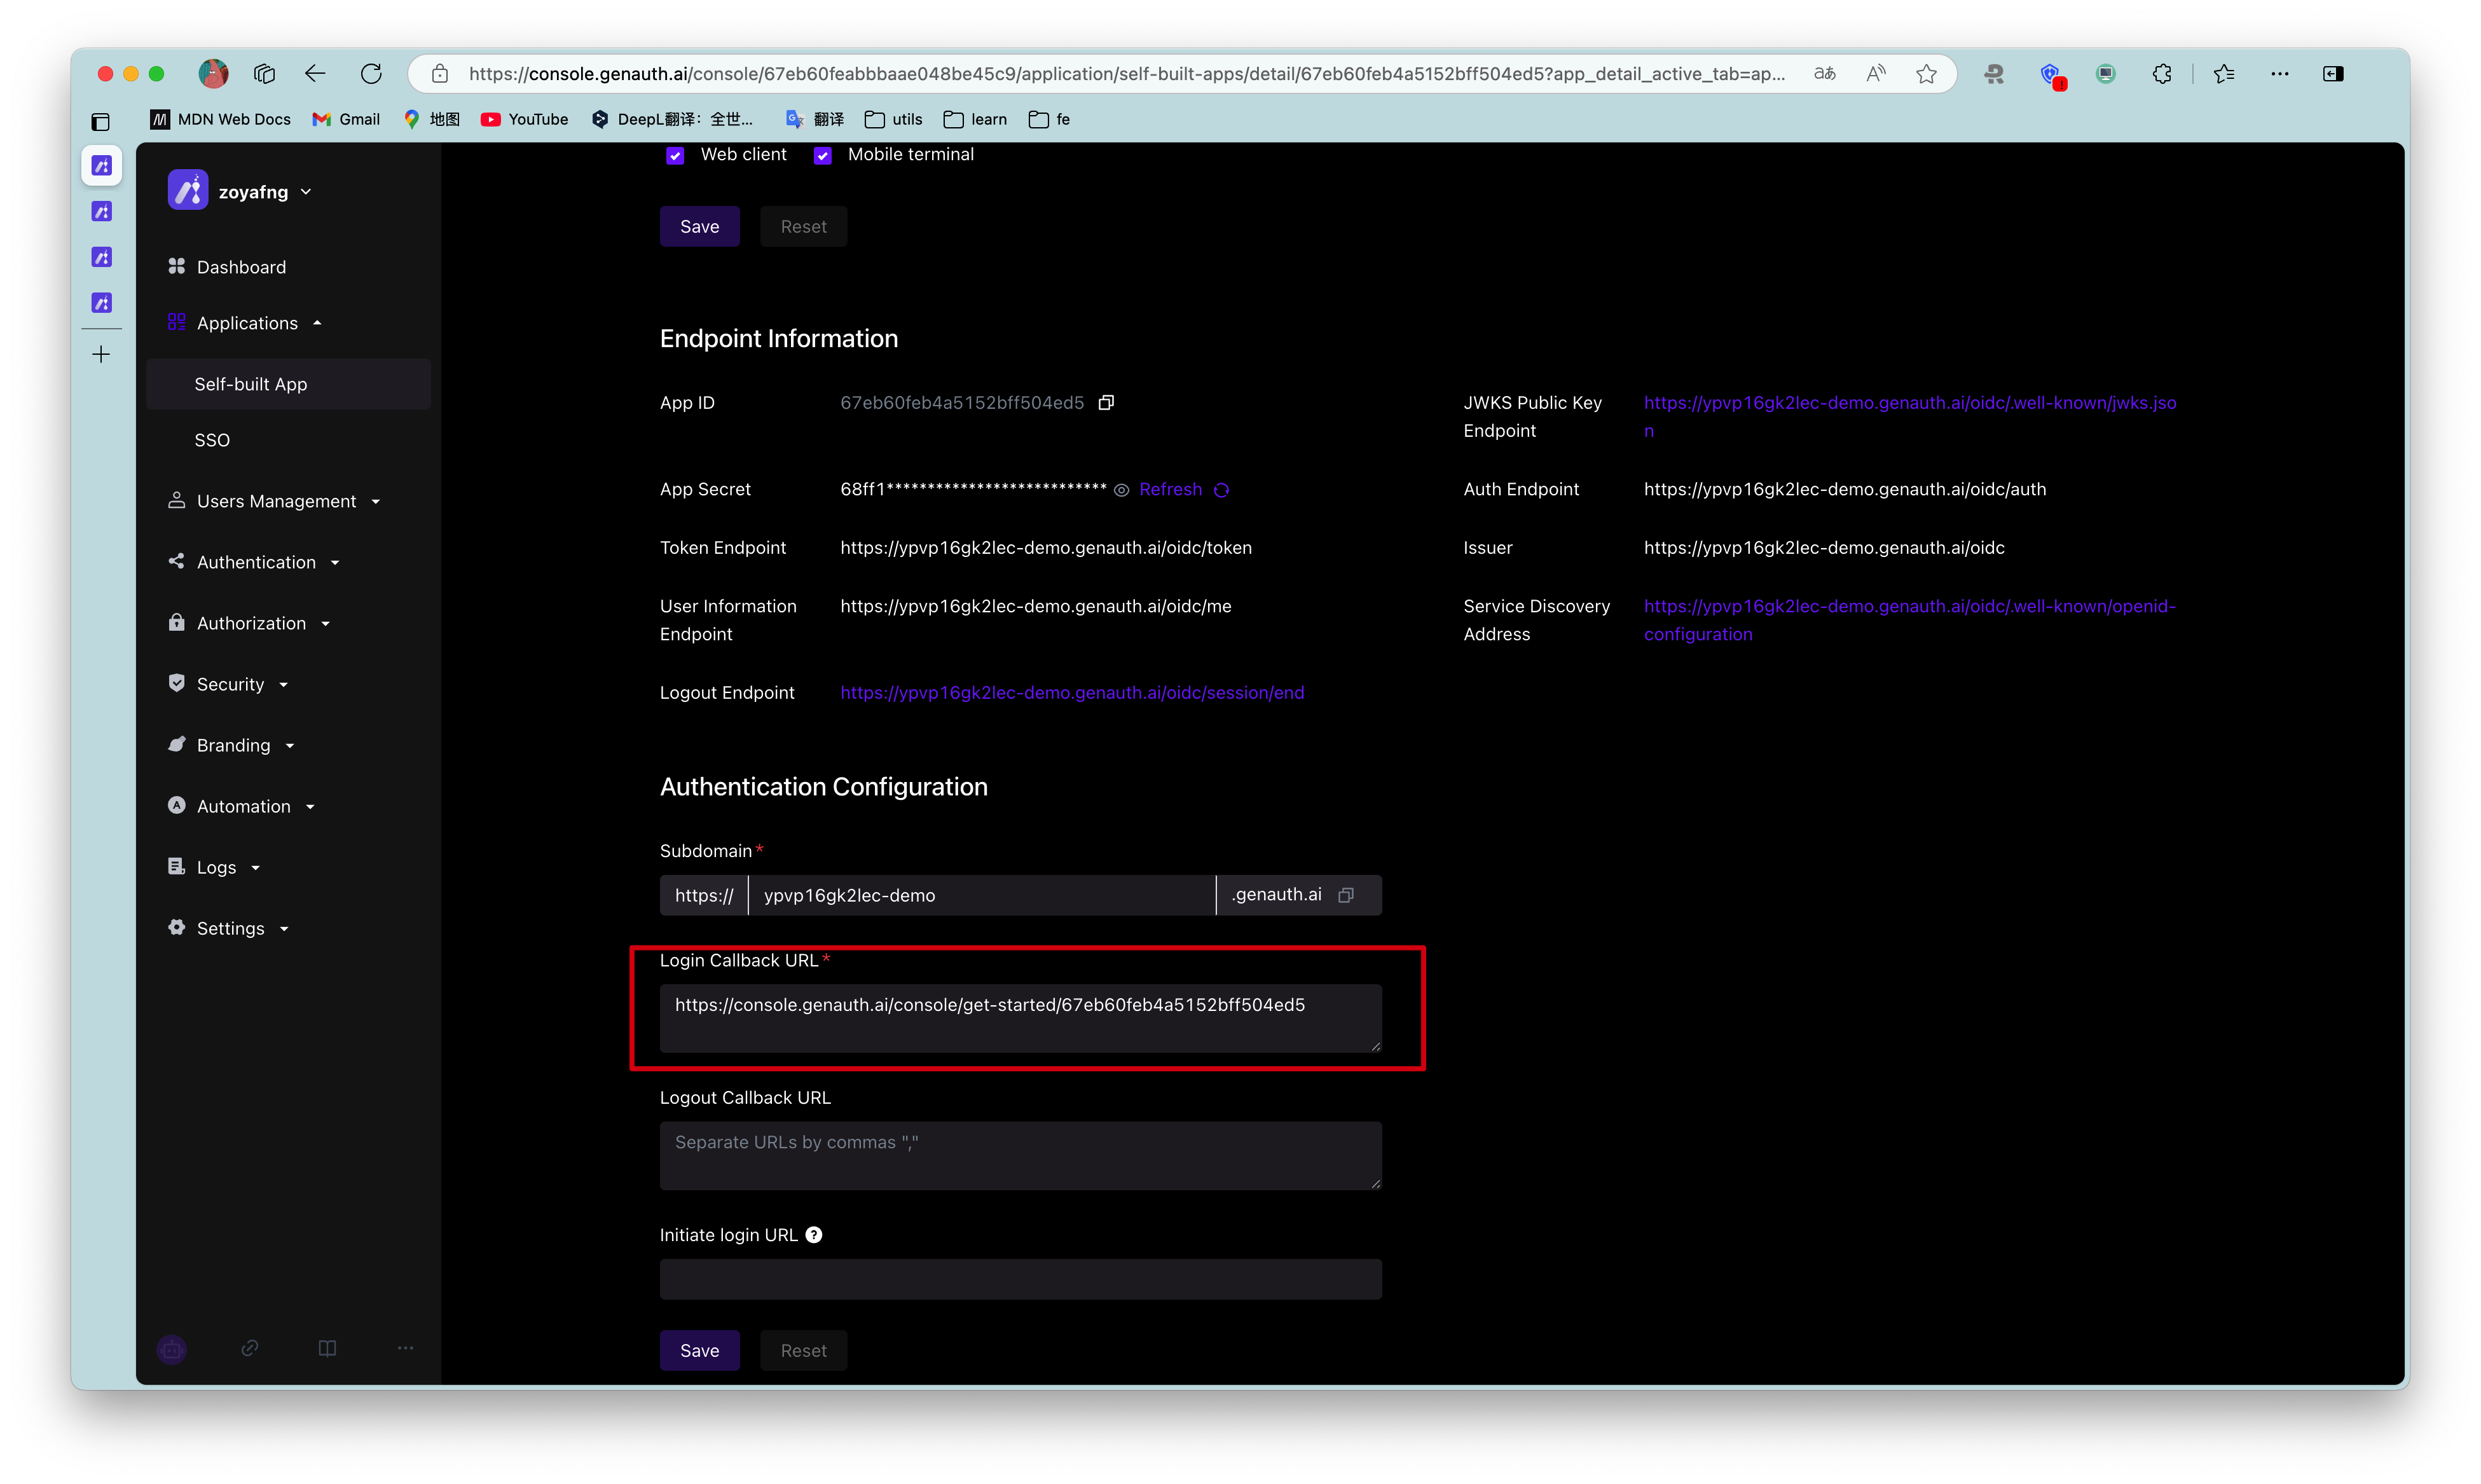
Go back to the login page, enter the email and password of the account you just created, and click Login. After successful login, you will jump to a callback guidance page (on this page you can view the subsequent detailed guidance process and best practices, it is recommended to read it in full). You can see that the URL contains the code query parameter. We will use this code to exchange for token in the next step.

¶ Step 5: Use Code to Exchange Token
In actual applications, you need to change the callback address to the actual business address, which needs to be a backend address.
After getting code, you need to use code to exchange for user information. The Node.js sample code is as follows:
const axios = require("axios");
const qs = require("querystring");
const code2tokenResponse = await axios.post(
  // Change to your application domain name
  "https://GEN_AUTH_APP_HOST/oidc/token",
  qs.stringify({
    code,
    client_id: "GEN_AUTH_APP_ID",
    client_secret: "GEN_AUTH_APP_SECRET",
    grant_type: "authorization_code",
    redirect_uri: "GEN_AUTH_APP_REDIRECTURI",
  }),
  {
    headers: {
      "Content-Type": "application/x-www-form-urlencoded",
    },
  }
);
const { id_token, access_token } = code2tokenResponse.data;
The returned data includes id_token and access_token. In simple terms, id_token is equivalent to the user's identity credential; access_token is the key that allows access to resources. For the difference between Access Token and ID Token, please refer to Access Token vs Id Token.
{
  "access_token": "eyJhbGciOiJSUzI1NiIsInR5cCI6IkpXVCIsImtpZCI6IldZU3ZYbVhFRnZCaXcyNW1DTi1rMDZKeDk3d08xNVNlZGIwNjFhcWZ2WFEifQ.eyJqdGkiOiJJWWpZMzR3Y1hfX0tOX2NlbVdleHEiLCJzdWIiOiI1ZWU5YzRmYjM3Mjg5MGE4MTUyOTE4NzMiLCJpYXQiOjE2MTQ0MjE4NjMsImV4cCI6MTYxNTYzMTQ2Mywic2NvcGUiOiJvcGVuaWQgcHJvZmlsZSBlbWFpbCBwaG9uZSIsImlzcyI6Imh0dHBzOi8vc2FtcGxlLWFwcC5hdXRoaW5nLmNuL29pZGMiLCJhdWQiOiI2MDA1M2I3NDE2NDc4ZGUyZTg4ZmFiNDMifQ.XKy6WTE4naogVaz60-u4L3B4O3l_tYBFnOd80089L-6Hm1bCjOaCY14lV4BN11HgZ_JbikrhE4-_SgbaAVIEsK0NC5P22Naz6as_mDv2tAVgH7eVAKKAHIUQQnWGB890KMY0ptRQXOtSI5Ge06LH1Qq3jPvDR-TklwlY8Kg2S1-oxqDQoZuwZxc5b2BC84M3uLYd5mskkVyGdXOtTBtaGhmn2gxUJ_OhqEVAVpsC_QZRi70D3jup1seG_oADXz11ViVP4EtzYx4jy_3CJLkBBZXGoBY6zzrEI02GPT0CXkKzBDQGymcXKK2FEWpeMYmgkKFTT2ZoI_WcsHrLeNJu7Q",
  "expires_in": 1209600,
  "id_token": "eyJhbGciOiJIUzI1NiIsInR5cCI6IkpXVCJ9.eyJzdWIiOiI1ZWU5YzRmYjM3Mjg5MGE4MTUyOTE4NzMiLCJiaXJ0aGRhdGUiOiIiLCJmYW1pbHlfbmFtZSI6IiIsImdlbmRlciI6Ik0iLCJnaXZlbl9uYW1lIjoiIiwibG9jYWxlIjoiemhfQ04iLCJtaWRkbGVfbmFtZSI6IiIsIm5hbWUiOiIiLCJuaWNrbmFtZSI6IuW7lumVv-axnyIsInBpY3R1cmUiOiJodHRwczovL3RoaXJkd3gucWxvZ28uY24vbW1vcGVuL3ZpXzMyL0diUUtQMElGdlZOOENmd2UyQ0FPbzFBcW1FWnF1RXVUamhSVEZTRVdIaWJHbkhLaWFjY3RpY3J3VE50OUc4U3hOUG5MUzEwcmJBdFFYRGVKZkJ6VEEwb0p3LzEzMiIsInByZWZlcnJlZF91c2VybmFtZSI6IiIsInByb2ZpbGUiOiIiLCJ1cGRhdGVkX2F0IjoiMjAyMS0wMi0yN1QxMDoyOTo0MC4zNzFaIiwid2Vic2l0ZSI6IiIsInpvbmVpbmZvIjoiIiwiZW1haWwiOm51bGwsImVtYWlsX3ZlcmlmaWVkIjpmYWxzZSwicGhvbmVfbnVtYmVyIjpudWxsLCJwaG9uZV9udW1iZXJfdmVyaWZpZWQiOmZhbHNlLCJub25jZSI6IjVEdVdSRFZGRkUiLCJhdF9oYXNoIjoiaEdsRmh1YnZhbkNGSGNXc3RtVEtfQSIsImF1ZCI6IjYwMDUzYjc0MTY0NzhkZTJlODhmYWI0MyIsImV4cCI6MTYxNTYzMTQ2MywiaWF0IjoxNjE0NDIxODYzLCJpc3MiOiJodHRwczovL3NhbXBsZS1hcHAuYXV0aGluZy5jbi9vaWRjIn0.32N4cdIf0p7fiGEM6sPS6PH1JPtIwF3Ee4PUaCt6eXU",
  "scope": "openid profile email phone",
  "token_type": "Bearer"
}
After decoding the id_token, the sample data is as follows. The meaning of each field can be found in the id_token mentioned above:
{
  "sub": "5ee9c4fb372890a815291873", // Abbreviation of subject, which is the user ID
  "birthdate": "",
  "family_name": "",
  "gender": "M",
  "given_name": "",
  "locale": "zh_CN",
  "middle_name": "",
  "name": "",
  "nickname": "Nickname",
  "picture": "https://thirdwx.qlogo.cn/mmopen/vi_32/GbQKP0IFvVN8Cfwe2CAOo1AqmEZquEuTjhRTFSEWHibGnHKiaccticrwTNt9G8SxNPnLS10rbAtQXDeJfBzTA0oJw/132",
  "preferred_username": "",
  "profile": "",
  "updated_at": "2021-02-27T10:29:40.371Z",
  "website": "",
  "zoneinfo": "",
  "email": null,
  "email_verified": false,
  "phone_number": null,
  "phone_number_verified": false
}
You can use the access_token obtained in the previous step to obtain the user's detailed information. The sample code is as follows:
const axios = require("axios");
const token2UserInfoResponse = await axios.get(
  "https://sample-app.genauth.ai/oidc/me?access_token=" + access_token
);
console.log(token2UserInfoResponse.data);
After that, you need to pass the id_token back to the frontend, which should save the id_token and carry it with it every time it requests the backend interface. The backend interface should first verify the legitimacy of the id_token sent by the frontend, and then process the user request. For details on verifying the legitimacy of the token, see How to verify user identity credentials (token).
¶ How to deal with scenarios without a backend?
The aforementioned Code to Token needs to be completed on the backend. If you are in a scenario without a backend, you can use the following two modes:
¶ Use OIDC implicit mode
Find your application in the console Application->Self-built Application, turn on implicit mode in Application Configuration->Other Configuration->Authorization Configuration->Authorization Mode, and check id_token token return type, then let your users initiate login using the following address:
GET https://sample-app.genauth.ai/oidc/auth?client_id=GEN_AUTH_APP_ID&redirect_uri={callback address}&scope=openid%20profile&response_type=id_token%20token&state={random string}&nonce={random string}
GenAuth directly returns id_token and access_token to the callback address in the form of URL hash (self-built application Application Configuration tab Authentication Configuration module), for example:
https://example.com/#id_token=eyJhbGciOiJIUzI1NiIsInR5cCI6IkpXVCJ9.eyJzdWIiOiI1Y2QwMjZlZjNlZDlmOTRkODBmZTM2YWUiLCJub25jZSI6IjE4MzEyODkiLCJzaWQiOiI4YzgzN2I5My01OTNlLTQzZjctYWMzNC0yYjRmZDU3ZGFhMTciLCJhdF9oYXNoIjoiVFFtbFlEVTVPZGF1Zjl0U0V KdHY5USIsInNfaGFzaCI6Ind3SDNXclV2b0hiSUp5TWVZVHU4bHciLCJhdWQiOiI1ZDAxZTM4OTk4NWY4MWM2YzFkZDMxZGUiLCJleHAiOjE1NjA0MDkzNjgsIml hdCI6MTU2MDQwNTc2OCwiaXNzIjoiaHR0cHM6Ly9vYXV0aC5hdXRoaW5nLmNuL29hdXRoL29pZGMifQ.T9M0s6rk4Teq6VOOBRIElgHK9KyM3q0ZJj2aS0VD_Fw& access_token=eyJhbGciOiJIUzI1NiIsInR5cCI6IkpXVCJ9.eyJqdGkiOiI3OE9XcVJNVXJEUXpMMXpHVzVtUWoiLCJzdWIiOiI1Y2QwMjZlZjNlZDlmOTRkO DBmZTM2YWUiLCJpc3MiOiJodHRwczovL29hdXRoLmF1dGhpbmcuY24vb2F1dGgvb2lkYyIsImlhdCI6MTU2MDQwNTc2OCwiZXhwIjoxNTYwNDA5MzY4LCJzY29wZ SI6Im9wZW5pZCBwcm9maWxlIiwiYXVkIjoiNWQwMWUzODk5ODVmODFjNmMxZGQzMWRlIn0.mR0MZDwlZWGRMsAZjQ27sDFFqYoDgZ6WHTK4C7JbML4&expires_in=3600&token_type=Bearer&state=jazz&session_state=26ec053be9f47d68dc430f84b97efb1095469fe10169a9e00ef4092718714b8b
You can extract the id_token from the url hash, and then you can decode the id_token to get the user information. For details, please see How to validate user credentials (token).
¶ Using GenAuth Web SDK
GenAuth provides another simple way to obtain user information on the front end without handling callbacks or other configuration.
For detailed usage, please see Single Sign-On (SSO) (opens new window).
¶ Visit the Personal Center
Each application created in GenAuth has a built-in personal center page for end users, the address is {YOUR_APP_DOMAIN}/u, such as "https://sample-app.genauth.ai/u", you can directly access this address through the browser.
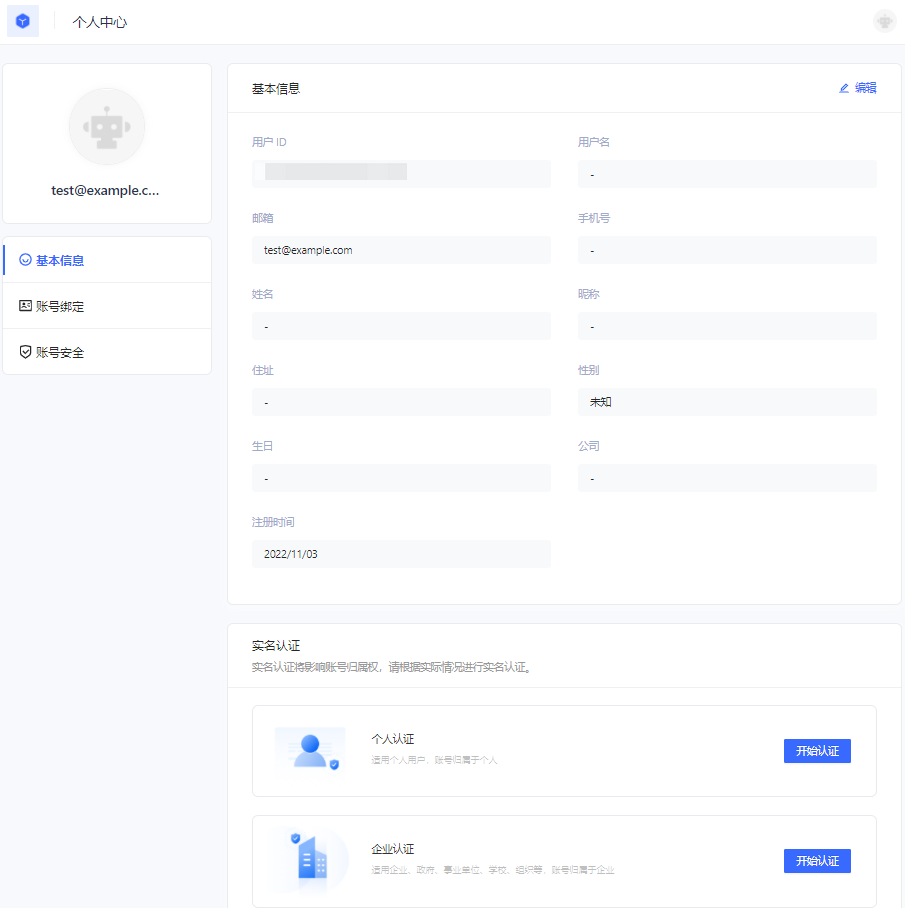
Here, end users can view and modify their personal information, change passwords, bind email and mobile phone numbers, bind MFA, etc.
¶ Using the login component
In the above process, we use the hosted login page operated by GenAuth. At the same time, we also provide Login components that support various mainstream web frameworks. Compared with online login pages, login components are more flexible and have stronger customization capabilities. You can integrate them into your own pages. For more information about login components, please refer to Use the embedded login component to complete authentication.
¶ Using the API & SDK
So far, you have learned how to quickly implement the core login and registration process with the help of GenAuth's hosted login page. If you want stronger customization requirements, you can also use the API & SDK provided by GenAuth. For detailed procedures, see Use API & SDK to complete authentication.