GenAuth DocsDocuments
Concepts
User Guide
Development Integration
AgentAuth
Metadata
Development Integration
Multi-tenant (beta)
Console Documentation
Multi-tenant Console
Tenant Console
Saas Application Demo
Concepts
User Guide
Development Integration
AgentAuth
Metadata
Development Integration
Multi-tenant (beta)
Console Documentation
Multi-tenant Console
Tenant Console
Saas Application Demo
Old version
User Guide
  • Quick Start

    • Authenticate Your First User

      • Overview
      • Use Hosted Login Page
      • Use Embedded Login Component
      • Use API & SDK
      • Validate User Token
      • Implement Access Control
      • Logout
      • What's Next
    • Integration Methods for Different Applications

    • Console Overview
  • Authentication

  • Access Control

  • Authorization

  • Adaptive MFA

  • User Account Management

  • User Directory Management

  • Applications

  • Become a Federation Authentication Identity Provider

  • Connect External Identity Providers (IdP)

  • WeChat Ecosystem Full Scenario Capabilities

  • Migrate Users to GenAuth

  • Security Settings

  • Branding

  • Automation

  • Audit Logs

  • Setting

  • FAQ

  1. User Guide
  2. /
  3. Quick Start

  4. /
  5. Authenticate Your First User
  6. /
  7. Use API & SDK

¶ Use API & SDK to complete authentication

Update time: 2025-07-23 07:34:21
Edit

In the previous guide, you have learned how to use GenAuth hosted login page and embedded login component to implement the login and registration process. In addition, we also provide HTTP APIs in RESTful and GraphQL, as well as SDKs in more than ten different languages ​​and frameworks. You can flexibly combine the authentication process you need based on these API & SDK resources.

¶ Select a familiar SDK

GenAuth supports SDKs in multiple programming languages including Java, JavaScript/Node.js, Python, PHP, C#, Swift, Go, Ruby, WeChat Mini Program, etc. You can choose the SDK you are familiar with:

  • Java/Kotlin
  • JavaScript/Node.js
  • Python
  • PHP
  • C#
  • Swift
  • Go
  • Ruby
  • WeChat Mini Program

¶ Initialize SDK

Select language
Java
Loading...

Use the UserPool ID and AppID to initialize the AuthenticationClient of the Java SDK:

import cn.genauth.core.auth.AuthenticationClient;
// Initialize with AppId and appHost
AuthenticationClientOptions options = new AuthenticationClientOptions();
options.setAppId(GEN_AUTH_APP_ID);
options.setAppHost(GEN_AUTH_APP_HOST);
AuthenticationClient client = new AuthenticationClient(options);

¶ Use SDK to authenticate users

Take the mobile phone verification code login (if the user account does not exist, an account will be created first) as an example:

First send the SMS verification code

Select language
Java
Loading...

Use the sendSmsCode method to send the verification code:

String phone = "phone number";
authenticationClient.sendSmsCode(phone).execute();

Then use the mobile phone verification code to log in:

Select language
Java
Loading...

Use the loginByPhoneCode method to log in using a phone number verification code:

String phone = "phone number";
String code = "1234";
User user = authenticationClient.loginByPhoneCode(new LoginByPhoneCodeInput(phone, code)).execute();

After successful login, you can get the user information of the user, where token is the user's identity credential. You should bring it with you when accessing your backend resources, and then verify the identity of this token on the backend.

¶ Verify user token

The token field of the user information is a standard OIDC IdToken. You can use application ID and Secret on the backend to verify this token.

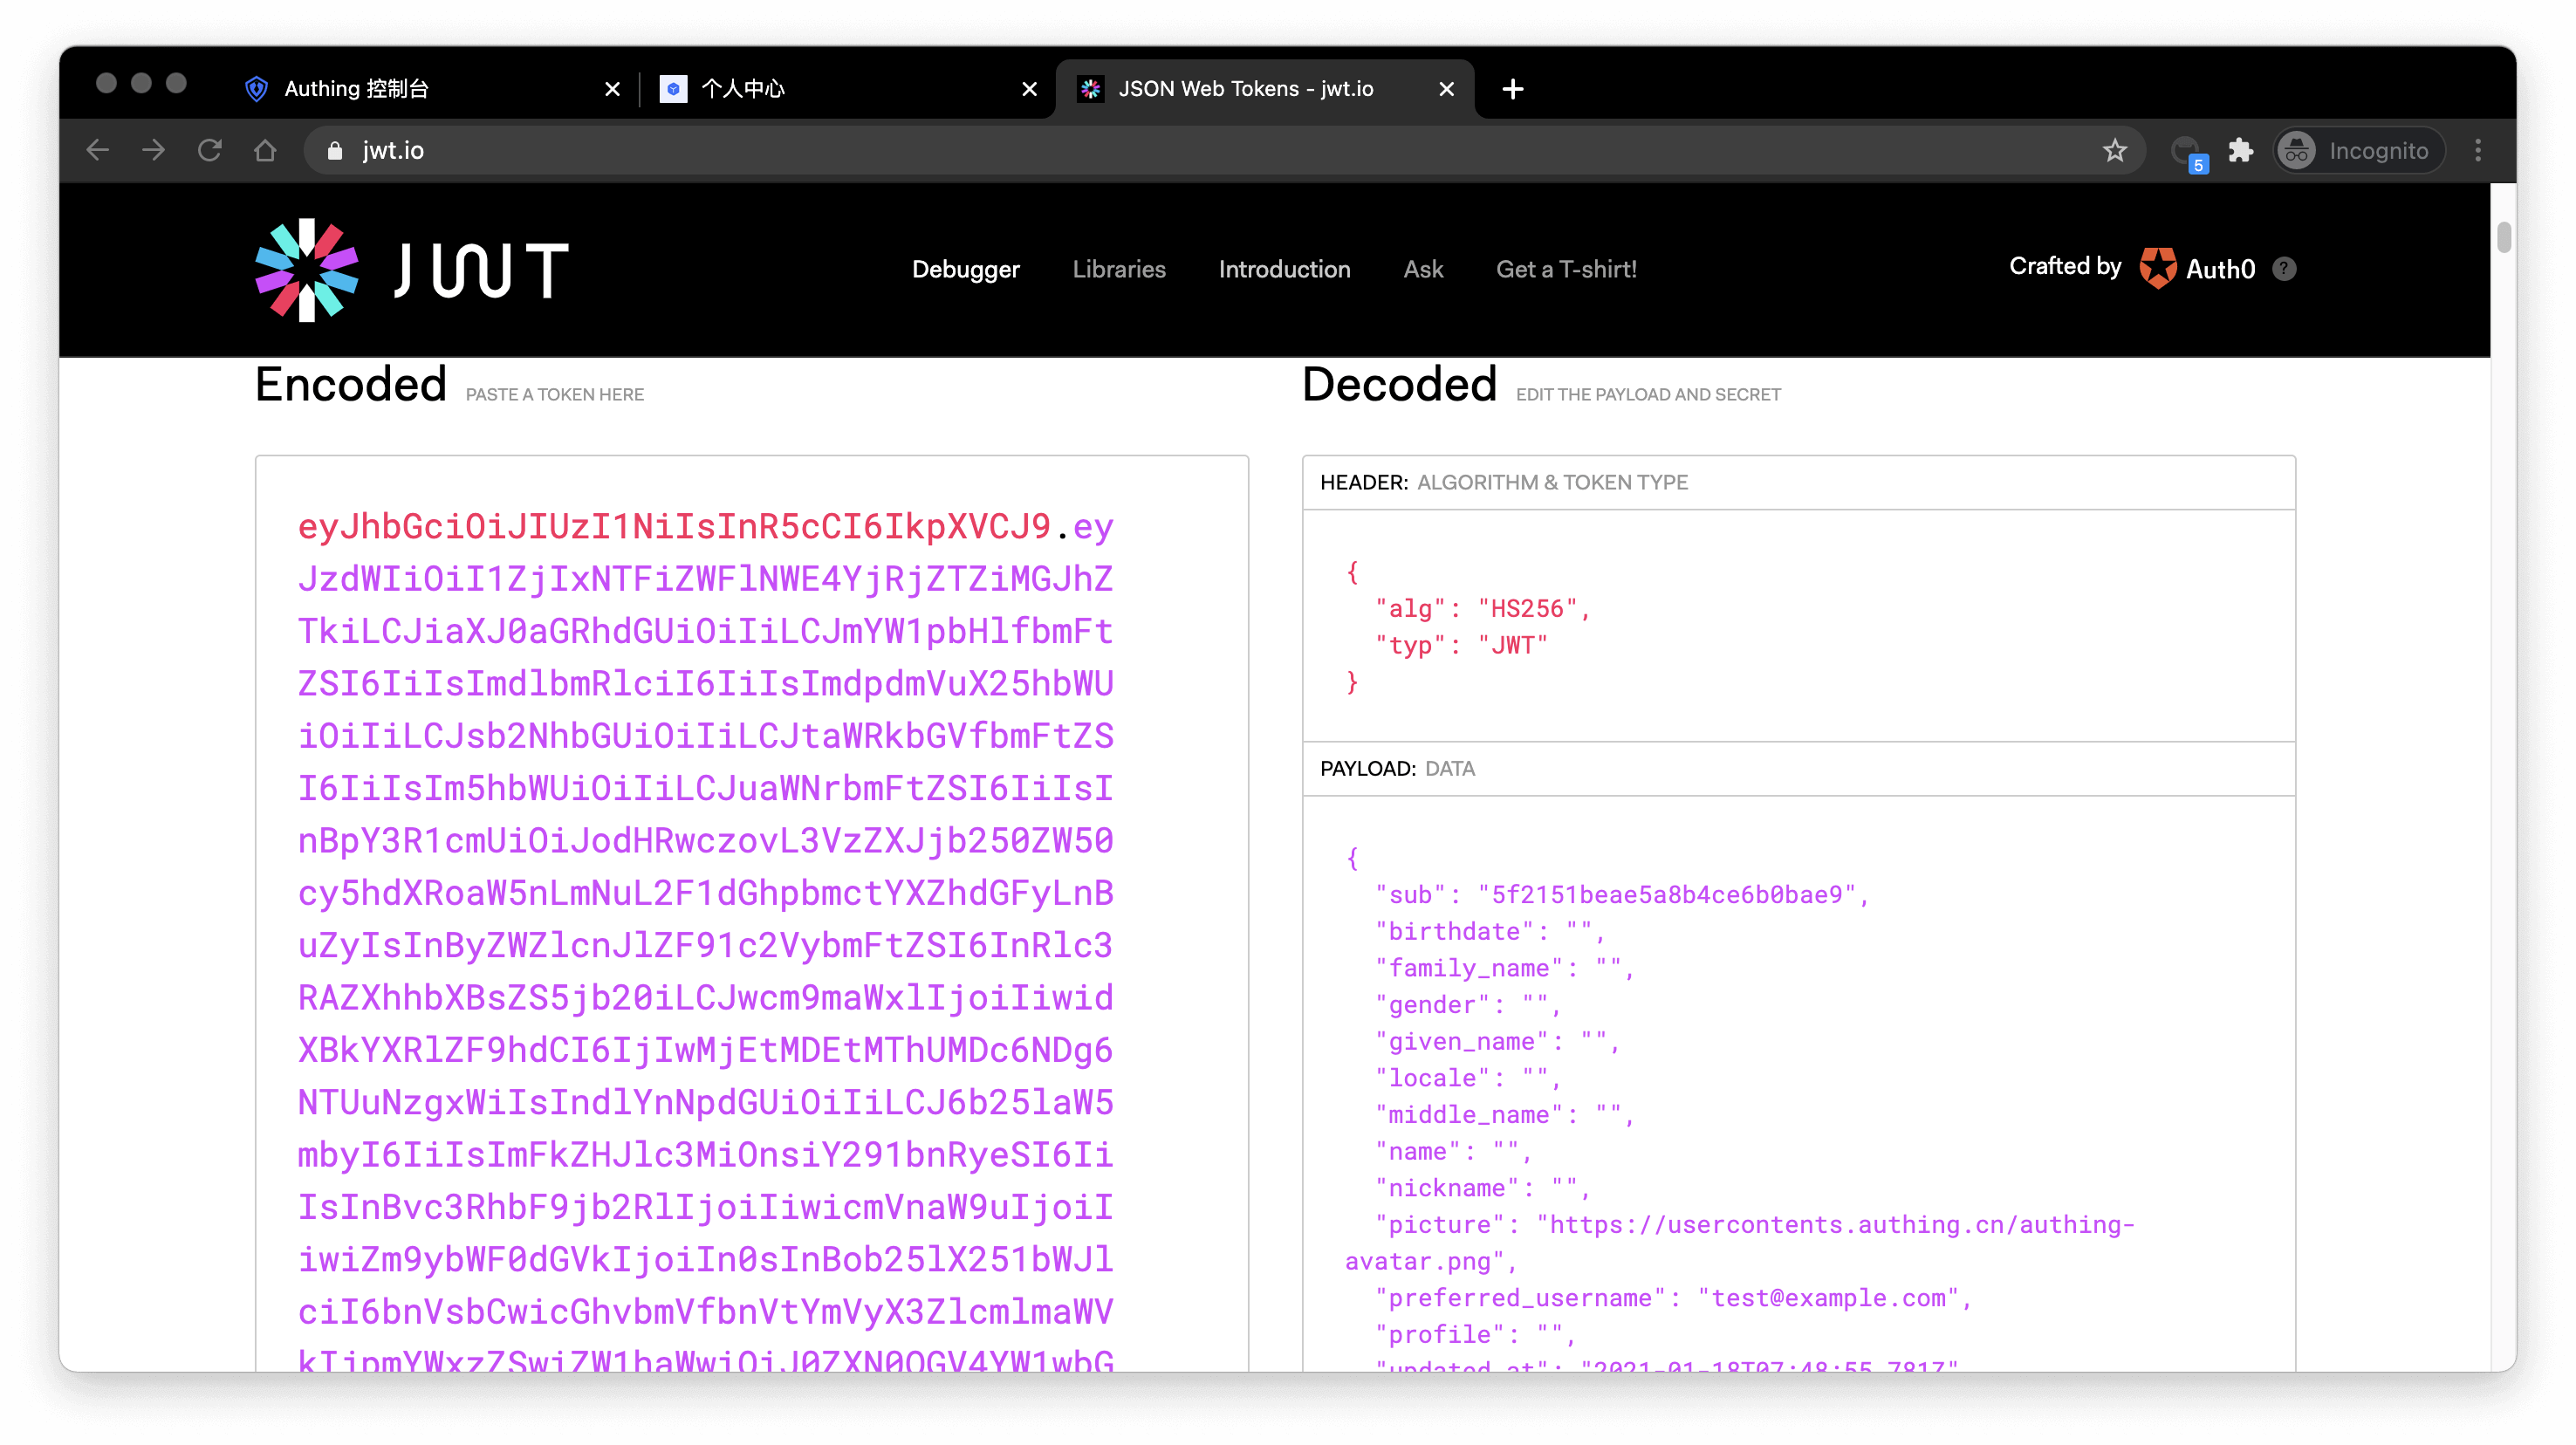
Example token As follows:

eyJhbGciOiJIUzI1NiIsInR5cCI6IkpXVCJ9.eyJzdWIiOiI1ZjIxNTFiZWFlNWE4YjRjZTZiMGJhZTkiLCJiaXJ0aGRhdGUiOiIiLCJmYW1pbHlfbmFtZSI6IiIsImdlbmRlciI6IiIsImdpdmVuX25hbWUiOiIiLCJsb2NhbGUiOiI iLCJtaWRkbGVfbmFtZSI6IiIsIm5hbWUiOiIiLCJuaWNrbmFtZSI6IiIsInBpY3R1cmUiOiJodHRwczovL3VzZXJjb25 0ZW50cy5hdXRoaW5nLmNuL2F1dGhpbmctYXZhdGFyLnBuZyIsInByZWZlcnJlZF91c2VybmFtZSI6InRlc3RAZXhhbXBs ZS5jb20iLCJwcm9maWxlIjoiIiwidXBkYXRlZF9hdCI6IjIwMjEtMDEtMThUMDc6NDg6NTUuNzgxWiIsIndlYnNpdGUi OiIiLCJ6b25laW5mbyI6IiIsImFkZHJlc3MiOnsiY291bnRyeSI6IiIsInBvc3RhbF9jb2RlIjoiIiwicmVnaW9uIjoiI iwiZm9ybWF0dGVkIjoiIn0sInBob25lX251bWJlciI6bnVsbCwicGhvbmVfbnVtYmVyX3ZlcmlmaWVkIjpmYWxzZSwiZ W1haWwiOiJ0ZXN0QGV4YW1wbGUuY29tIiwiZW1haWxfdmVyaWZpZWQiOmZhbHNlLCJkYXRhIjp7InR5cGUiOiJ1c2VyIi widXNlclBvb2xJZCI6IjVhOWZhMjZjZjg2MzVhMDAwMTg1NTI4YyIsImFwcElkIjoiNjAwNTNiNzQxNjQ3OGRlMmU4OG ZhYjQzIiwiaWQiOiI1ZjIxNTFiZWFlNWE4YjRjZTZiMGJhZTkiLCJ1c2VySWQiOiI1ZjIxNTFiZWFlNWE4YjRjZTZiMGJ hZTkiLCJfaWQiOiI1ZjIxNTFiZWFlNWE4YjRjZTZiMGJhZTkiLCJwaG9uZSI6bnVsbCwiZW1haWwiOiJ0ZXN0QGV4YW1 wbGUuY29tIiwidXNlcm5hbWUiOiJ0ZXN0QGV4YW1wbGUuY29tIiwidW5pb25pZCI6bnVsbCwib3BlbmlkIjpudWxsLCJj bGllbnRJZCI6IjVhOWZhMjZjZjg2MzVhMDAwMTg1NTI4YyJ9LCJ1c2VycG9vbF9pZCI6IjVhOWZhMjZjZjg2MzVhMDAw MTg1NTI4YyIsImF1ZCI6IjYwMDUzYjc0MTY0NzhkZTJlODhmYWI0MyIsImV4cCI6MTYxMjE2NTg4OCwiaWF0IjoxNjEwO TU2Mjg4LCJpc3MiOiJodHRwczovL3NhbXBsZS1hcHAuYXV0aGluZy5jbi9vaWRjIn0.SNyGBffF-zBqDQFINGxUJZrWSAADHQhbEOsKvnH4SLg

You can decode this on this website (opens new window) (domestic users can access this mirror site (opens new window)) IdToken:

Basically all languages ​​provide libraries for verifying IdToken. You can choose the language you are familiar with:

Select language
Java
Loading...

Java can use java-jwt (opens new window) to verify the IdToken:

String token = "eyJhbGciOiJIUzI1NiIsInR5cCI6IkpXUyJ9.eyJpc3MiOiJhdXRoMCJ9.AbIJTDMFc7yUa5MhvcP03nJPyCPzZtQcGEp-zWfOkEE";
try {
    Algorithm algorithm = Algorithm.HMAC256("secret");
    JWTVerifier verifier = JWT.require(algorithm)
        .withIssuer("auth0")
        .build(); //Reusable verifier instance
    DecodedJWT jwt = verifier.verify(token);

    //Get user info
    JWTClaimsSet jwtClaimSet = JWTParser.parse(token)
        .getJWTClaimsSet();
    Map<String, Object> map = jwtClaimSet.getClaims();
} catch (JWTVerificationException | ParseException exception){
    //Invalid signature/claims
}

If the verification is successful, you can get the user information of the id_token, where the sub field is the user's ID and the aud field is the application's ID. You can click here to learn about the detailed meaning of each field of IdToken.

¶ Next

After identifying the user, you may also need to manage the user's permissions to determine whether the user has the permission to operate this API.

Previous article: Use Embedded Login Component Next article: Validate User Token
  • Select a familiar SDK
  • Initialize SDK
  • Use SDK to authenticate users
  • Verify user token
  • Next

User identity management

Integrated third-party login
Customized authentication process

Enterprise internal management

Single sign-on
Multi-factor authentication
Permission management

Developer

Development Documentation
GitHub (opens new window)

Company

official@genauth.ai
16th Floor, Building B, Beichen Century Center, Chaoyang District, Beijing (Total)
Room 406, 4th Floor, Block B, No. 200, Tianfu Fifth Street, High-tech Zone, Chengdu (Branch)

© Beijing Steamory Technology Co., Ltd.