¶ Integrate GenAuth in a standard web application
This article takes the Node.js web framework Express (opens new window) as an example to introduce how to quickly access GenAuth in traditional web projects (such as Express MVC, Django, PHP Laravel, etc.) to implement functions such as login, logout, and obtaining user information.
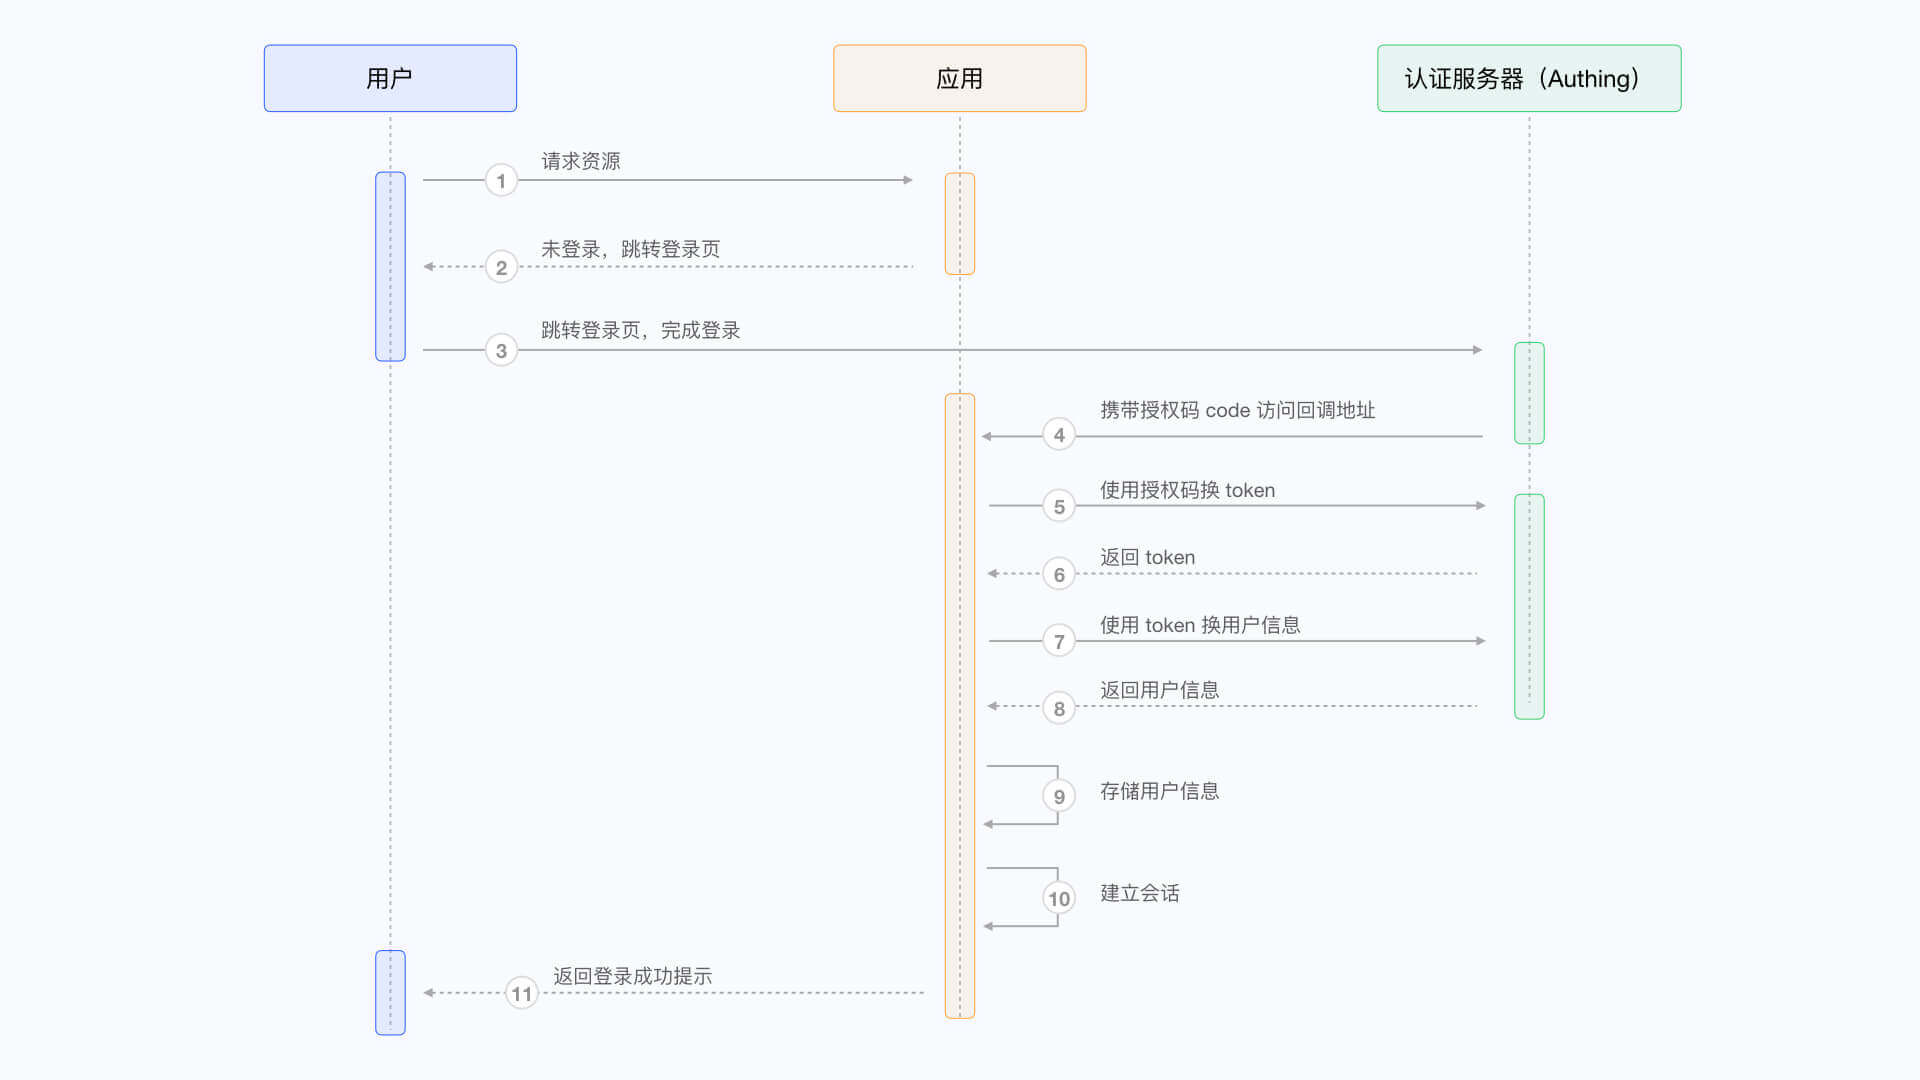
There are three parties involved here: the end user browser, the application server, and the GenAuth server. The complete process is as follows:
- The end user browser requests the application service and finds that the user is not logged in, so it jumps to the login page hosted by GenAuth.
- After the user completes the login on this login page, the end user browser will carry the authorization code (Authorization Code) and other data in the request parameters to jump to the callback chain pre-configured by the application server.
- The application server uses the authorization code to request the GenAuth server in exchange for user information.
- After the application server obtains the user information, it establishes a session with the end user.
- The end user receives a successful login prompt, and the authentication process is completed.
The flow chart is as follows:
¶ Configure in GenAuth
Before you start, you need to create an application in GenAuth. You can create an application on the application list page of the GenAuth console.
¶ Configure callback link
Path: Application->Self-built application->Application details page->Application configuration->Authentication configuration
When the user successfully logs in at GenAuth, the browser will jump to the callback link (Callback URL) you configured. This callback link should be a route in your application, and you need to complete operations such as exchanging user information in this route. You must configure this callback link, otherwise the user will not be able to log in, and an invalid_redirect_uri error prompt will be displayed.
The callback link for this sample code is https://console.genauth.ai/console/get-started, copy it to the Login callback URL configuration item, and then click Save. For more information, see Application Configuration
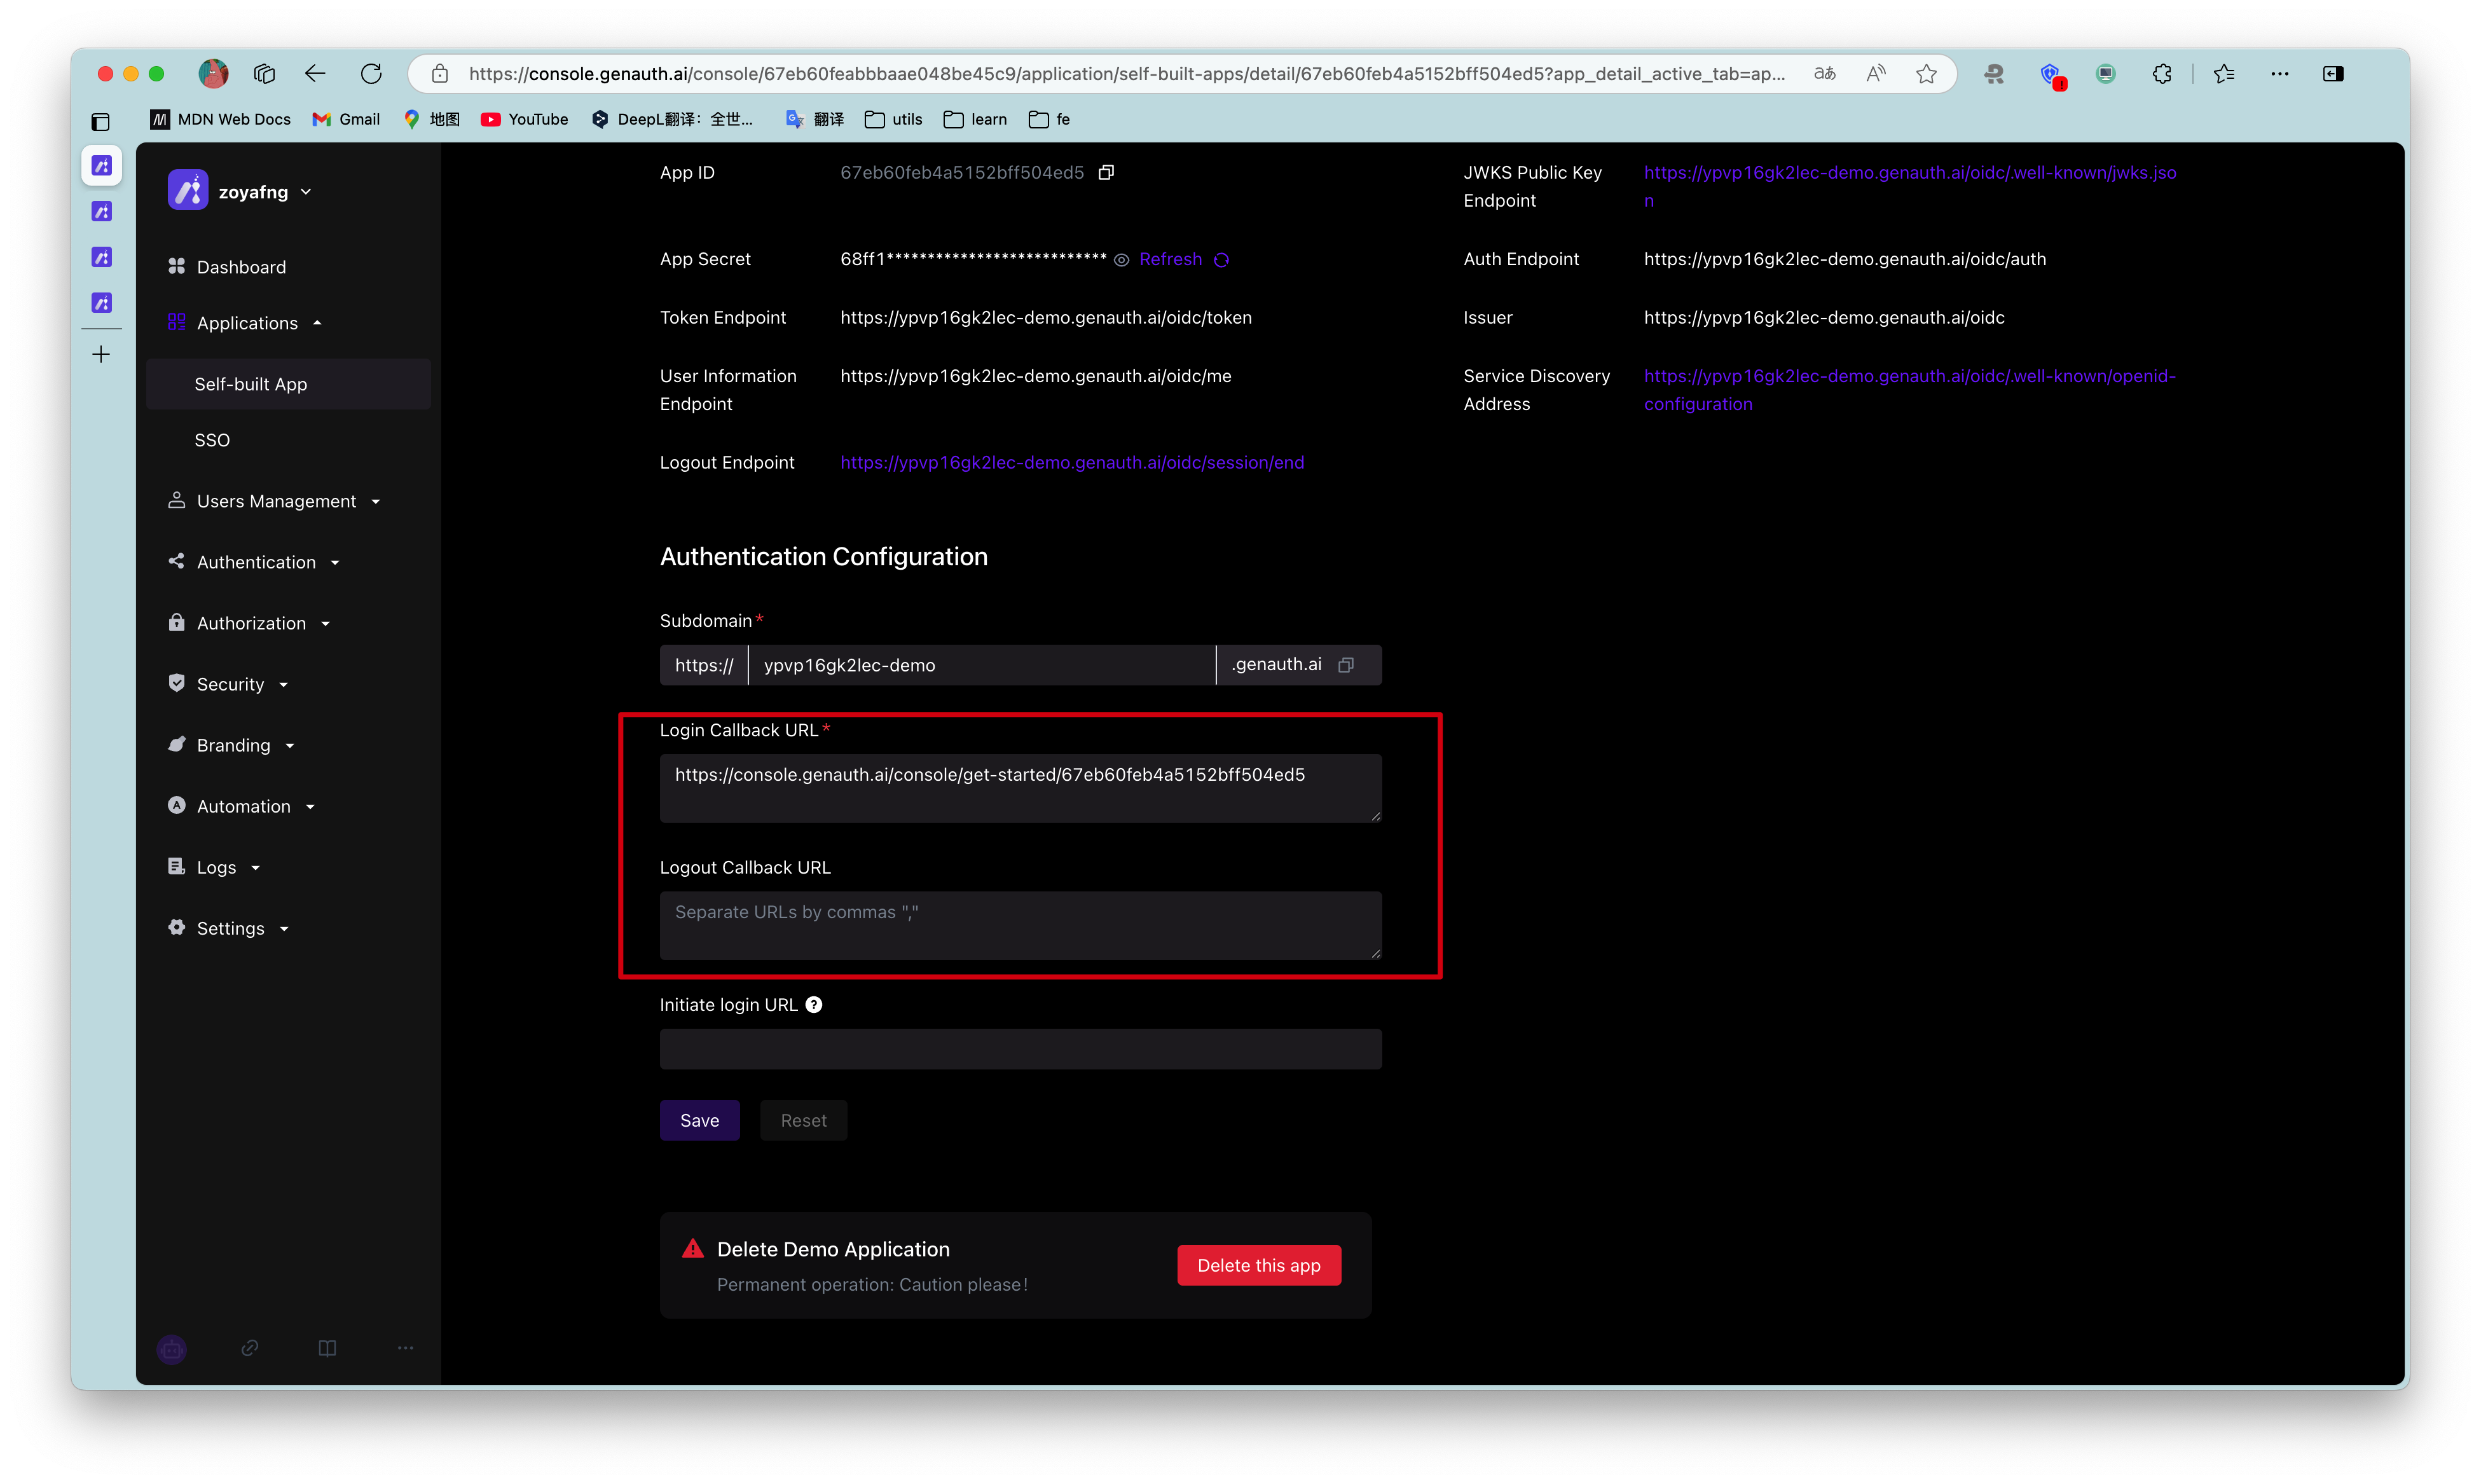
¶ Configure logout callback link
You need to configure the callback address (Logout URLs) after logging out. The URL that users return to after logging out of the GenAuth hosted login page. You must configure this callback URL, otherwise users will not be able to log out and will be shown a misconfiguration error message. The callback URL for this sample code is http://localhost:3000, copy it to the Logout callback URL configuration item, and then click Save.
¶ Integrate GenAuth into your system
¶ Install dependencies
This is a node.js example, you need to install openid-client (opens new window) and passportjs (opens new window) that support the standard OIDC protocol.
yarn add express express-session passport openid-client
Java developers can use spring-security (opens new window) of the Spring framework. For detailed access process, please refer to the document.
¶ Initialization
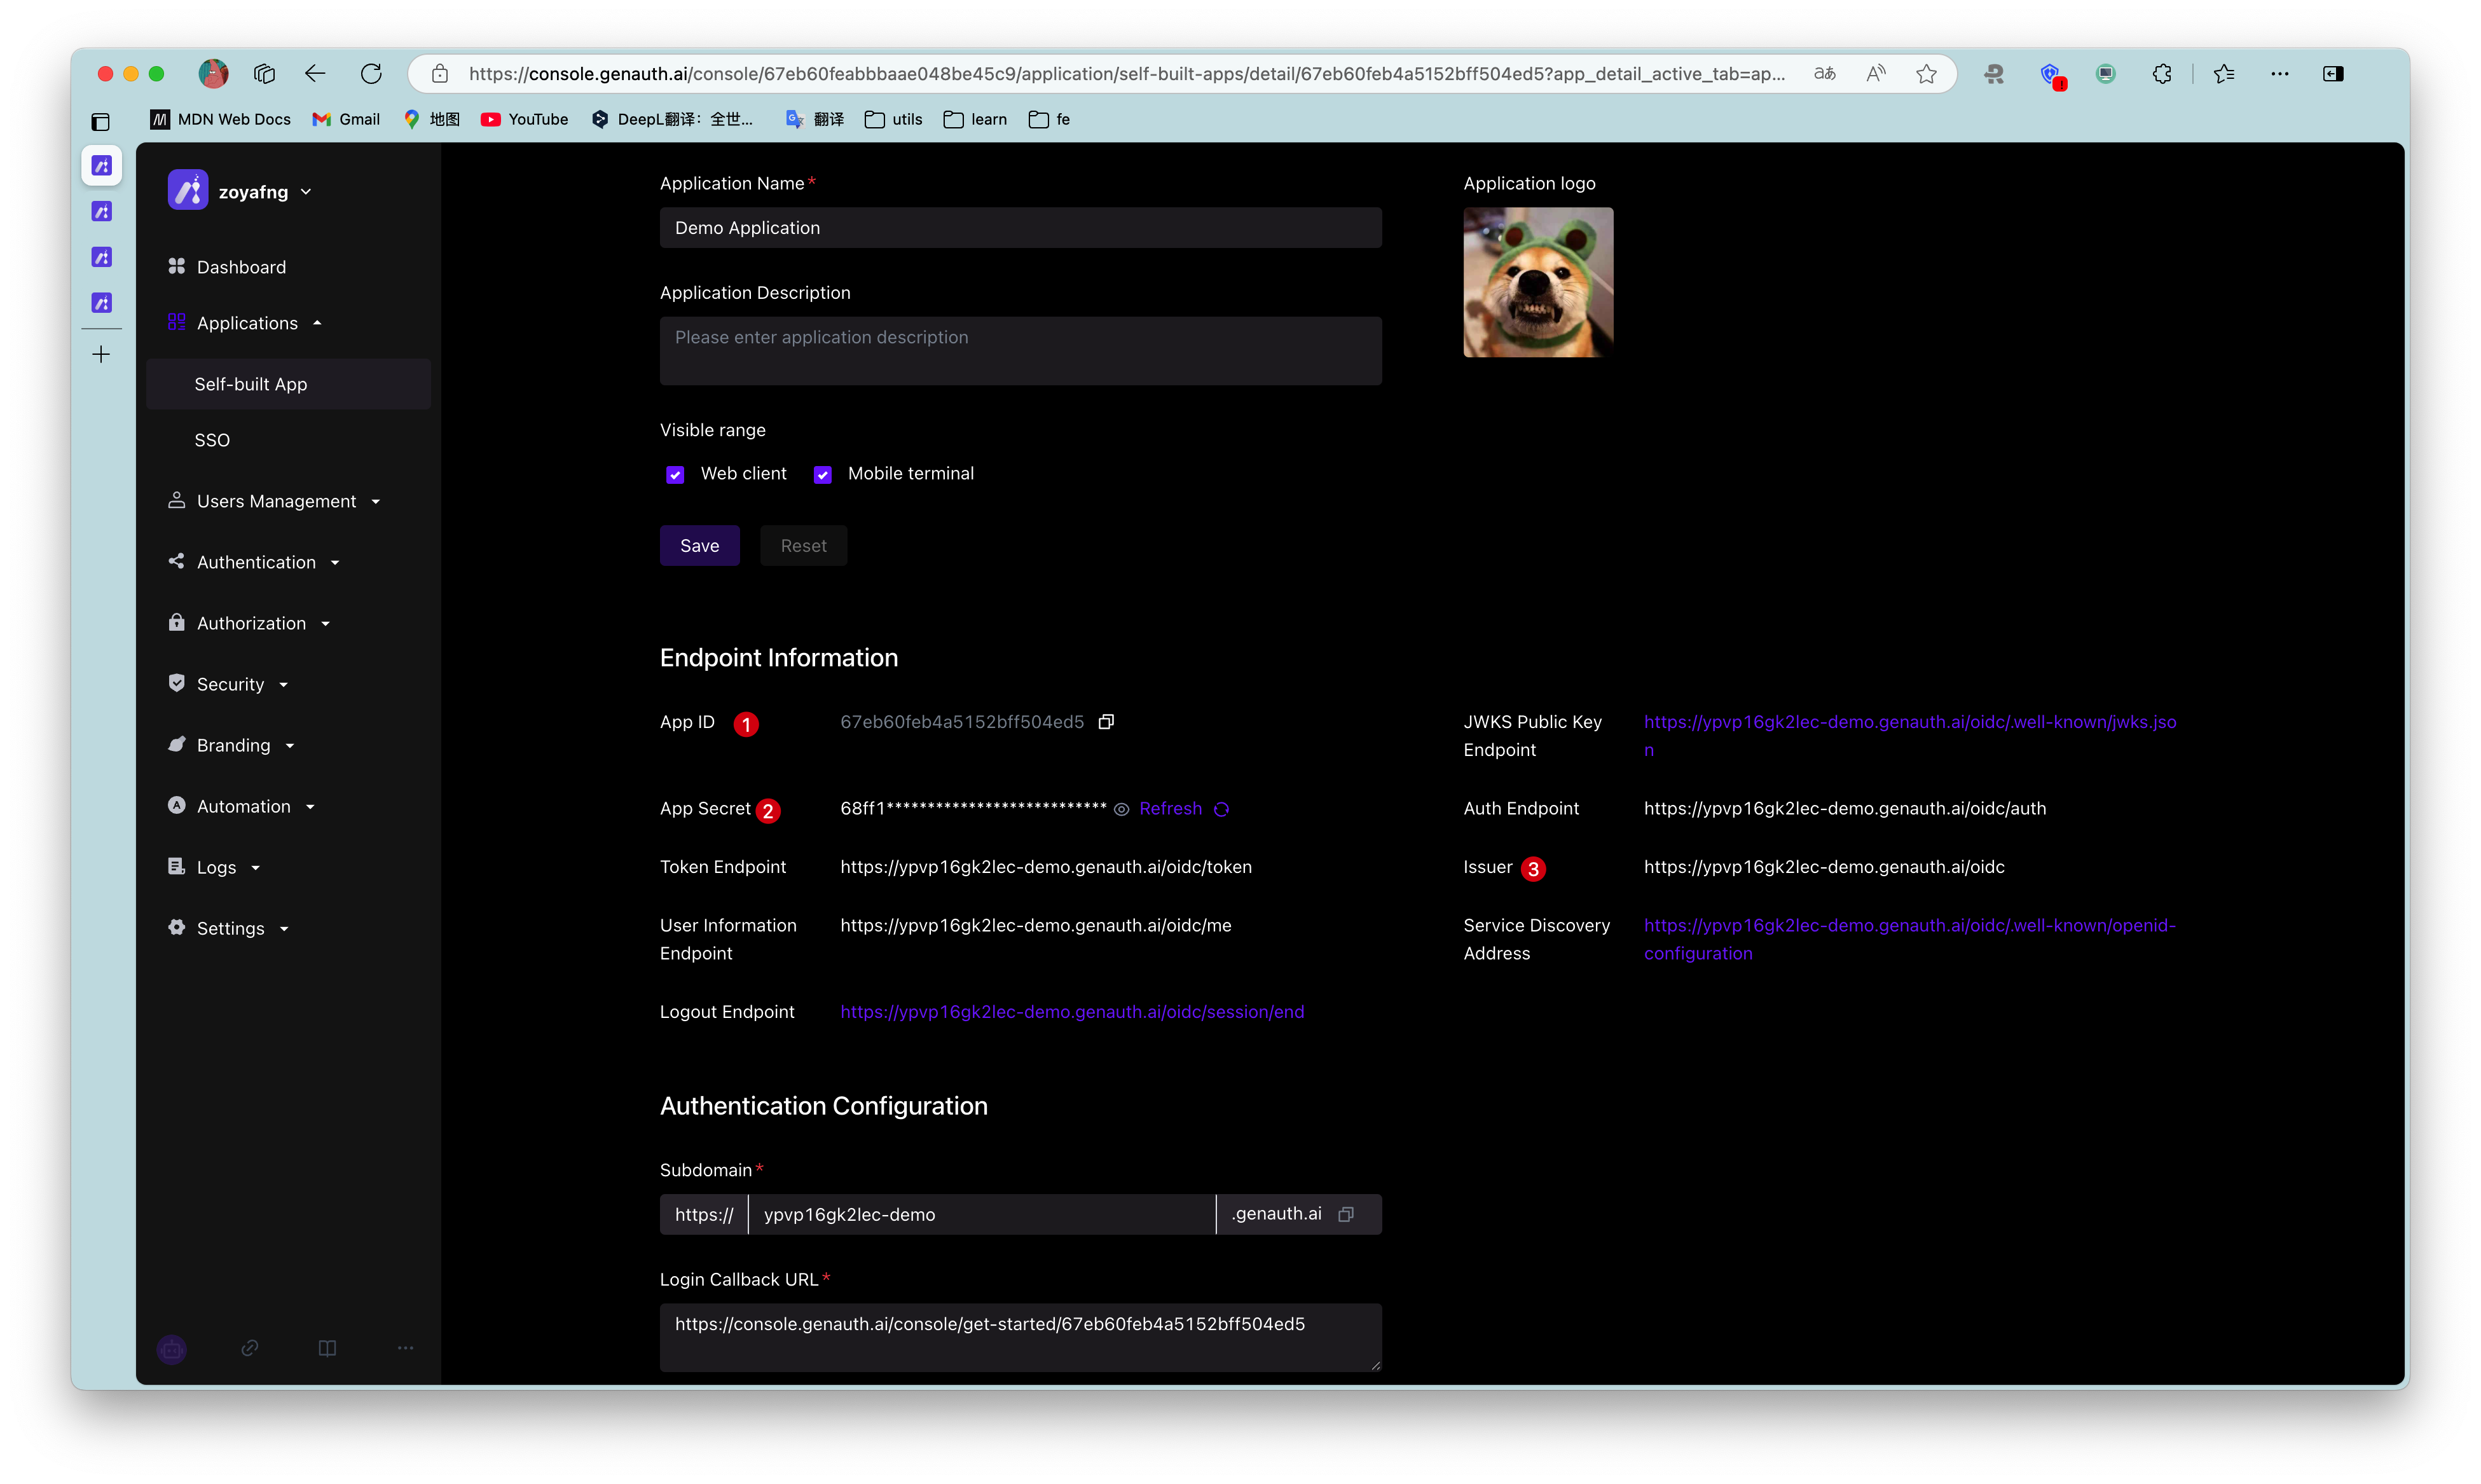
At the beginning of the project, we need to initialize the Issuer of openid-client. The initialization parameters are as follows:
- client_id: OIDC Client ID, which is your application ID in GenAuth;
- client_secret: OIDC Client Secret, which is your application secret in GenAuth;
- issuer: OIDC Issuer, which you can get in the endpoint information of the application.
The acquisition method is shown in the figure. You need to save these contents or remember the acquisition method, as you may use it frequently in the future:
For demonstration purposes, passport.serializeUser directly passes user to the callback function done, which will store the user information in req.session.passport.user. This is not recommended in a formal production environment, because if the user information is modified and session is not updated, data inconsistency will occur. The second parameter passed to the callback function done by passport.deserializeUser will be mounted on req.user. If you don't know enough about passport.js (opens new window), it is recommended to read the passport.js official documentation (opens new window) first.
passport.serializeUser(function (user, done) {
  console.log("serializeUser", user);
  done(null, user.sub);
});
passport.deserializeUser(function (userId, done) {
  console.log("deserializeUser", userId);
  done(null, userId);
});
The detailed sample code is as follows:
const express = require("express");
const session = require("express-session");
const passport = require("passport");
const { Strategy, Issuer } = require("openid-client");

const OIDC_CLIENT_ID = "YOUR_APPLICATION_ID";
const OIDC_CLIENT_SECRET = "YOUR_APPLICATION_SECRET";
const OIDC_ISSUER = "YOUR_OIDC_ISSUER";
const REDIRECT_URI = "http://localhost:3000/auth/callback";

(async () => {
  const issuer = await Issuer.discover(OIDC_ISSUER);
  const client = new issuer.Client({
    client_id: OIDC_CLIENT_ID,
    client_secret: OIDC_CLIENT_SECRET,
    id_token_signed_response_alg: "HS256",
    token_endpoint_auth_method: "client_secret_post",
  });

  passport.use(
    "oidc",
    new Strategy(
      {
        client,
        params: {
          redirect_uri: REDIRECT_URI,
          scope: "openid profile email phone",
          grant_type: "authorization_code",
          response_type: "code",
        },
      },
      (tokenset, userinfo, done) => {
        return done(null, userinfo);
      }
    )
  );

  passport.serializeUser(function (user, done) {
    done(null, user);
  });
  passport.deserializeUser(function (user, done) {
    done(null, user);
  });

  const app = express();
  app.use(
    session({
      secret: "secret",
      resave: true,
      saveUninitialized: true,
    })
  );
  app.use(passport.initialize());
  app.use(passport.session());
  app.listen(3010, () =>
    console.log(`Example app listening at http://localhost:3010 🚀`)
  );
})();
¶ Complete the login logic
First, we initialize a login route:
app.get("/login", passport.authenticate("oidc"));
app.get(
  "/auth/callback",
  passport.authenticate("oidc", {
    successRedirect: "/user",
    failureRedirect: "/403",
  })
);
When calling /login, passport.authenticate is called, and the system will jump to the online login address of the GenAuth OIDC Provider:
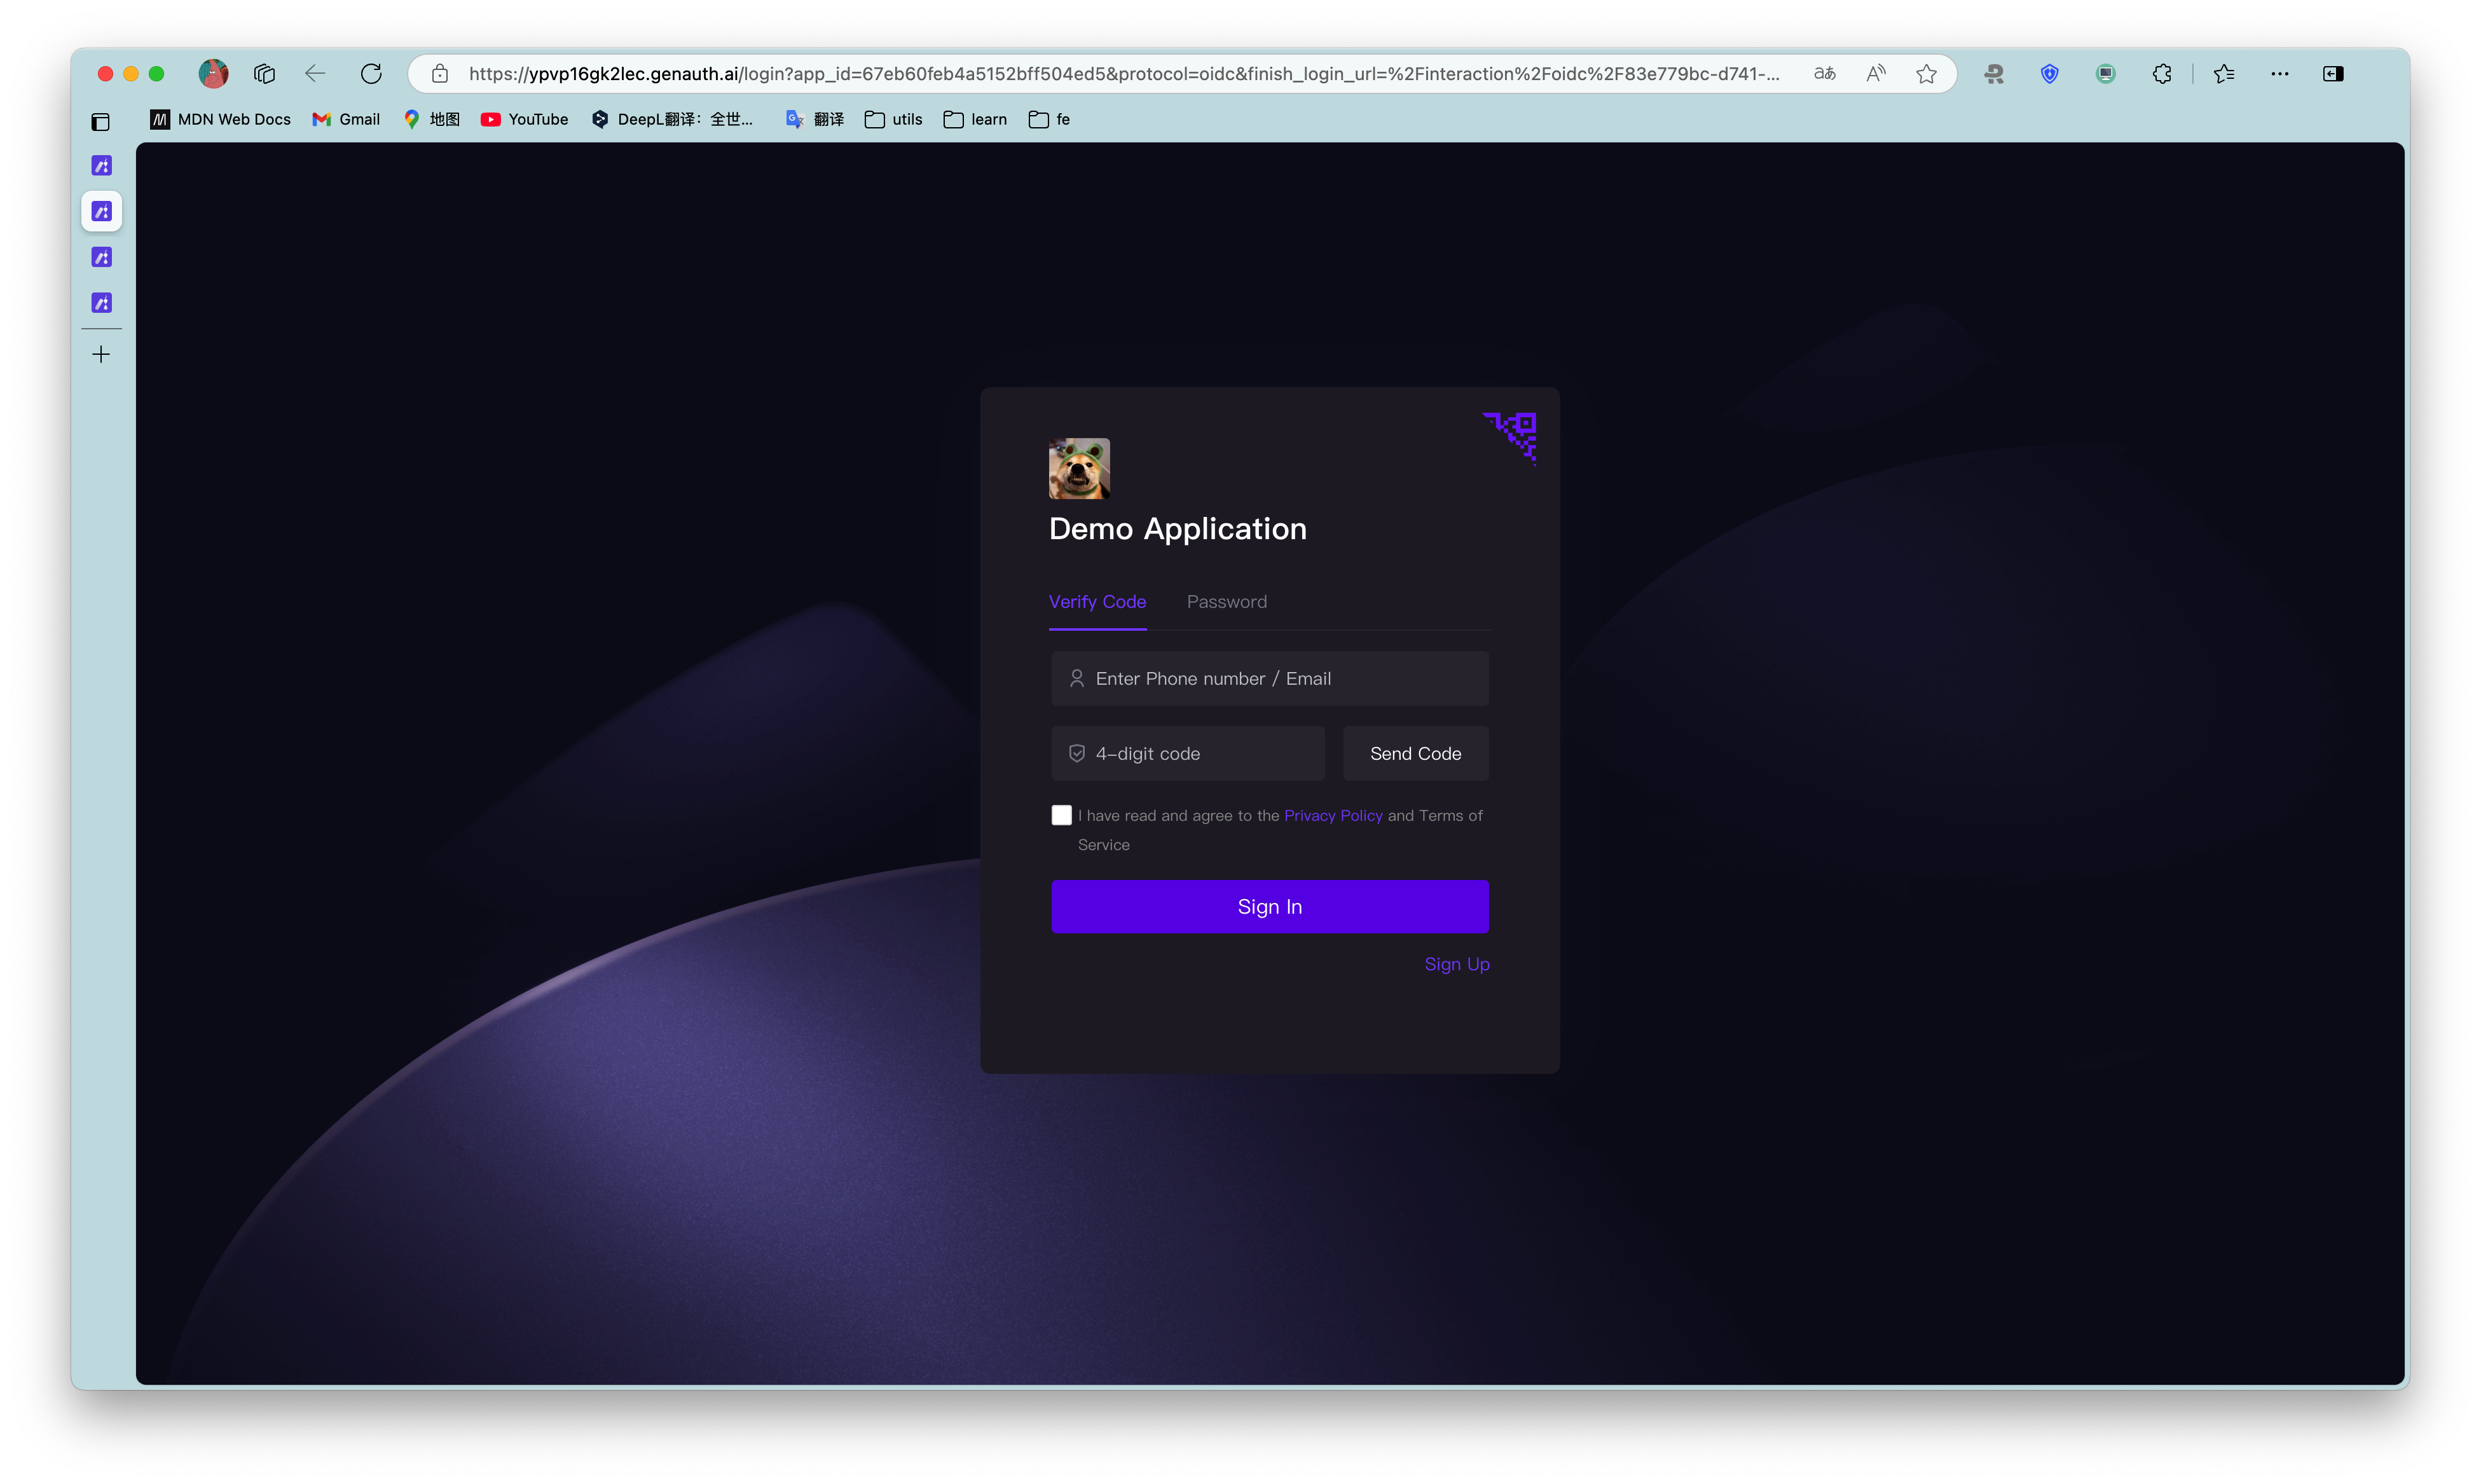
After logging in using any of the login methods, the browser will jump to http://localhost:3000/auth/callback (this is the callback link we configured in the application details in the first step), where it will obtain user information from the GenAuth server, and then jump to the /user route after successfully obtaining the user information.
¶ Complete the logic of displaying user information
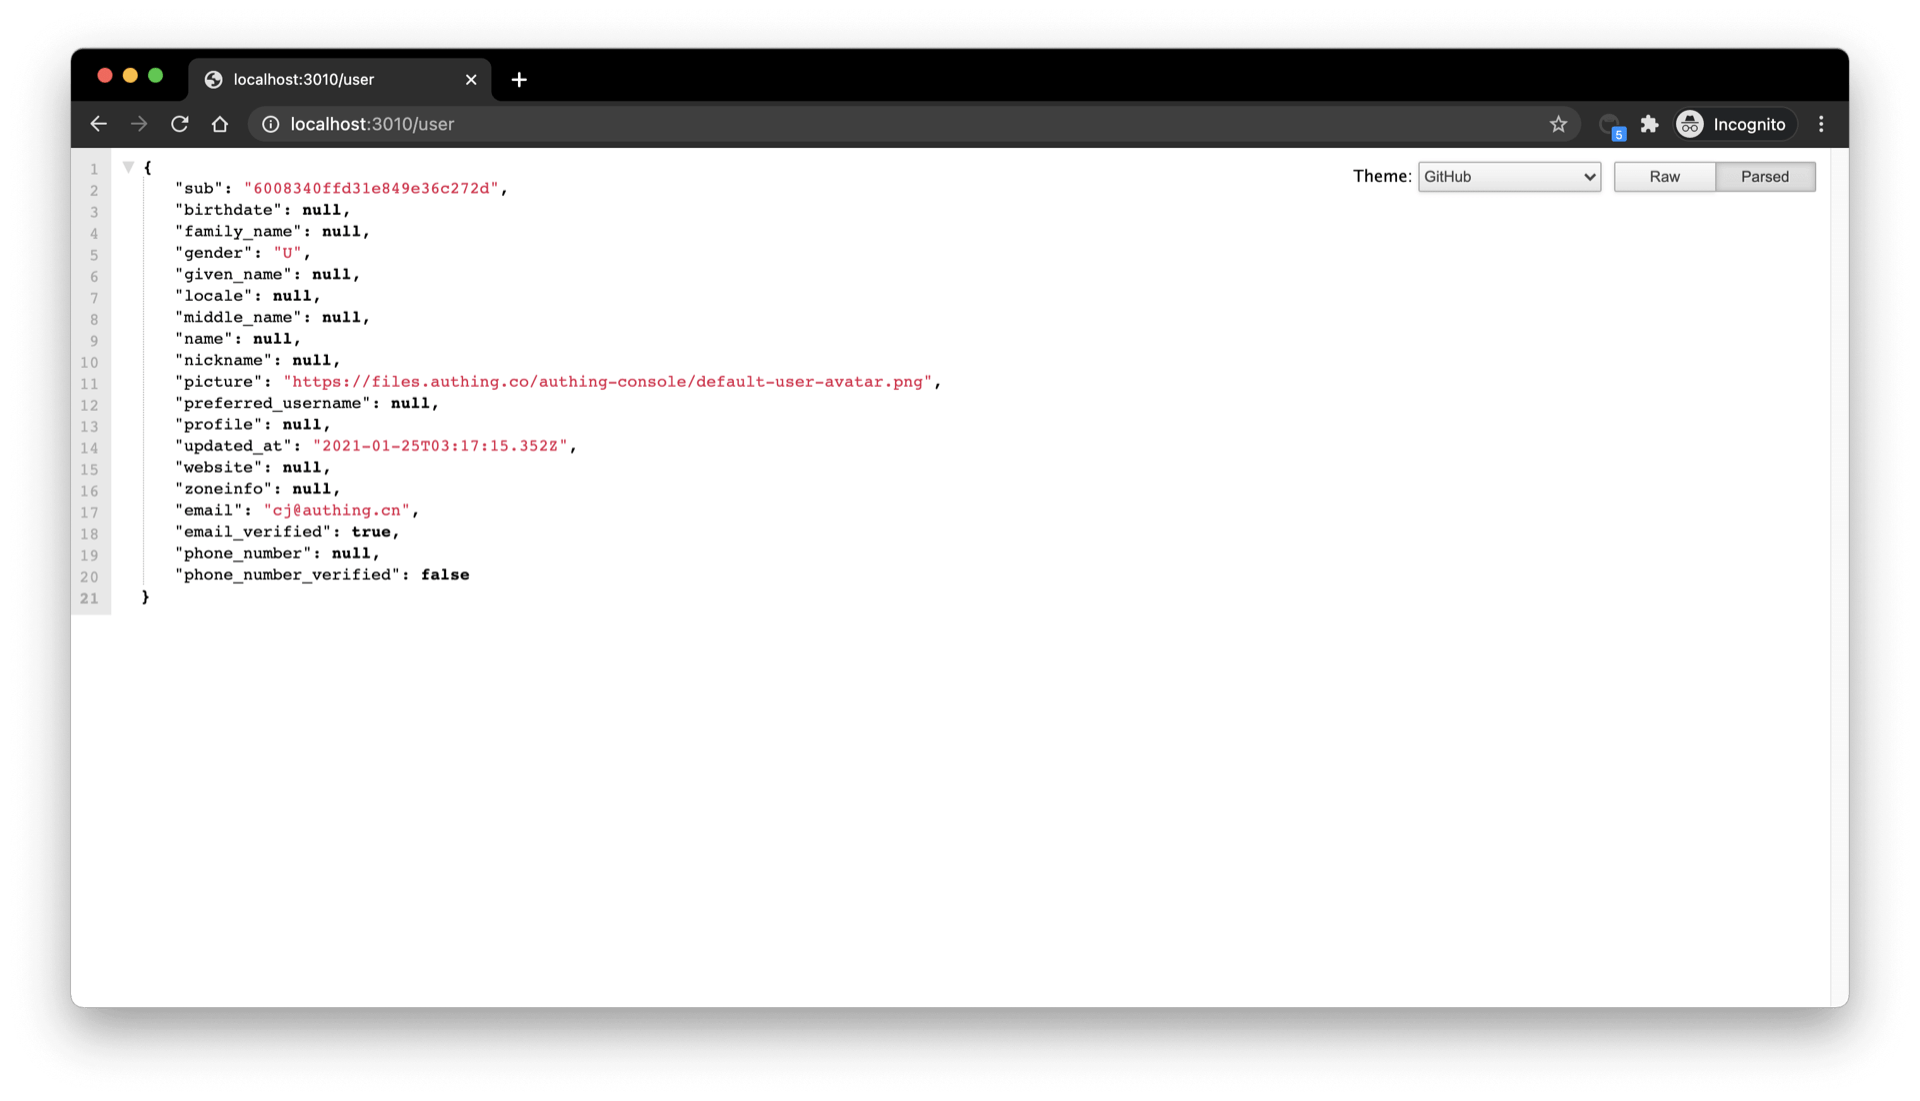
Next, we will implement the logic of the /user route. As mentioned earlier, after the user logs in successfully, the user information will be mounted on req.user, so here we add the following simple logic:
app.get("/user", (req, res) => {
res.send(req.user);
});
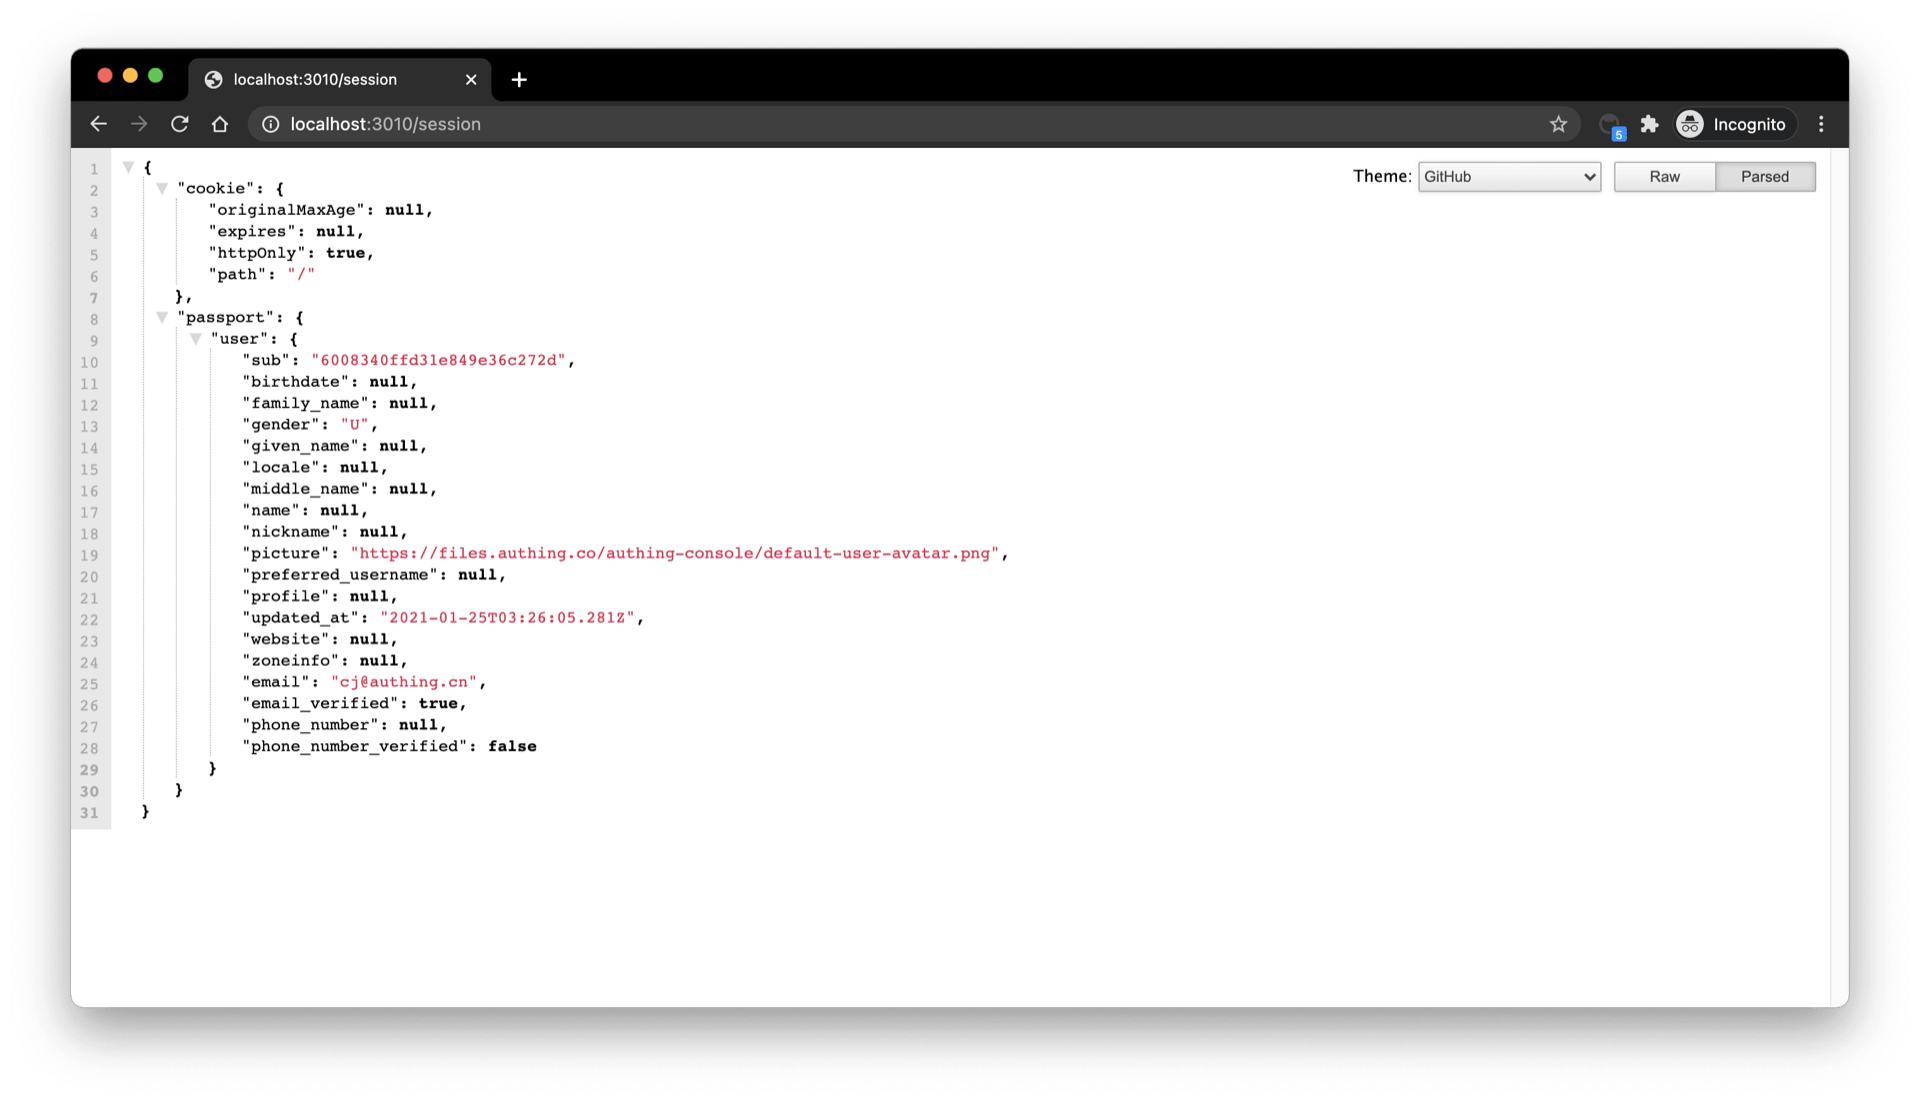
app.get("/session", (req, res) => {
res.send(req.session);
});
Visit /user to see the user information of the currently logged in user:
Visit /session to see the session of the currently logged in user:
¶ Complete the logout logic
Finally, we implement the logout logic:
- First, clear the current application through
req.session.destroy()session; - Jump to the logout link of the OIDC application.
const OIDC_LOGOUT_URL = "{{YOUR_APP_DOMAIN}}/login/profile/logout";
const LOGOUT_REDIRECT_URL = "http://localhost:3000";
app.get("/logout", (req, res) => {
  req.session.destroy();
  const logoutUrl = `${OIDC_LOGOUT_URL}?app_id=${OIDC_CLIENT_ID}&redirect_uri=${LOGOUT_REDIRECT_URL}`;
  res.redirect(logoutUrl);
});