¶ Google Mobile
¶ Scenario Introduction
¶ Overview
GenAuth provides developers with a way to quickly jump to Google login to obtain user information in mobile (iOS or Android) applications. Google account access can be completed by simply calling the GenAuth mobile SDK.
¶ Application Scenario
Mobile APP
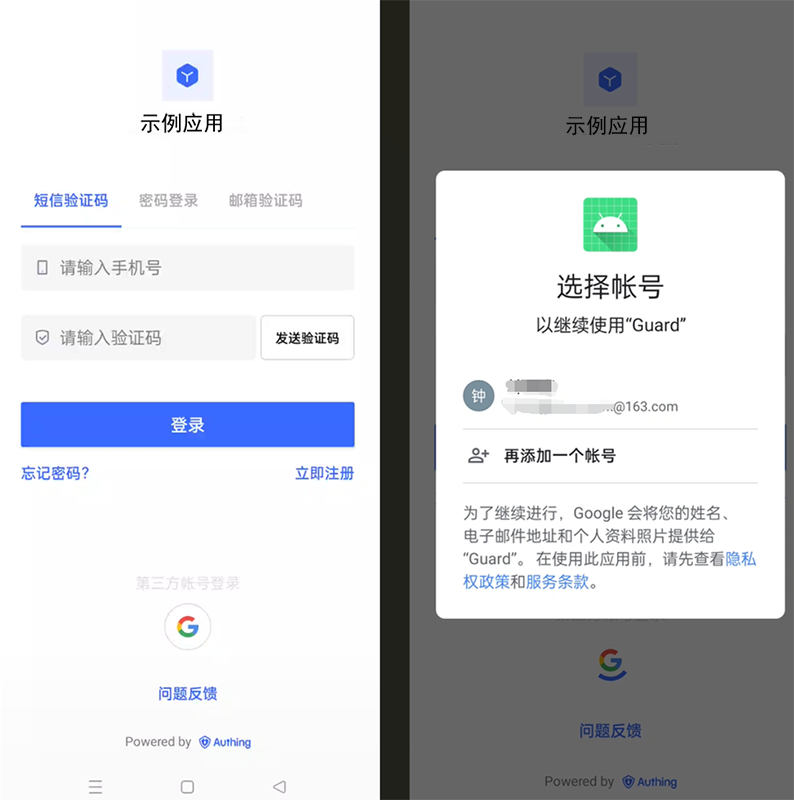
¶ End User Preview
Pull up the Google page in the mobile application to log in.
¶ Preparation
If you don't have a Google account, please go to Google (opens new window) to register.
If you don't have a GenAuth console account, please go to GenAuth Console (opens new window) to register a developer account.
¶ Configuration steps
¶ Step 1: Create three OAuth client IDs in Google Open Platform
¶ Web application
Open the Google API Console Credentials (opens new window) console.
On the Credentials page, select CREATE CREDENTIALS->OAuth client ID at the top.

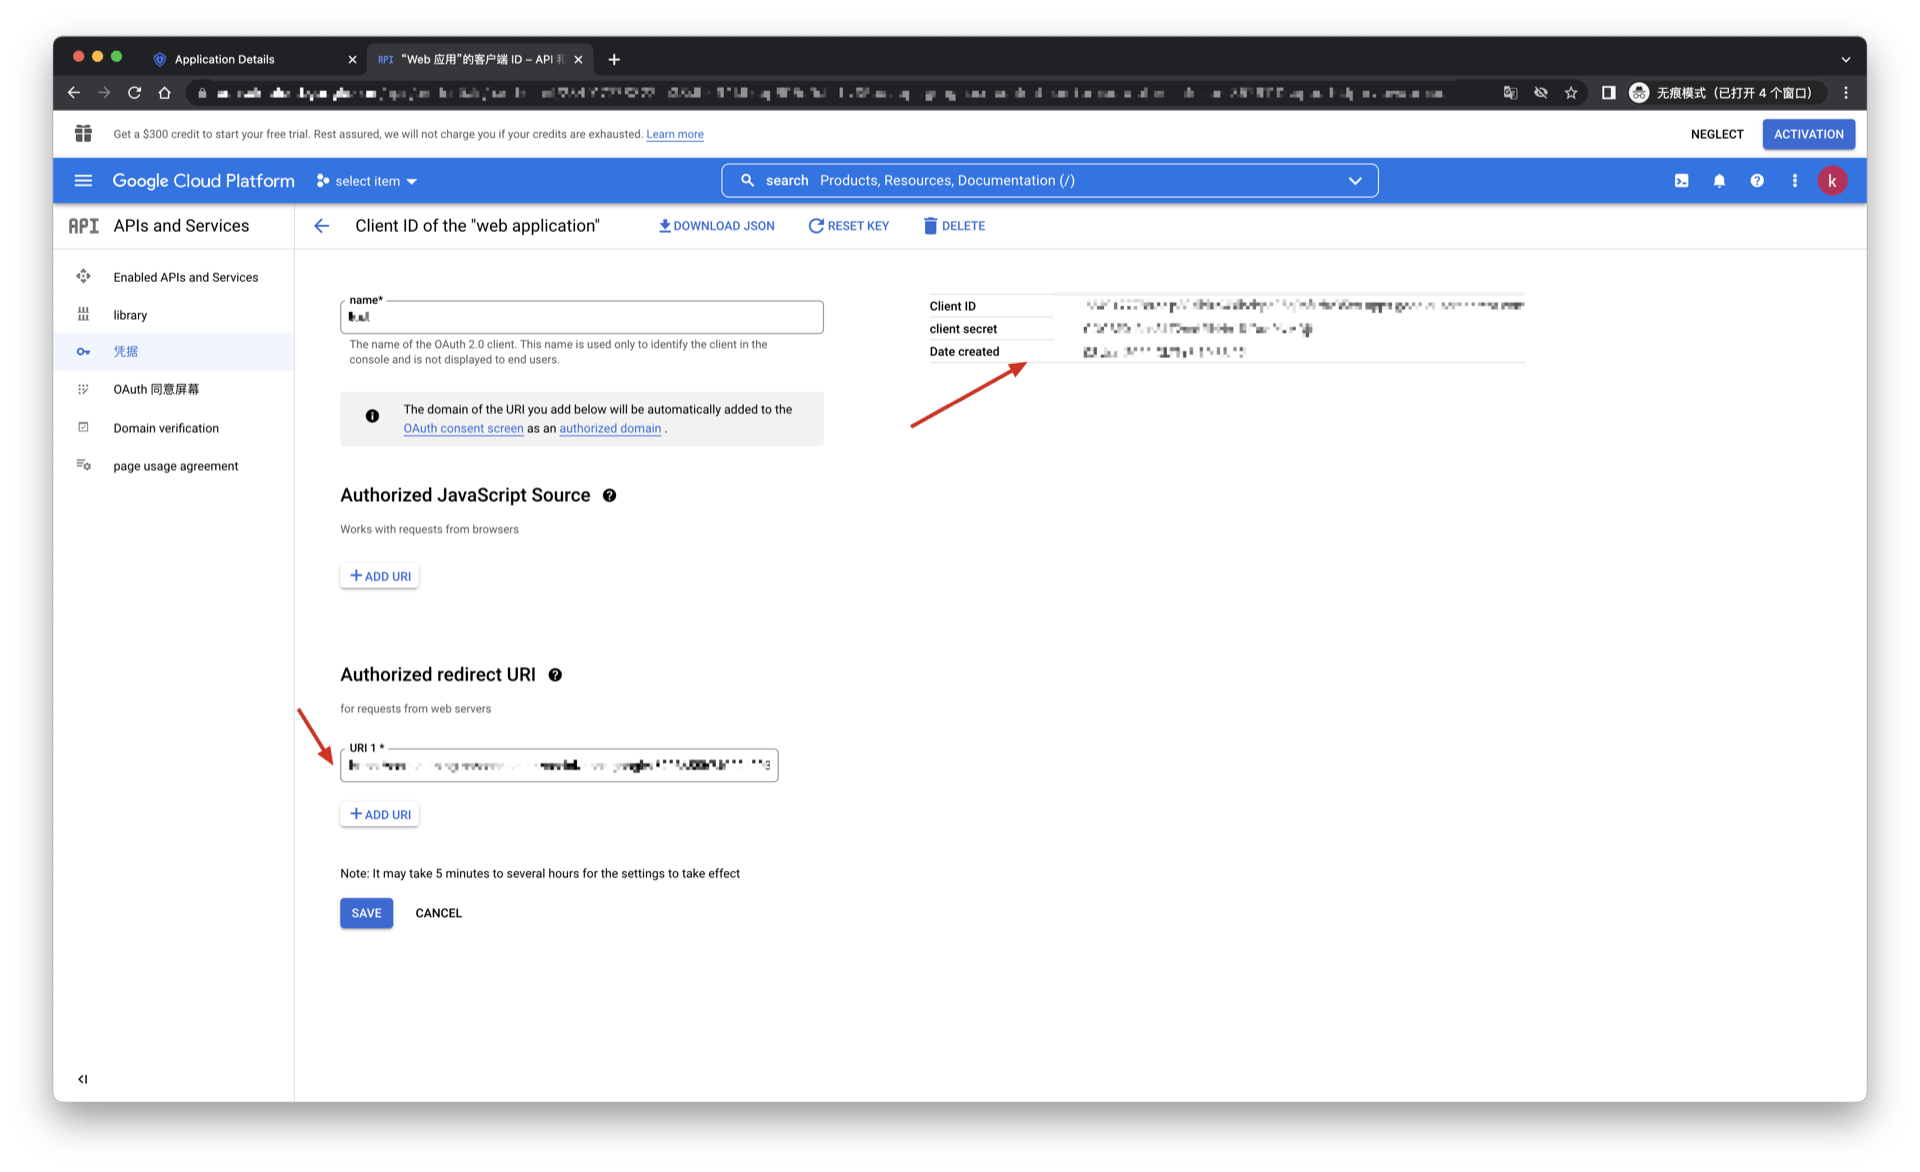
- Select Application type as Web application, fill in Name and Authorized redirect URIs (temporarily write a valid address), and click the CREATE button.
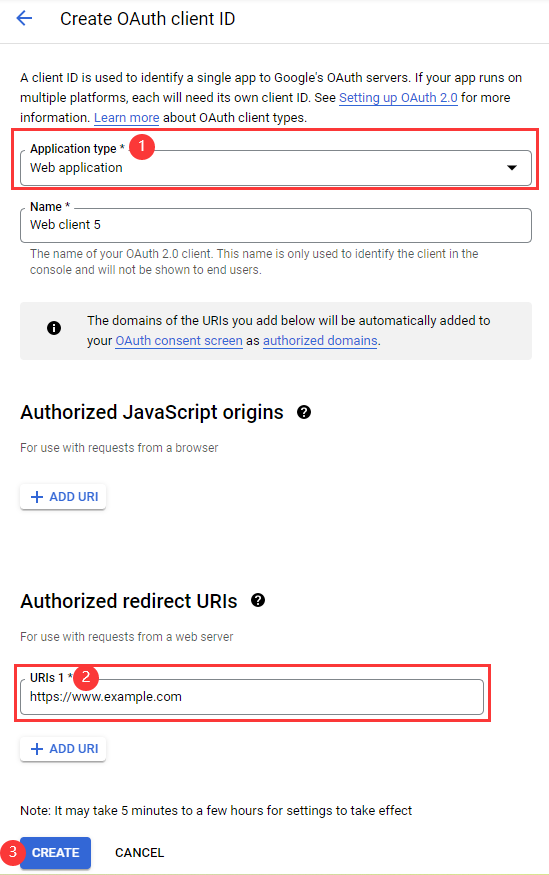
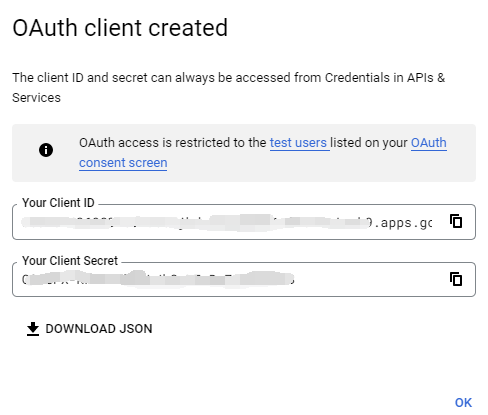
- After the creation is successful, you can get Your Client ID and Your Client Secret of this application on the next page, record them.
¶ Android
Open the Google API Console Credentials (opens new window) console.
On the Credentials page, select CREATE CREDENTIALS->OAuth client ID at the top.
Select Application type as Android, fill in Name, Package name and SHA-1 certificate fingerprint, and click the CREATE button.
- You need to log in to your mobile app backend to obtain Package name (Android app package name) and SHA-1 certificate fingerprint (Android app's SHA-1).
- It takes some time for the settings to take effect after being saved, please wait patiently.
- Download and save the JSON file on the viewing page and hand it over to the Android development engineer (for subsequent detailed operations, please refer to Google Mobile Developer Documentation - Android).

¶ iOS
Open the Google API Console Credentials (opens new window) console.
On the Credentials page, select CREATE CREDENTIALS->OAuth client ID at the top.
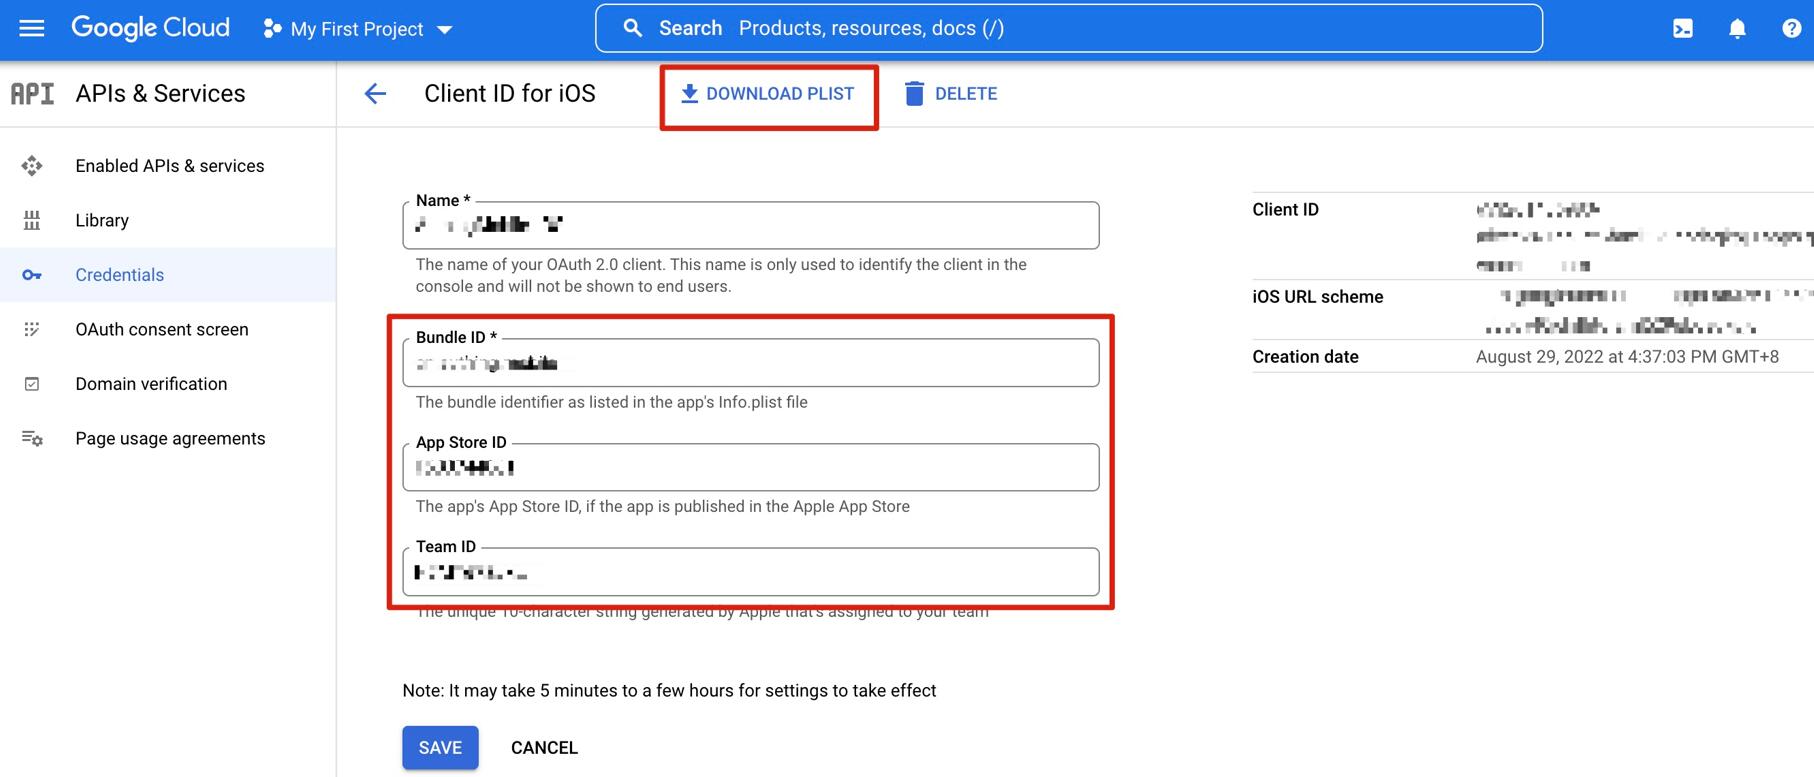
Select Application type as iOS, fill in Bundle ID, App Store ID and Team ID, and click CREATE button.
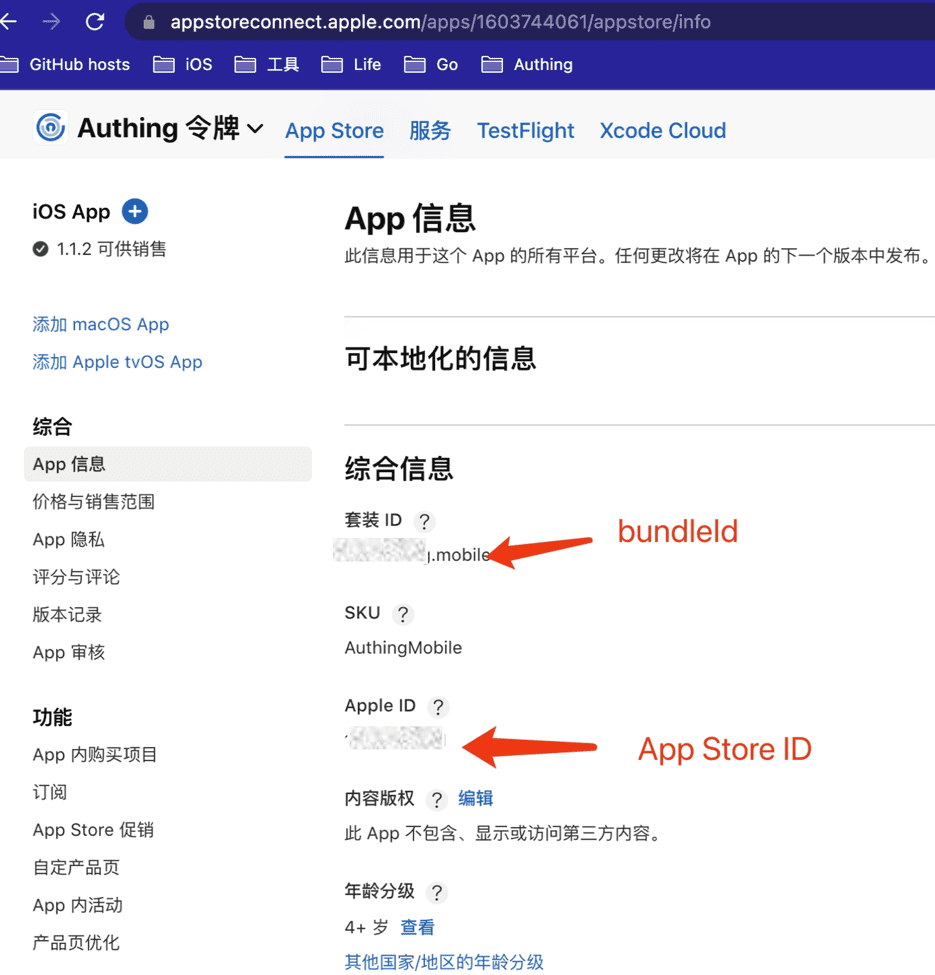
Bundle ID and App Store ID
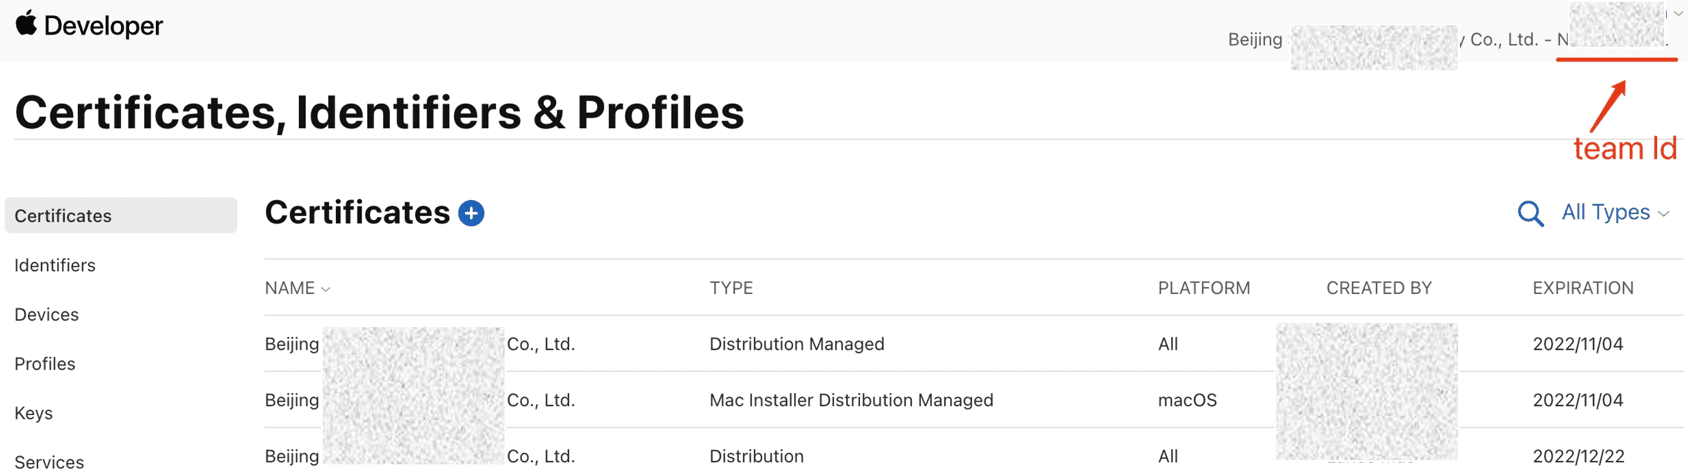
Team ID
- You can get Bundle ID and App Store ID at Apple Store Connect (opens new window).
- You can get the Team ID in the Apple Developer Backend (opens new window).
- It will take some time for the settings to take effect after being saved, please wait patiently.
- Download and save the corresponding PLIST file and hand it over to the iOS development engineer (for subsequent detailed operations, please refer to the Google Mobile Developer Documentation - iOS).
¶ Step 2: Configure Google Mobile Login in the GenAuth Console
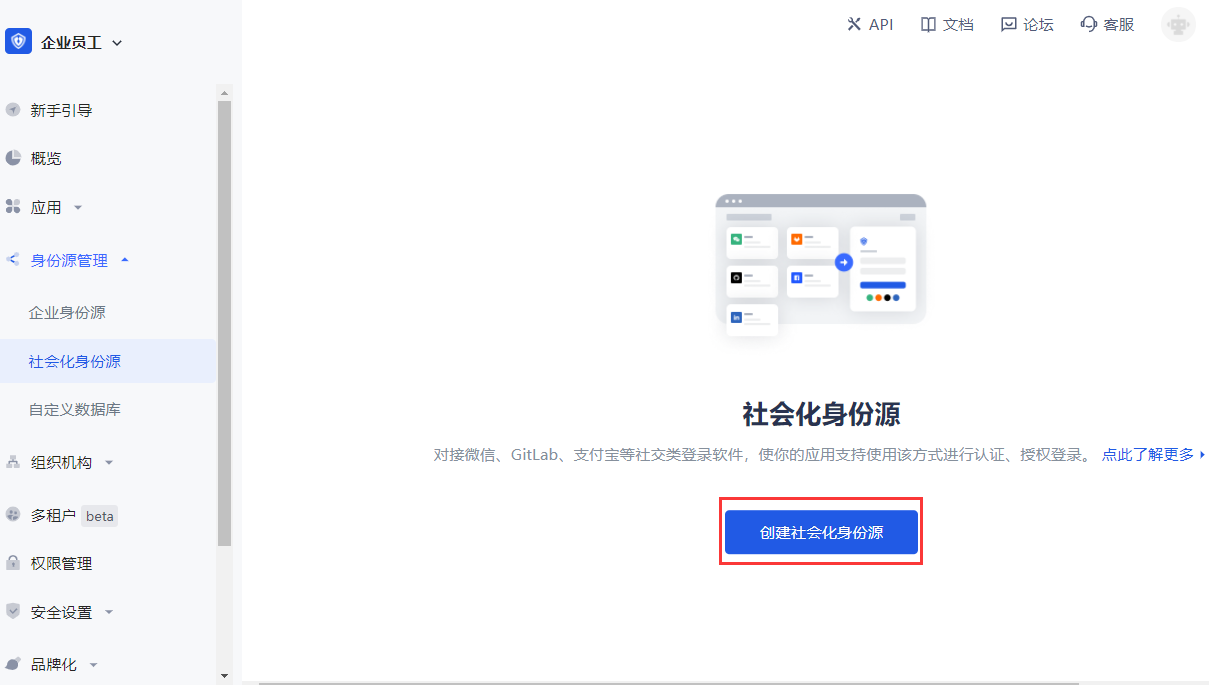
- On the Social Identity Source page of the Atuhing console, click the Create Social Identity Source button to enter the Select Social Identity Source page.
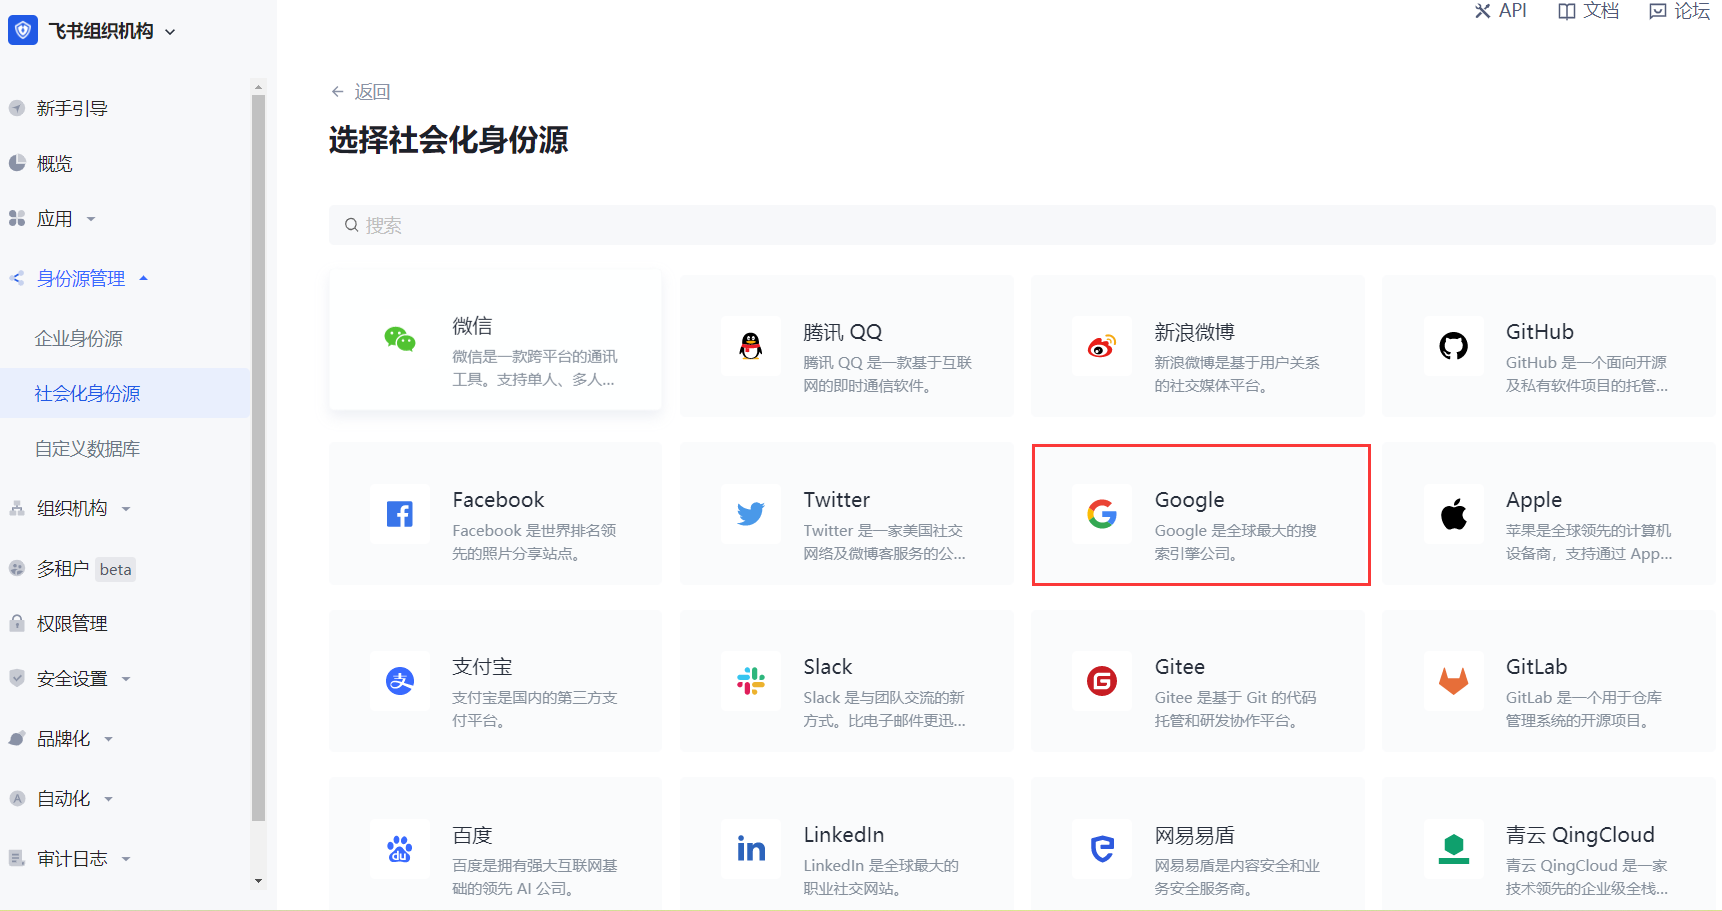
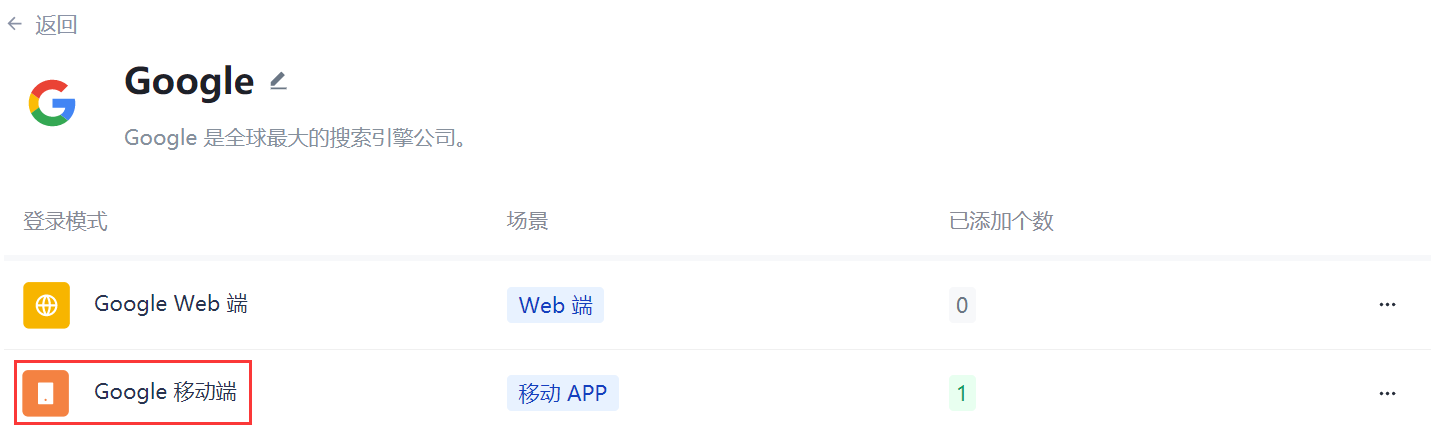
- On the Identity Source Management->Social Identity Source->Select Social Identity page of the GenAuth console, click the "Google" identity source card to enter the Google login mode selection page.
- Select Google Mobile to enter.
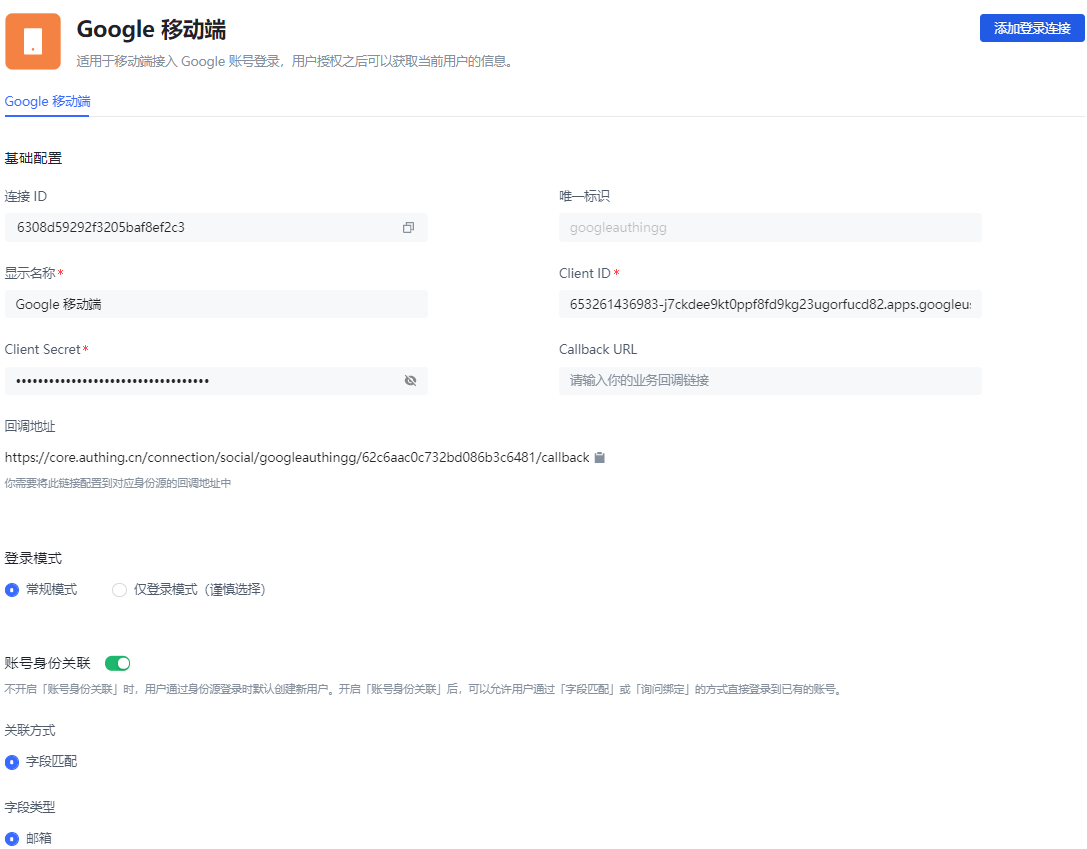
- On the Google Mobile page of the GenAuth console, configure the relevant field information.
| Field | Description |
|---|---|
| Unique ID |
|
| Display Name | This name will be displayed on the button of the terminal user's login interface. |
| Client ID | Fill in Your Client ID obtained when Application type is Web application on the Google Open Platform. |
| Client Secret | Fill in the Client Secret obtained when Application type is Web application on the Google Open Platform. |
| Callback URL | You can fill in your business callback address. After the user completes the login, the browser will jump to this address. |
| Callback address | Google valid jump URI. This URL needs to be configured on the Google Open Platform. |
| Login mode | After turning on Login only mode, you can only log in to existing accounts, and cannot create new accounts. Please choose carefully. |
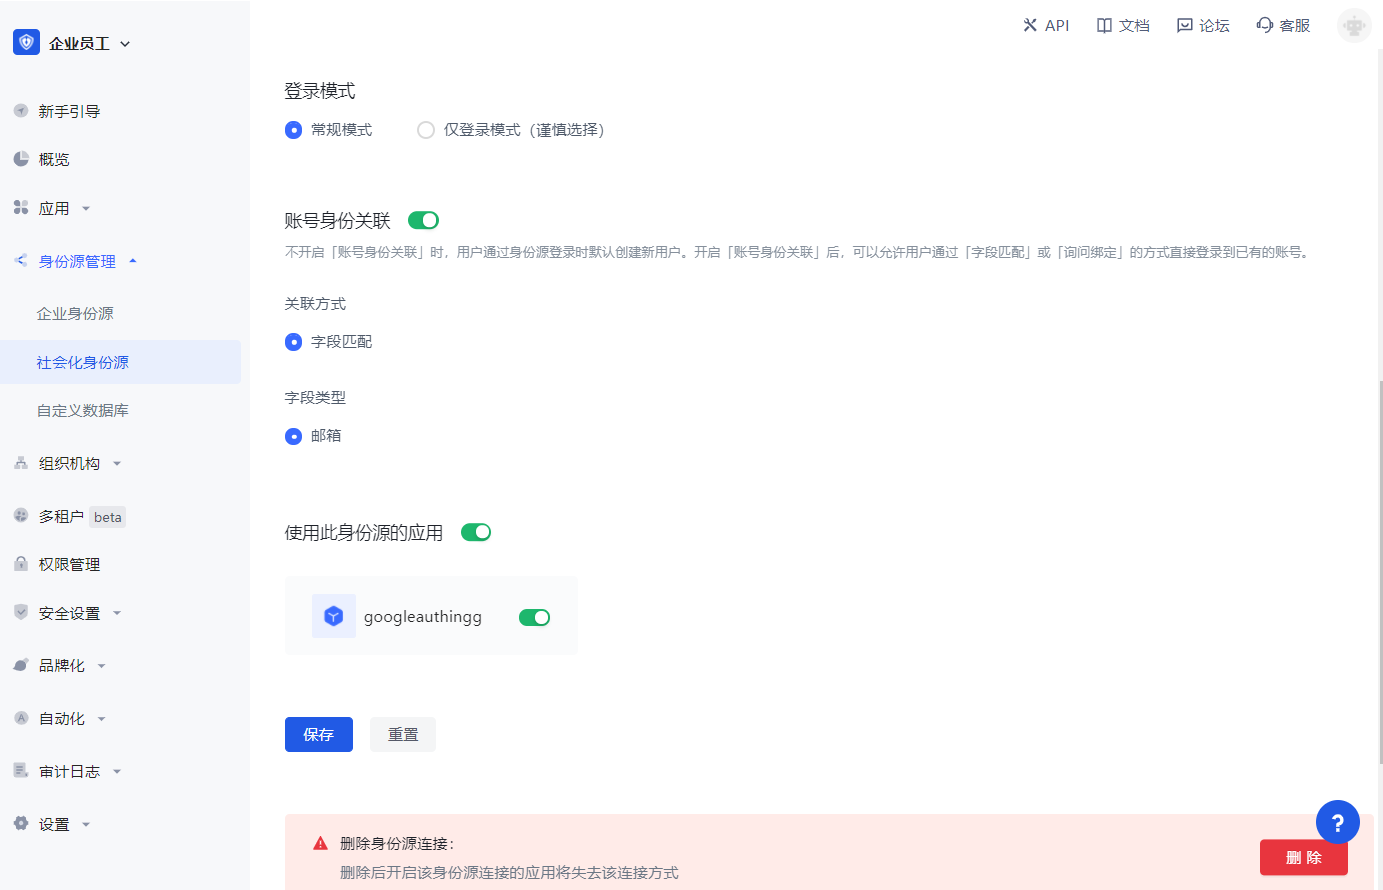
| Account Identity Association | When Account Identity Association is not enabled, a new user is created by default when a user logs in through an identity source; when Account Identity Association is enabled, users can be allowed to log in directly to an existing account through Field Matching or Query Binding. |
- After the configuration is complete, click the Create or Save button to complete the creation.
After creating the Google identity source on the GenAuth console, you need to configure the callback address to the Authorized redirect URI on the Google Open Platform.
¶ Step 3: Development access
¶ Recommended development access method
SDK
¶ Advantages and disadvantages
Simple operation and maintenance, which is handled by GenAuth. Each user pool has an independent secondary domain name; if you need to embed it in your application, you need to log in using the pop-up mode, that is: after clicking the login button, a window will pop up with the login page hosted by GenAuth, or redirect the browser to the login page hosted by GenAuth.
¶ Detailed access method
Create an application in the GenAuth console. For details, see: How to create an application in GenAuth.
On the created Google identity source connection details page, open and associate an application created in the GenAuth console.
- Experience Google third-party login on the login page (as shown in the [end-user preview image](#end-user preview image)).