¶ Spring Security integrated with GenAuth CAS to get started quickly
This article takes Spring Security 5 (opens new window), which is used to provide authentication and access control in the Spring ecosystem, as an example to introduce in detail how Spring Security 5 (opens new window) can be connected to GenAuth CAS.
Spring Security is a security framework that provides secure access control solutions. It provides a set of beans that can be configured in the Spring application context, making full use of Spring IOC (inversion of control), DI (dependency injection) and AOP (aspect-oriented programming) functions to provide declarative security access control functions for application systems, enhance the security of enterprise systems, and reduce the burden of writing a lot of repetitive code.
The main functions of Spring Security include:
Authentication (authentication is about verifying your credentials, such as username/mobile number/email and password, to verify the identity of the visitor.)
Authorization (authorization occurs after the system completes identity authentication, and ultimately grants you full access to resources, which determines your ability to access the system and the extent to which you can do so.)
Attack protection (used to prevent and resist malicious attacks on the network.)
¶ Integration Introduction
Single Sign On (Single Sign On), the English name abbreviation SSO, SSO means that in a multi-system environment, any single system can access the relevant trusted system without logging in again**. That is to say, you only need to log in once to a single system. GenAuth CAS is a specific implementation of the SSO solution, that is, in multiple systems, users only need to log in once to a central server to access any of these systems, without multiple logins. And support multiple authentication mechanisms, security policies, support authorization and provide high availability. Customers do not need to focus on how to implement CAS Server, configure HTTPS, and provide personalized login and logout pages, etc. GenAuth CAS **simplifies the configuration process** and provides users with one-stop application integration. Users only need to configure various required methods on the platform.
Taking the CAS service provided by GenAuth as an example, the method of integrating GenAuth CAS single sign-on using Spring Security 5 will be introduced in detail.
- Development tool: IDEA
- Project management tool: Maven
- JDK version: 1.8
¶ Configure GenAuth
¶ Get GenAuth platform information
First, register an account in GenAuth, then enter the console and follow the guided steps to create a new user pool.
Click the "Application" menu item on the left, and you will see a default application created on the right.

Click "Configure", find the authentication configuration under the application page, and configure your own login callback URL. 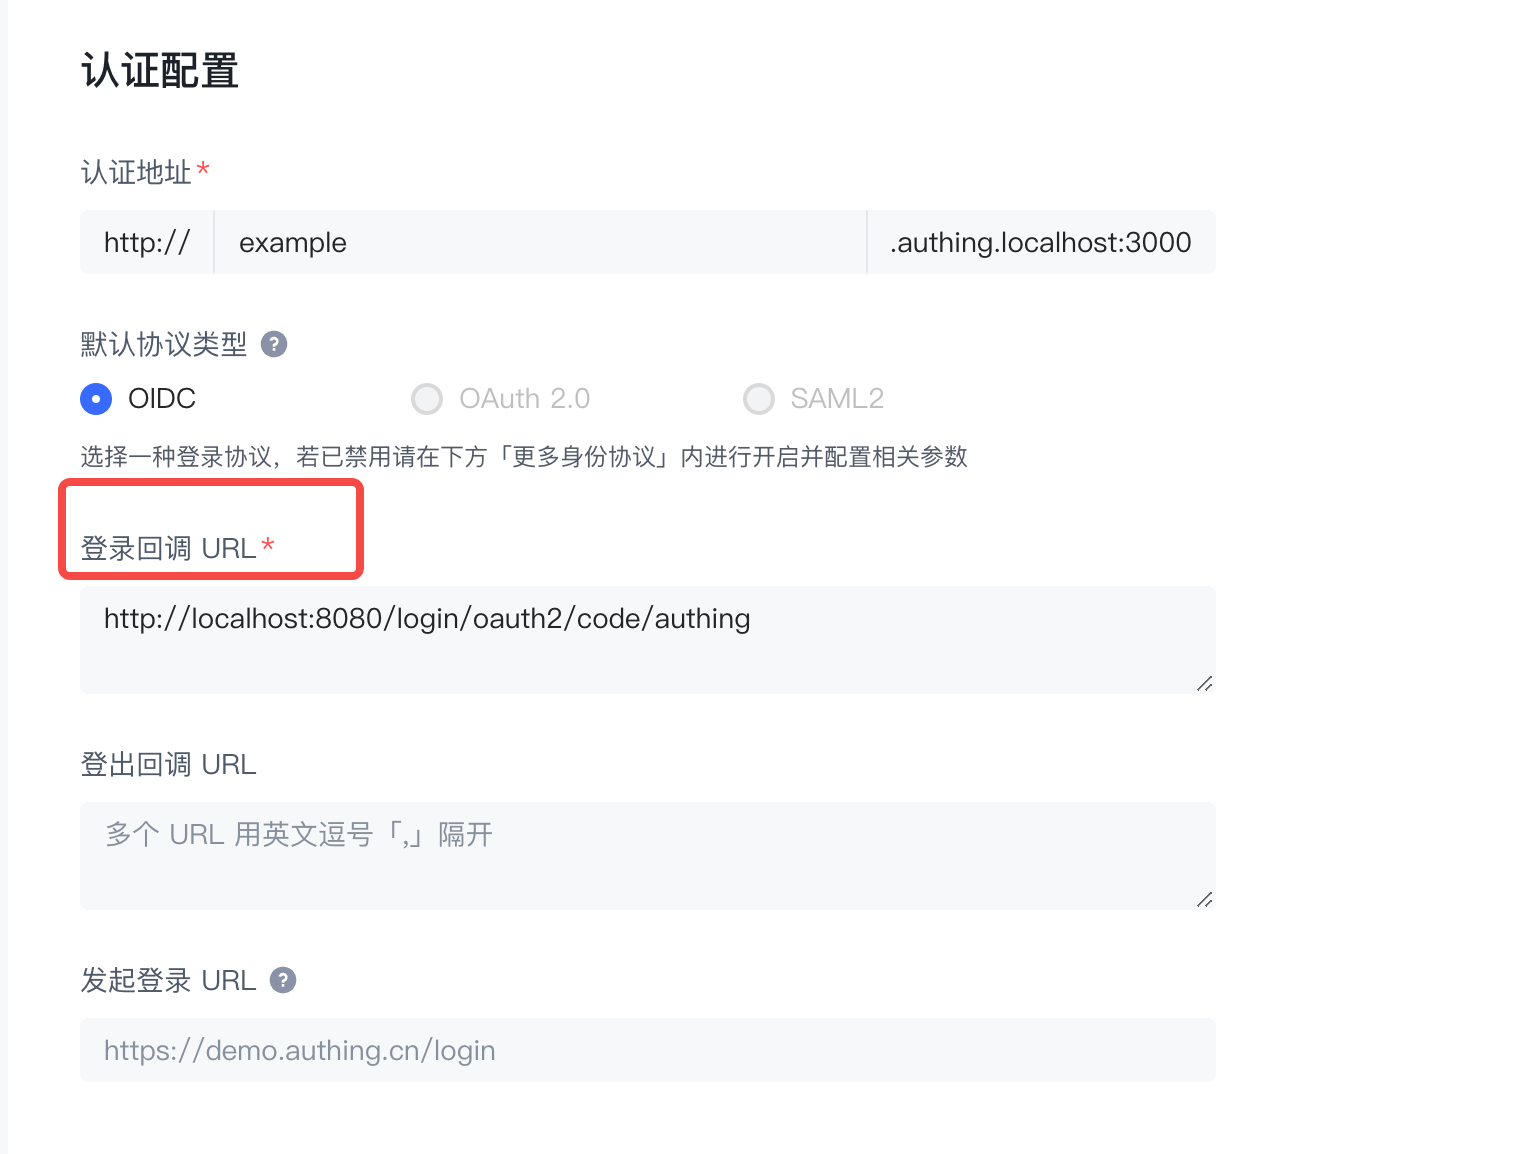
After configuring the above, continue to configure below, click "Other Configuration" and you will see the More Protocols column. 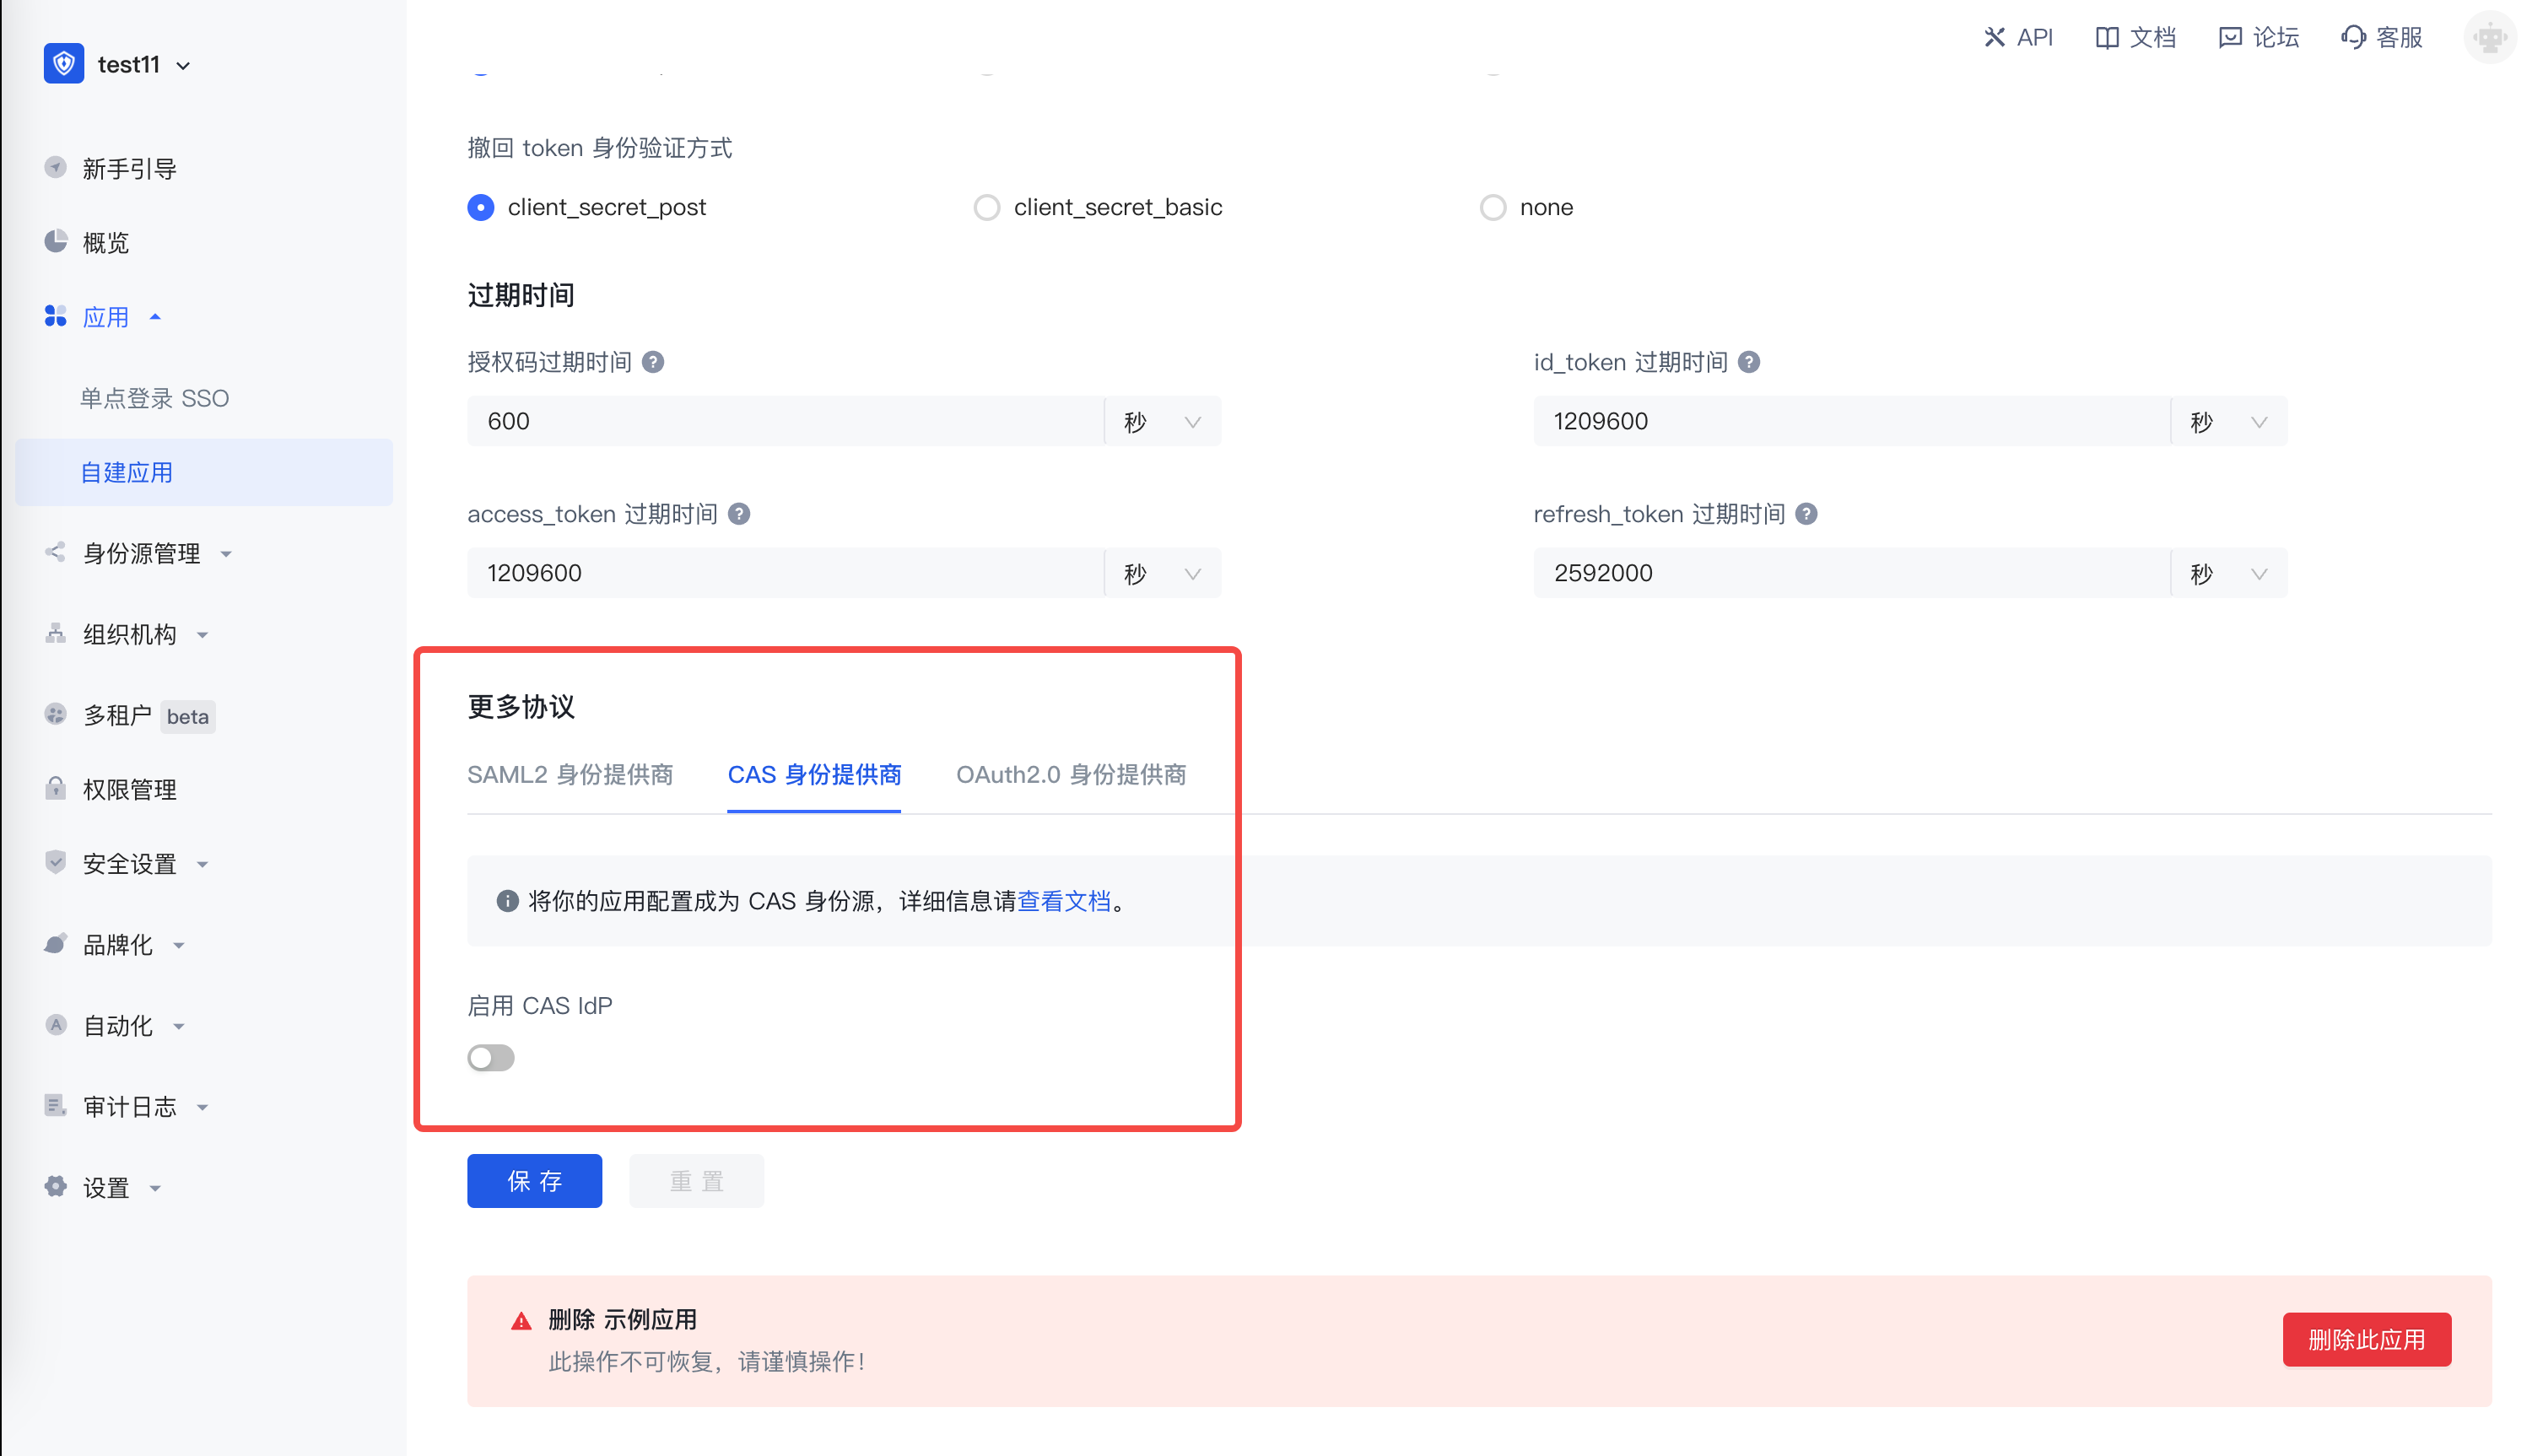
Switch to CAS identity provider, enable CAS IdP, record the addresses of login endpoint, logout endpoint, and service ticket verification endpoint (CAS 2.0), which will be used to build the project later. 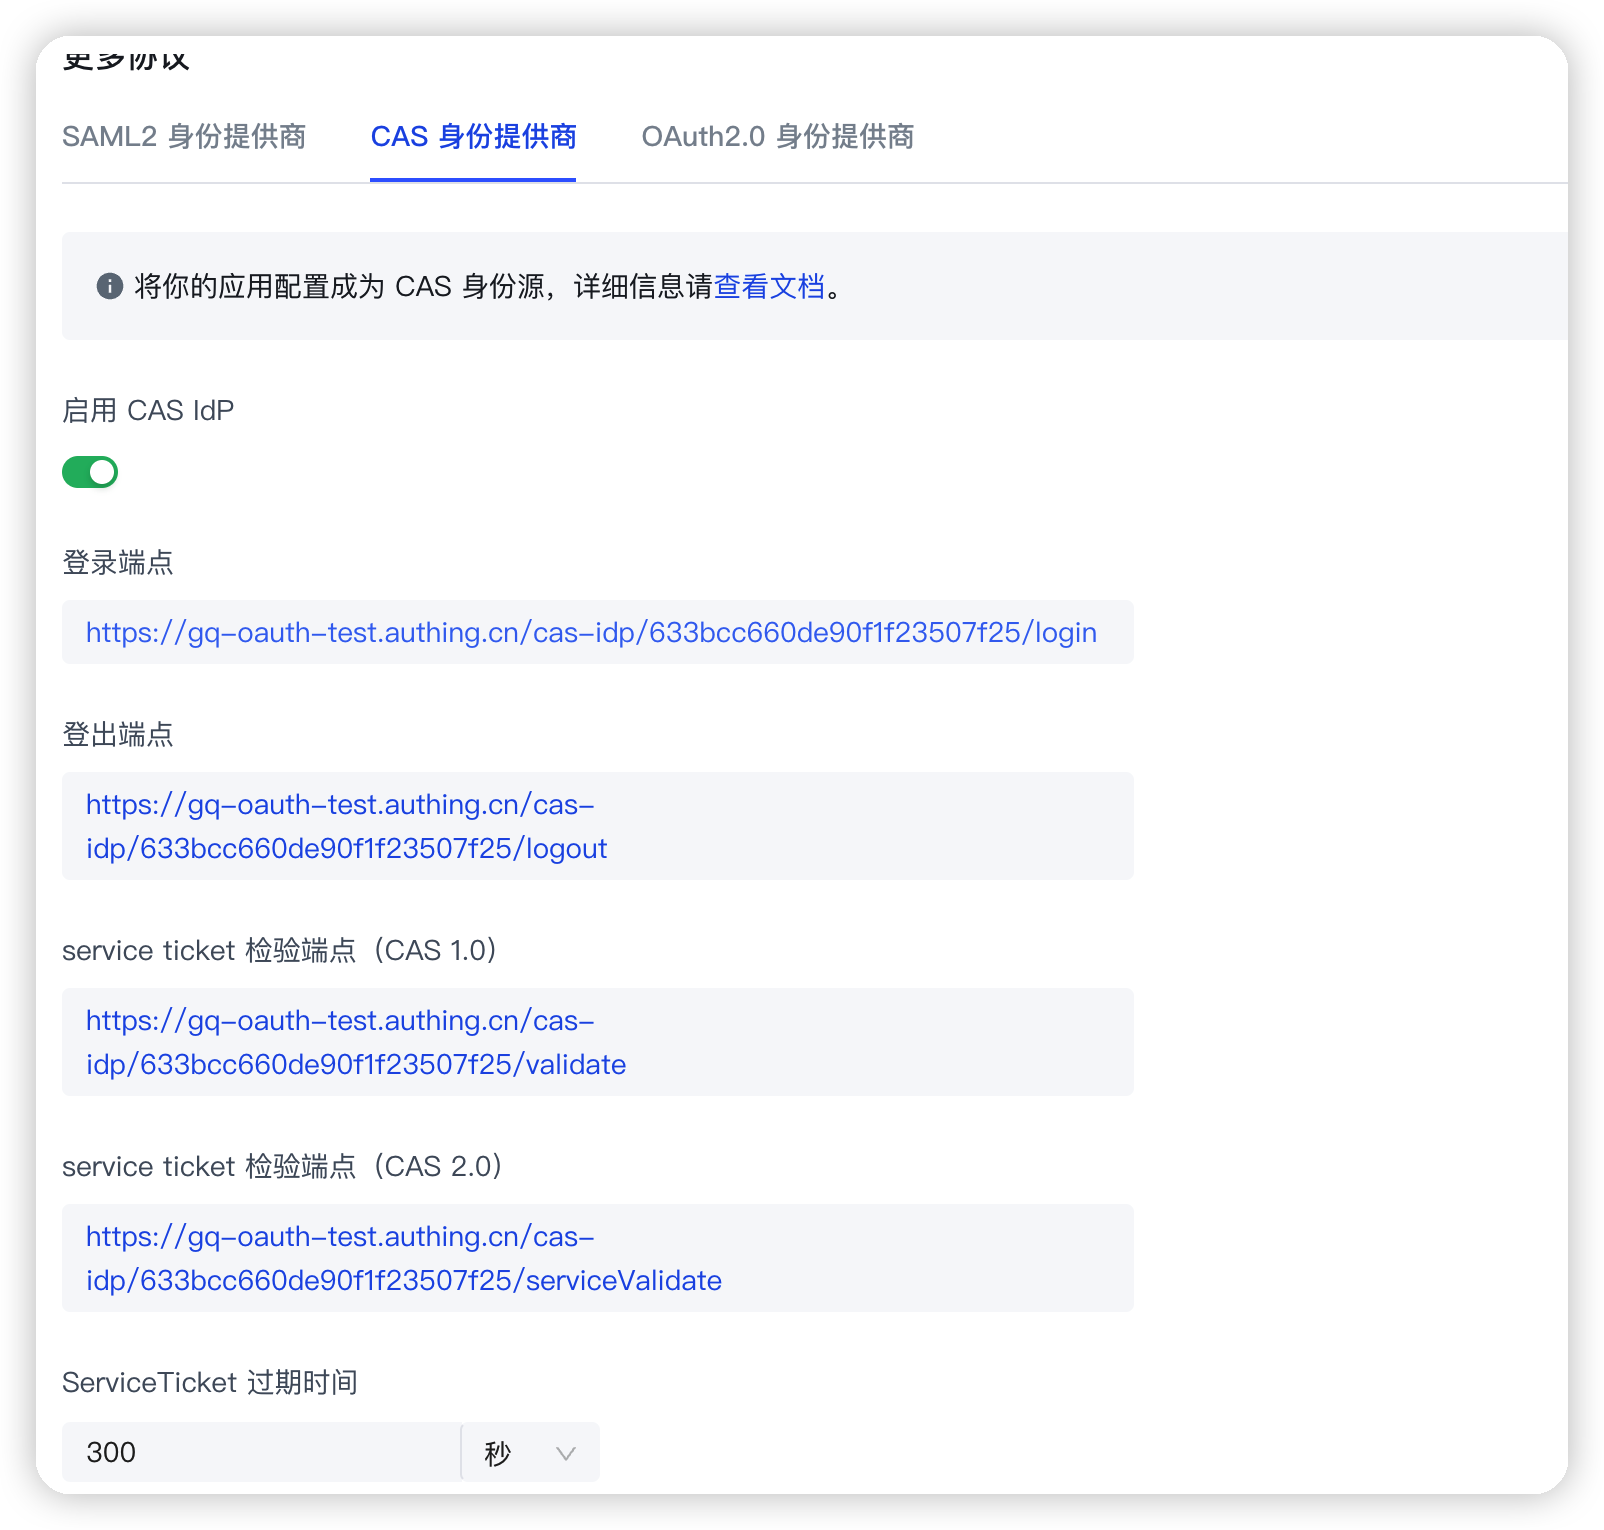
¶ Spring Boot project building
This article will introduce two building methods: Spring Initializr and Maven.
¶ Development environment
- Development tool: IDEA
- Project management tool: Maven
- JDK version: 1.8
¶ Use Spring Initializr to quickly build a project
Open IDEA, click New Project to create a new project, select Spring Initializr to create a Spring Boot project, and enter the project's Group and Artifact information. 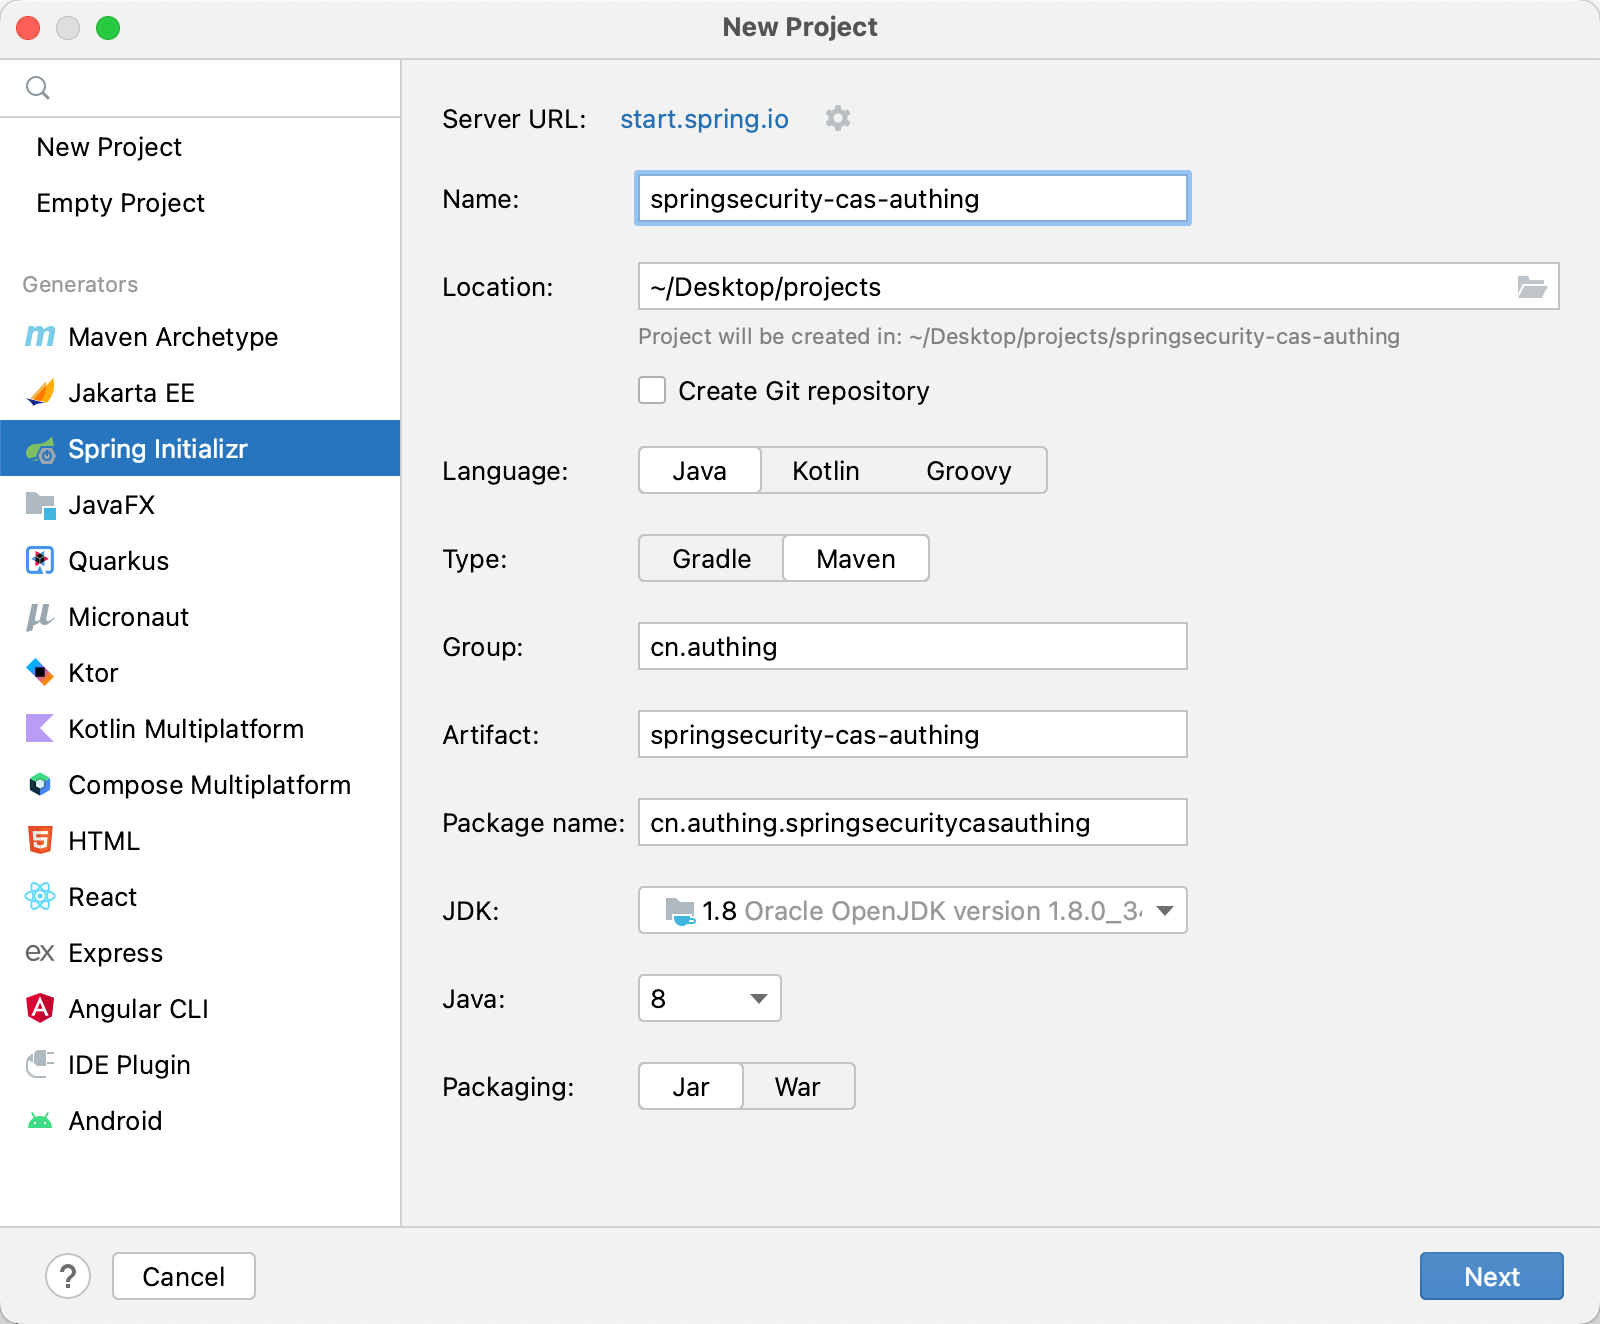
Add Spring Web and Spring Security dependencies. 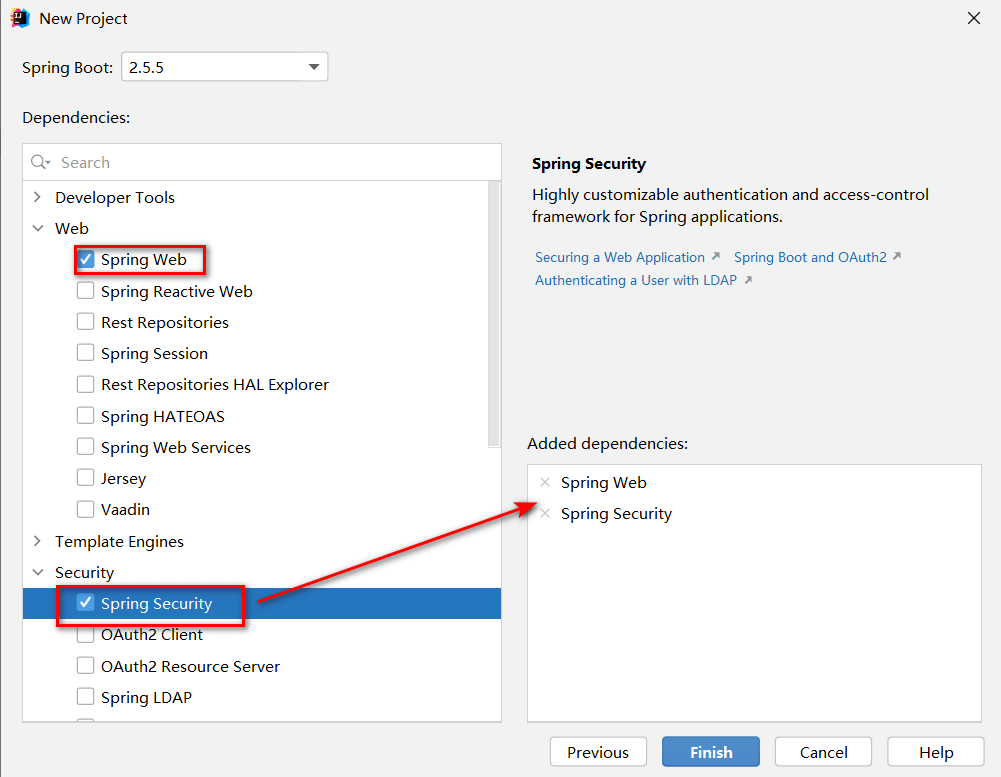
In addition, some other dependency packages need to be added to pom.xml during the integration process, as follows:
<dependency>
<groupId>org.springframework.boot</groupId>
<artifactId>spring-boot-starter-tomcat</artifactId>
</dependency>

<dependency>
<groupId>net.unicon.cas</groupId>
<artifactId>cas-client-autoconfig-support</artifactId>
<version>2.3.0-GA</version>
</dependency>

<!--Remote call interface usage-->
<dependency>
<groupId>cn.hutool</groupId>
<artifactId>hutool-all</artifactId>
<version>5.7.11</version>
</dependency>
Among them, the hutool toolkit is used to remotely call the interface. When a callback request is received, the toolkit will be used to remotely call the serviceValidate interface of the CAS Service Ticket to verify the legitimacy of the endpoint. The subsequent automatic callback interface coding will be used.
Finally, you need to add the @EnableCasClient annotation in the startup class to enable support for the CAS client, as follows:
@SpringBootApplication(exclude = DataSourceAutoConfiguration.class)
@EnableCasClient
public class AuthingCasApplication {

    public static void main(String[] args) {
        SpringApplication.run(AuthingCasApplication.class, args);
    }

}
¶ Use Maven to build a project
Open IDEA, click New Project to create a new project, select Maven to create a Maven project, then click Next, fill in the project name, and finally Finish. 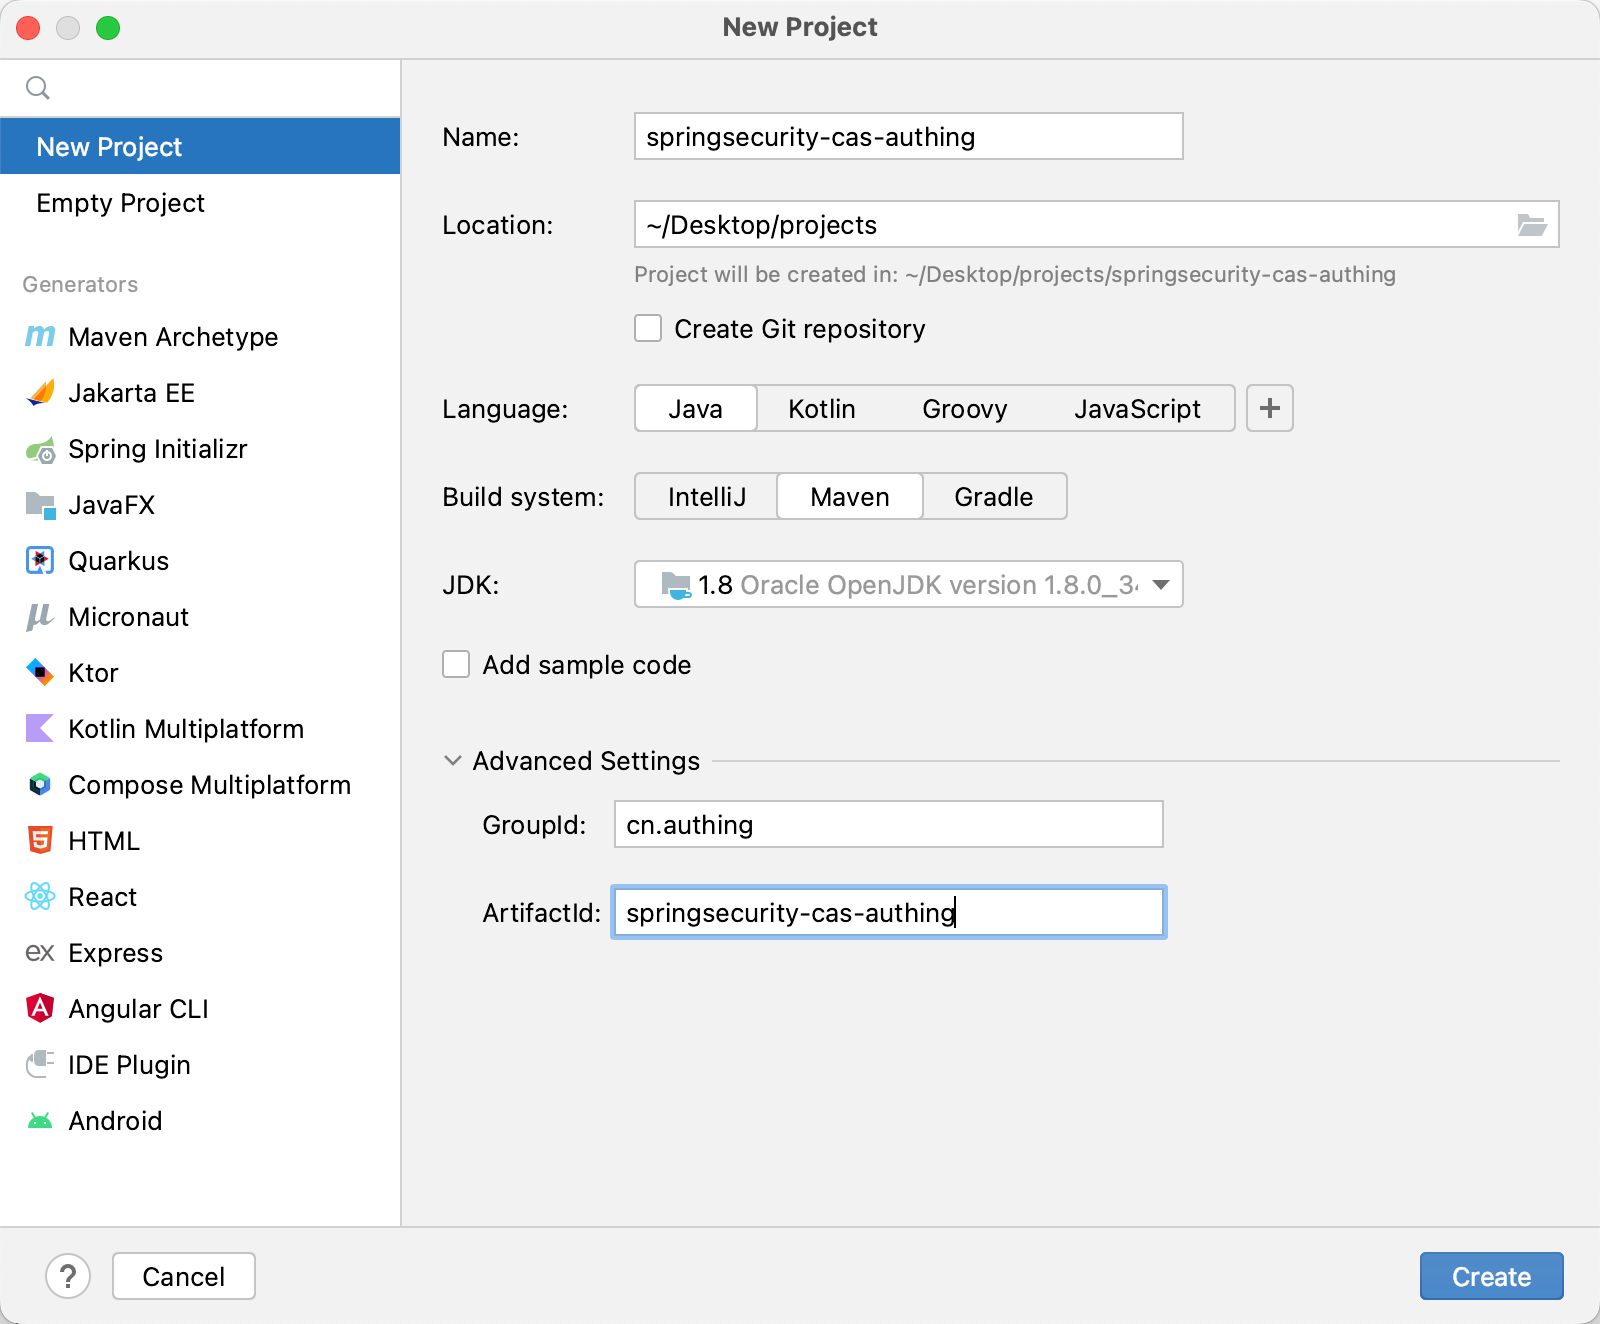
Next, add the parent project dependency and other dependency packages required during the integration process in pom.xml.
    <parent>
        <groupId>org.springframework.boot</groupId>
        <artifactId>spring-boot-starter-parent</artifactId>
        <version>2.5.5</version>
        <relativePath/> <!-- lookup parent from repository -->
    </parent>

        <dependency>
            <groupId>org.springframework.boot</groupId>
            <artifactId>spring-boot-starter-security</artifactId>
        </dependency>
        <dependency>
            <groupId>org.springframework.boot</groupId>
            <artifactId>spring-boot-starter-web</artifactId>
        </dependency>
        <dependency>
            <groupId>org.springframework.security</groupId>
            <artifactId>spring-security-test</artifactId>
            <scope>test</scope>
        </dependency>
        <dependency>
            <groupId>org.springframework.boot</groupId>
            <artifactId>spring-boot-starter-tomcat</artifactId>
        </dependency>
        <dependency>
            <groupId>net.unicon.cas</groupId>
            <artifactId>cas-client-autoconfig-support</artifactId>
            <version>2.3.0-GA</version>
        </dependency>

        <!--Remote call interface usage-->
        <dependency>
            <groupId>cn.hutool</groupId>
            <artifactId>hutool-all</artifactId>
            <version>5.7.11</version>
        </dependency>
🎉🎉🎉 So far, you have completed building a project using Spring Initializr and Maven. Please choose a method that suits your project development.
¶ Configure the configuration file in the project
Find src/main/resources/application.properties, rename it to application.yml, and add the following content:
server:
port: 9999

cas:
server-url-prefix:
{
Replace with your server-url-prefix, such as: https://cjtjls-demo.genauth.ai/cas-idp/613196xxxxxc9ca9ca071,
}
server-login-url:
{
Replace with your server-url-prefix, such as: https://cjtjls-demo.genauth.ai/cas-idp/613196xxxxx0c9ca9ca071/login,
}
client-host-url: { Replace with your client-host-url, such as: http://localhost:9999/ }
validation-url-patterns:
- /**
Replace {server-url-prefix}, {server-login-url}, and {client-host-url} with the actual information in the previous application configuration.
¶ Automatic callback interface coding
Create a new package under the project, and then create a new CallBackController. The function of this interface is to obtain user information through the CAS ticket. Note that the following parameters service and ticket are the standards of GenAuth CAS and the provisions of the standard protocol (if you want to modify them, please follow the CAS protocol standard to modify them). The values corresponding to the service parameters are those previously configured in the GenAuth platform application.
package com.authing.cas.authingcas.controller;
import cn.hutool.http.HttpUtil;
import org.springframework.http.MediaType;
import org.springframework.stereotype.Controller;
import org.springframework.web.bind.annotation.GetMapping;
import org.springframework.web.bind.annotation.ResponseBody;
import java.util.HashMap;

@RestController public class CallbackController {
@GetMapping(value = "/", produces = MediaType.APPLICATION_XML_VALUE)
  public String getTicket(String ticket) {
    HashMap<String, Object> paramMap = new HashMap<>();
    paramMap.put("service", "http://localhost:9999/");
    paramMap.put("ticket", ticket);
    String result = HttpUtil.get("https://cjtjls-demo.genauth.ai/cas-idp/61319680ea8b30c9ca9ca071/serviceValidate", paramMap);
    return result;
  }
}
¶ Test project
Everything is ready. Now start the project and visit http://localhost:9999, and you can see the GenAuth login window. 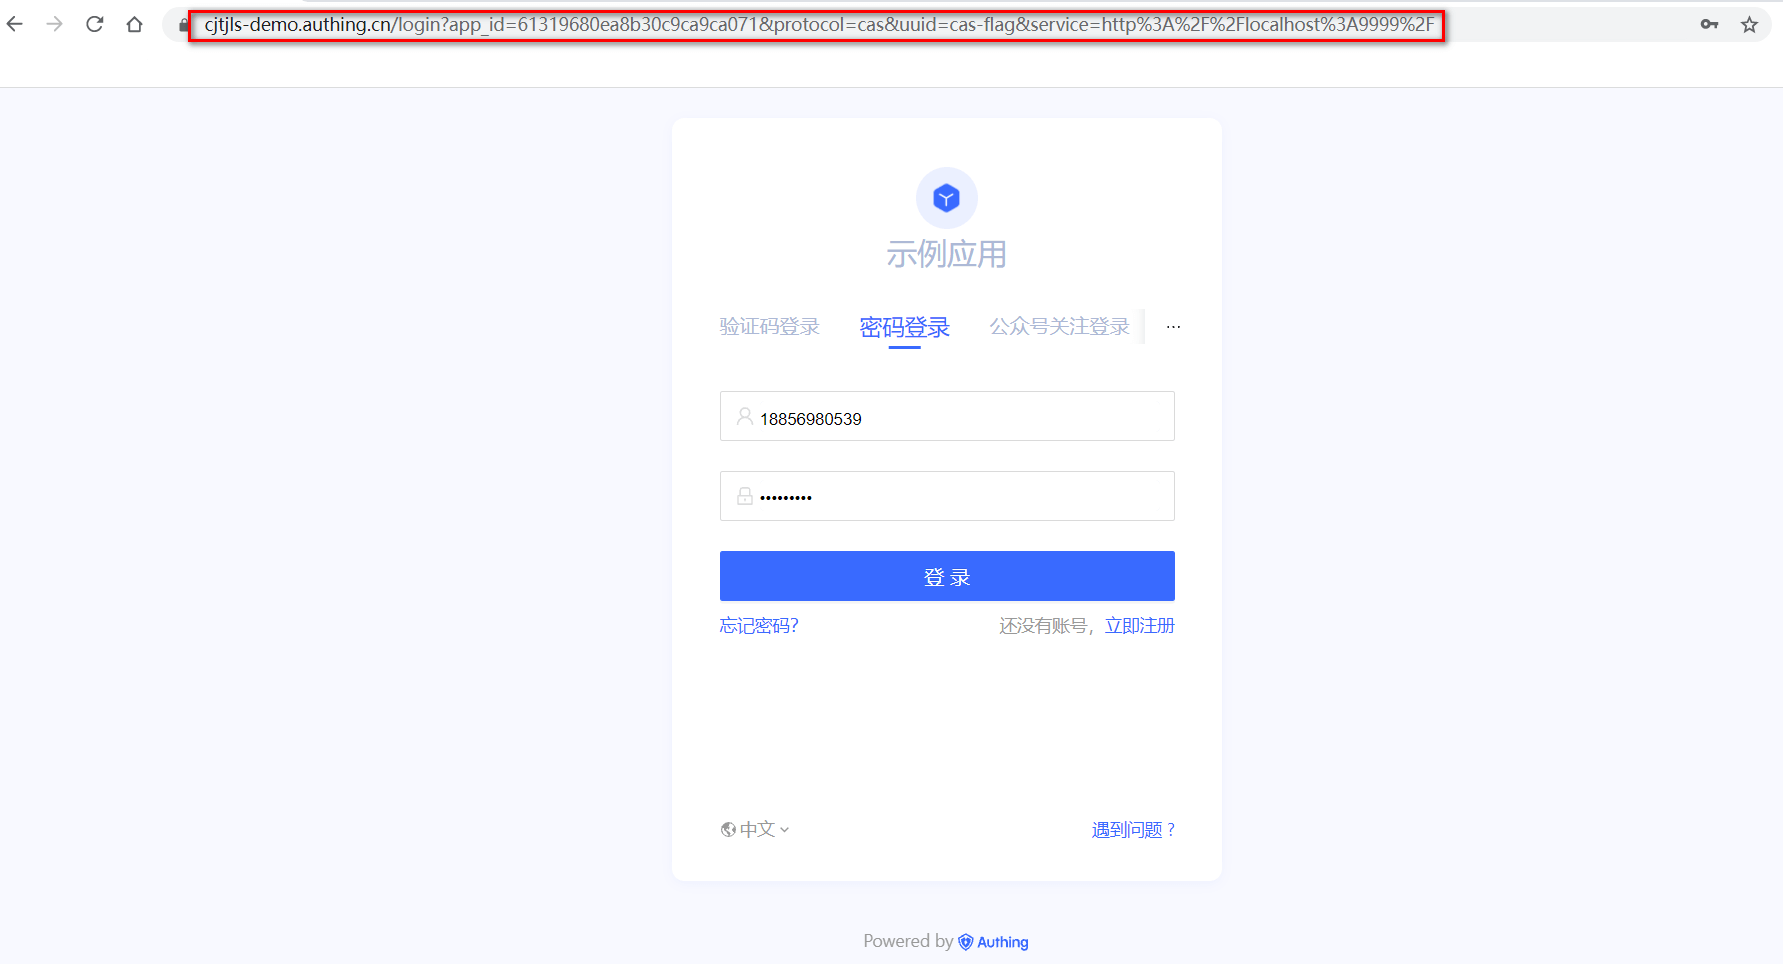
Next, you can enter the username and password to log in and view the result after login. 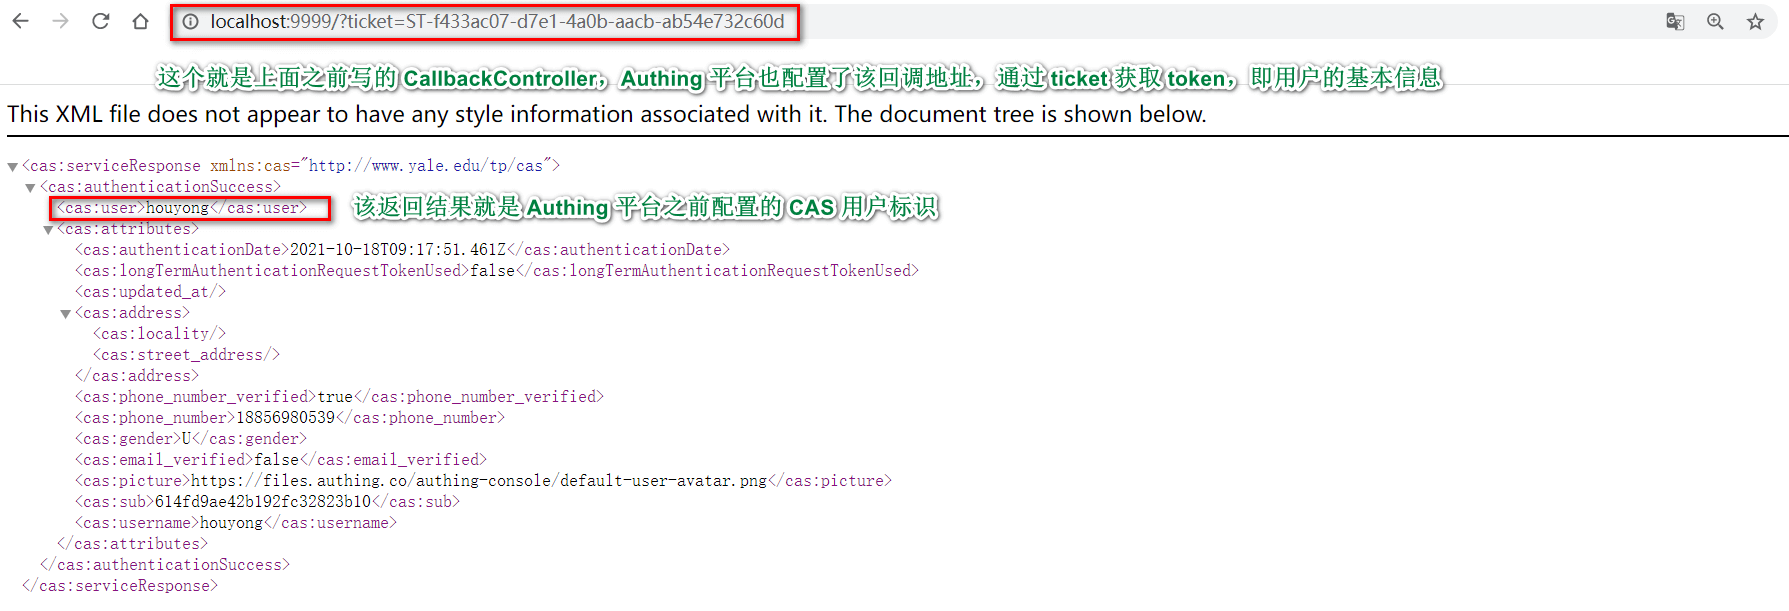 You can refer to this link (opens new window)
<cas:serviceResponse xmlns:cas="http://www.yale.edu/tp/cas">
  <cas:authenticationSuccess>
    <cas:user>username</cas:user>
    <cas:attributes>
      <cas:authenticationDate>2021-07-20T10:04:14.044Z</cas:authenticationDate>
      <cas:longTermAuthenticationRequestTokenUsed>false</cas:longTermAuthenticationRequestTokenUsed>
      <cas:updated_at />
      <cas:address>
        <cas:locality />
        <cas:street_address />
      </cas:address>
      <cas:phone_number_verified>false</cas:phone_number_verified>
      <cas:gender>U</cas:gender>
      <cas:email_verified>false</cas:email_verified>
      <cas:picture>https://files.authing.co/authing-console/default-user-avatar.png</cas:picture>
      <cas:sub>60a5e57cfaa50e4850dd12b0</cas:sub>
    </cas:attributes>
  </cas:authenticationSuccess>
</cas:serviceResponse>
In addition, GenAuth will save the user's login status, and the user does not need to authenticate again within a short period of time. In addition, if the ticket verification fails, GenAuth will return an xml document in the following format.
<cas:serviceResponse xmlns:cas="http://www.yale.edu/tp/cas">
<cas:authenticationFailure code="INVALID_TICKET">Ticket does not exist</cas:authenticationFailure>
</cas:serviceResponse>
Congratulations 🎉🎉🎉, you have learned how to integrate Spring Security 5 with GenAuth CAS authentication and authorization.
¶ Other knowledge learning
¶ What is single sign-on
Single Sign On: Single Sign On, referred to as SSO, SSO enables users to access all mutually trusted application systems in multiple application systems with only one login.
¶ What is CAS
CAS framework: CAS (Central Authentication Service, i.e.: unified authentication service) is a framework for implementing SSO single sign-on.
¶ CAS Terminology
Ticket Granting ticket (TGT): It can be considered as a ticket generated by the CAS server based on the username and password, and stored on the server.
Ticket-granting cookie (TGC): It is actually a cookie that stores user identity information and is sent by the server to the client.
Service ticket (ST): A one-time ticket generated by TGT, used for verification, and can only be used once. It is equivalent to the server sending a ticket to the client, and then the client takes this ticket to the server for verification to see if it is issued by the server.
¶ Next you may need
Integrate OAuth 2.0 with Spring Security
Resources on this pageExpress Learning
Express Integration OIDC Single Sign-On GuideIntegrate OIDC with Spring Security
Resources on this page