¶ Spring Security integration with GenAuth OAuth 2.0 quick start
This article takes Spring Security 5 (opens new window), which is used to provide authentication and access control in the Spring ecosystem, as an example to introduce in detail how Spring Security 5 (opens new window) can be connected to GenAuth OAuth 2.0.
Spring Security is a security framework that provides secure access control solutions. It provides a set of beans that can be configured in the Spring application context, making full use of Spring IOC (inversion of control), DI (dependency injection) and AOP (aspect-oriented programming) functions to provide declarative security access control functions for application systems, enhancing the security of enterprise systems and reducing the burden of writing a lot of duplicate code.
The main functions of Spring Security include:
Authentication (Authentication is about verifying your credentials, such as username/mobile number/email and password, to verify the identity of the visitor.)
Authorization (Authorization occurs after the system completes identity authentication, and will eventually grant you full access to resources, which determines your ability to access the system and the extent to which you can do so.)
Attack protection (used to prevent and resist malicious attacks on the network.)
¶ Integration Introduction
The OAuth 2.0 protocol defines how third-party applications can access HTTP services with limited permissions. It can allow third-party applications to access services on behalf of resource owners by building a permission interaction mechanism between resource owners and HTTP services, or by granting permissions to third-party applications to allow them to access services on their behalf. Spring Security is a powerful and highly customizable authentication and access control framework. It is the de facto standard for protecting Spring-based applications. It is dedicated to providing authentication and authorization for Java applications. Like all Spring projects, the real power of Spring Security lies in its ability to be easily extended to meet custom requirements.
Taking the OAuth 2.0 service provided by GenAuth as an example, the following will introduce in detail how to use Spring Security 5 to integrate GenAuth OAuth 2.0 single sign-on.
- Development tool: IDEA
- Project management tool: Maven
- JDK version: 1.8
¶ Configure GenAuth
Configure the self-built application in the GenAuth console.
¶ Get GenAuth platform information
First, register an account in GenAuth, then enter the console and follow the guided steps to create a new user pool.
Click the "Application" menu item on the left, select an existing application or Manually create an application (opens new window) and click in.
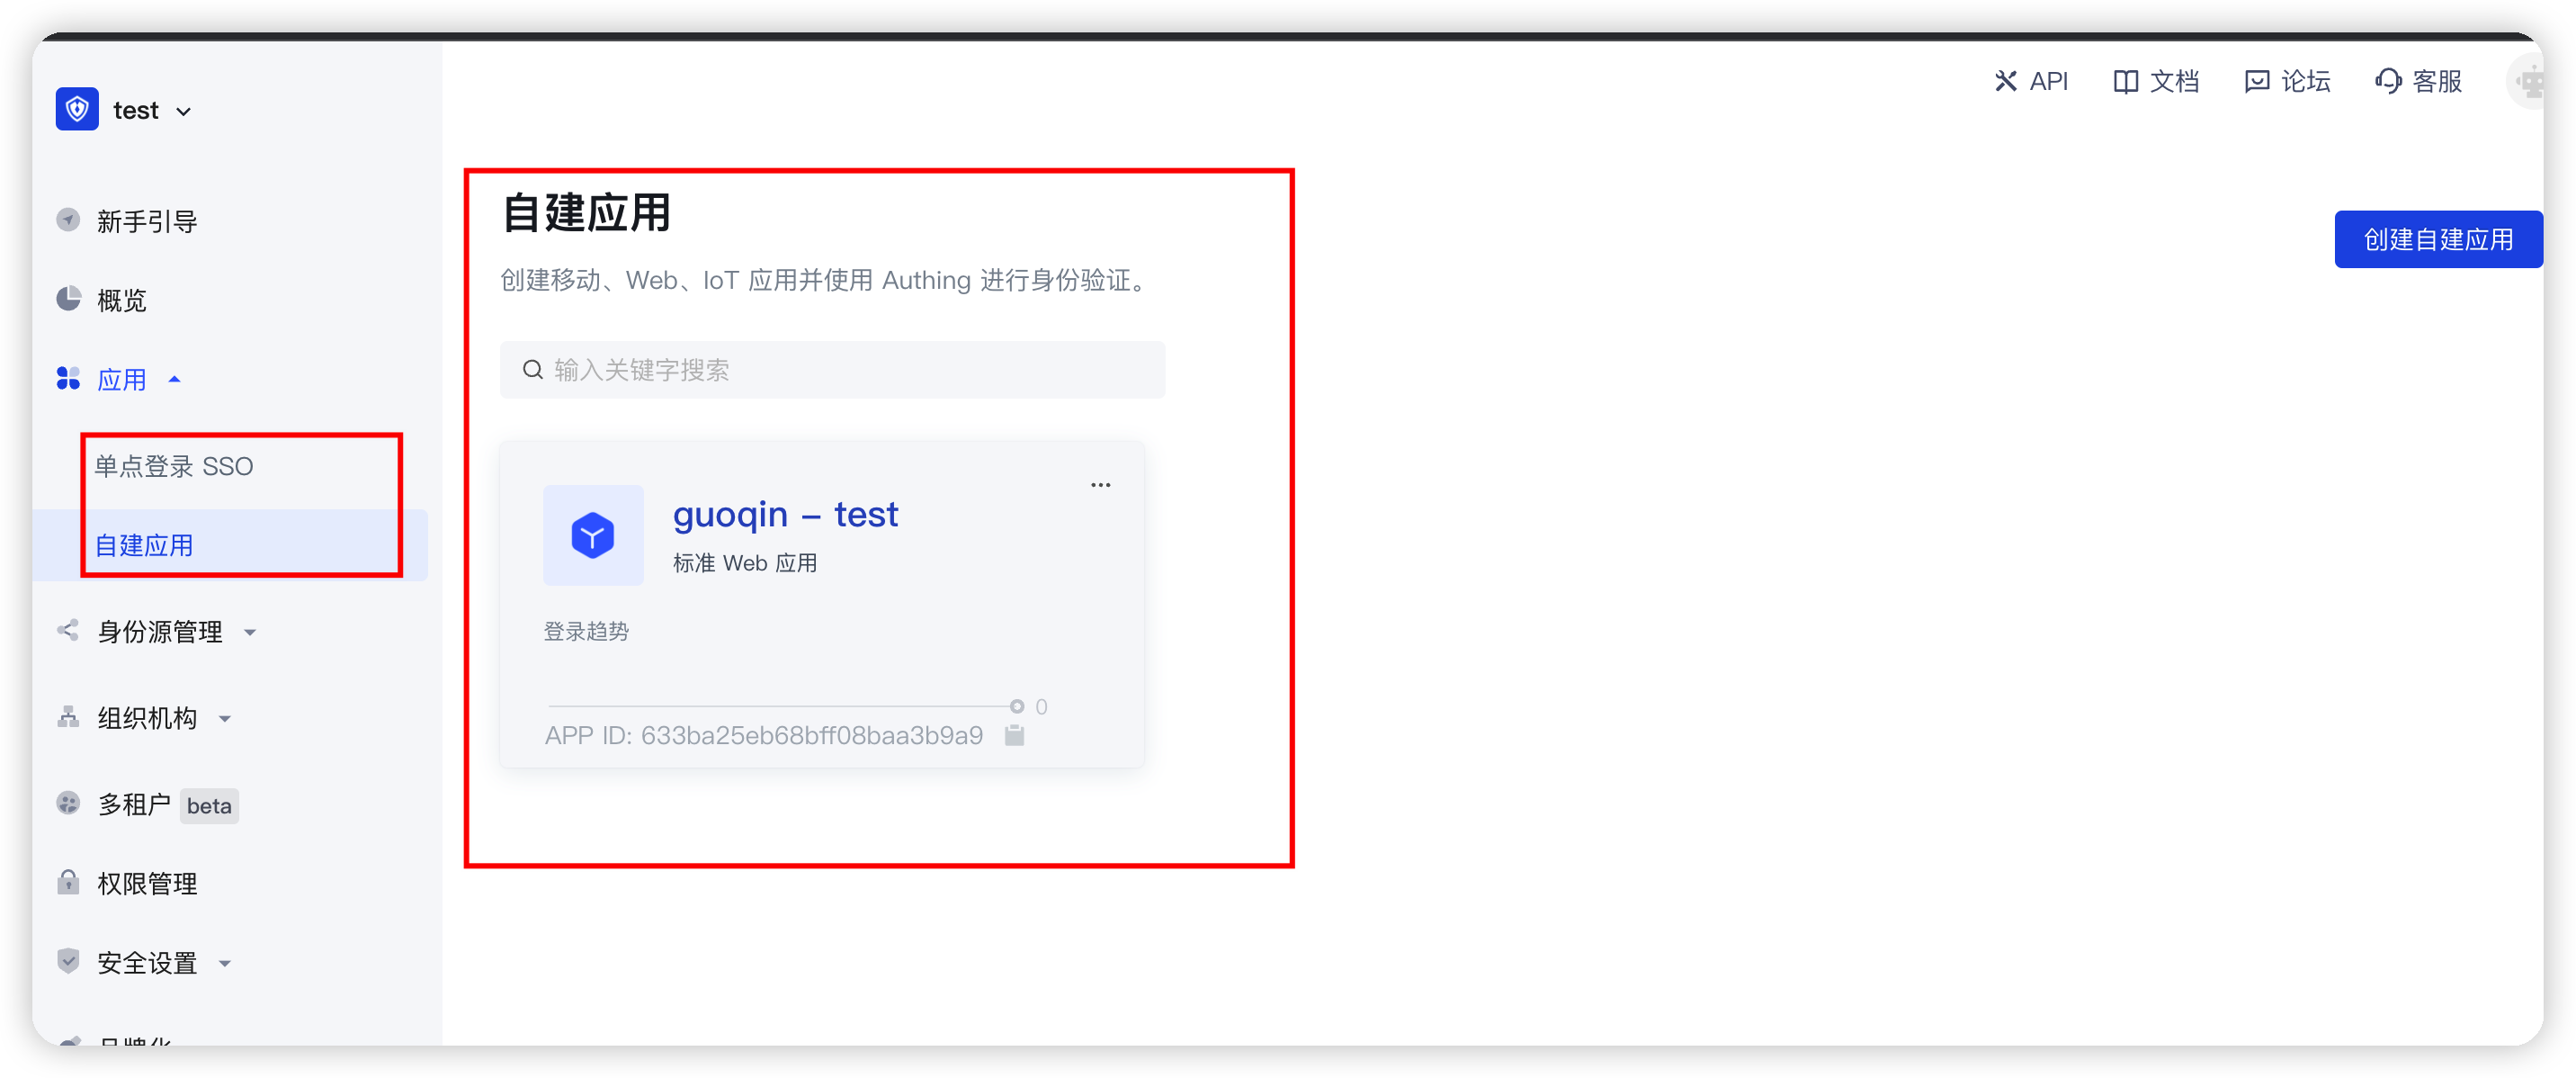
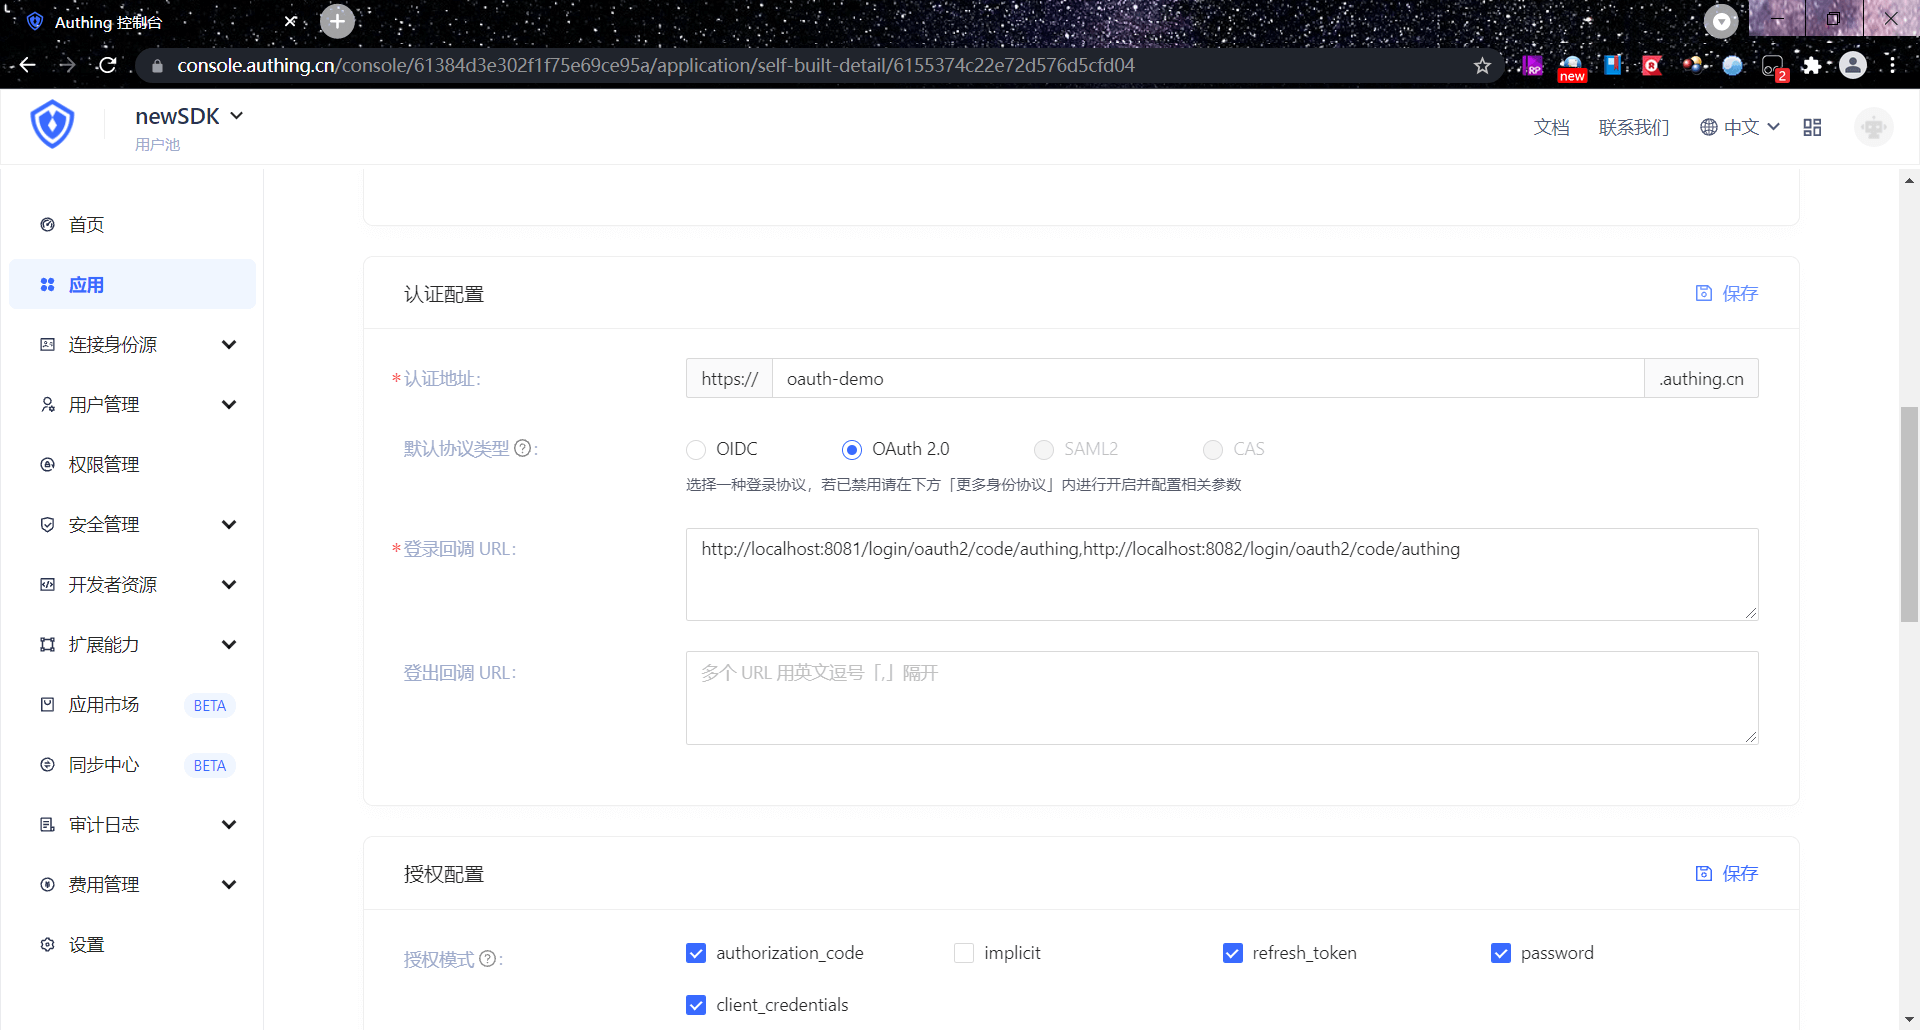
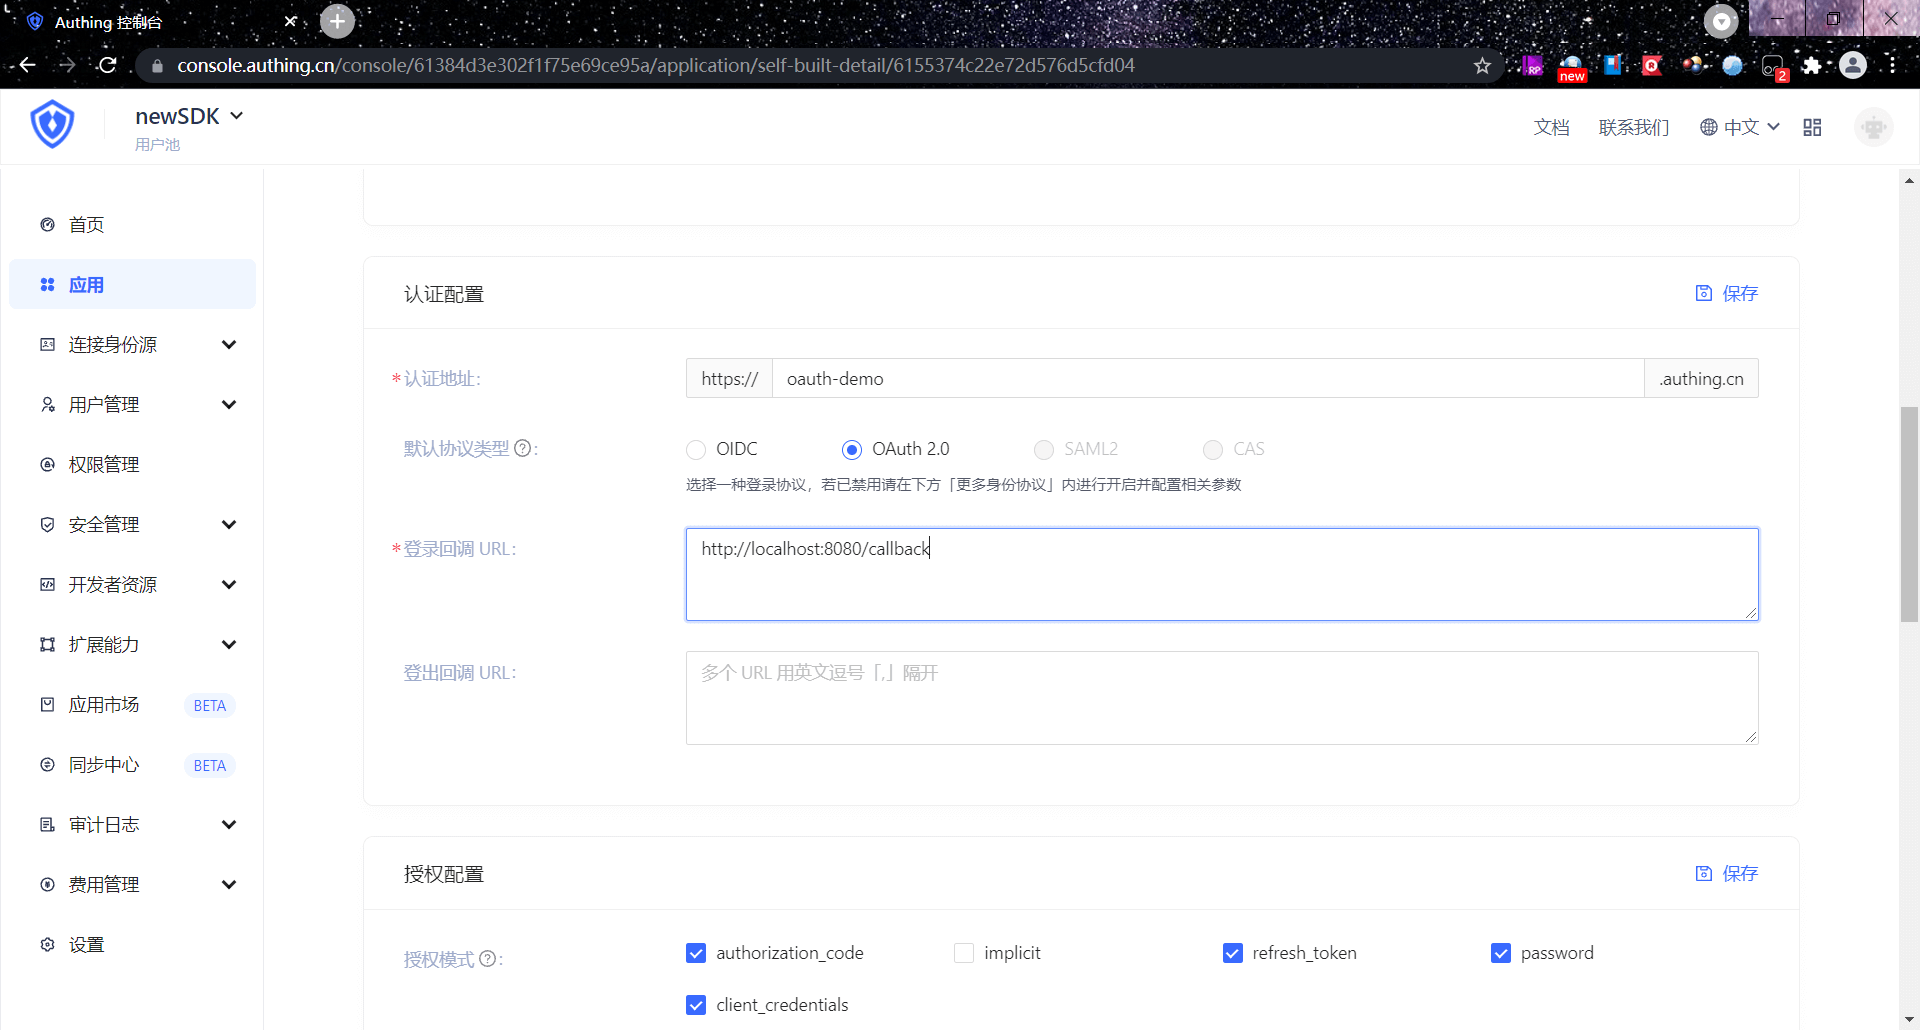
You will see the App ID, App Secret, Issuer url and Token endpoint. Please save them properly as they will be used later. 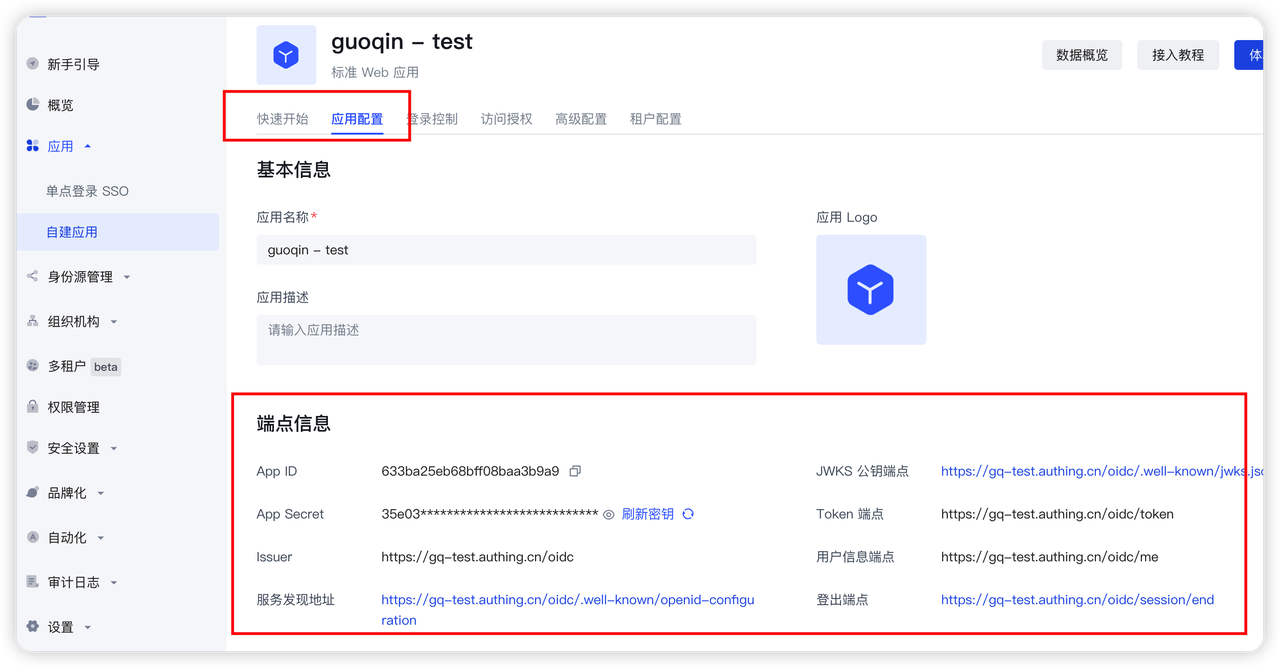
Then you need to add http://localhost:8080/login/oauth2/code/authing to the login callback URL. The options after that should be consistent with the following figure.
The default callback address of Spring Security OAuth is /login/oauth2/code/{clientId}
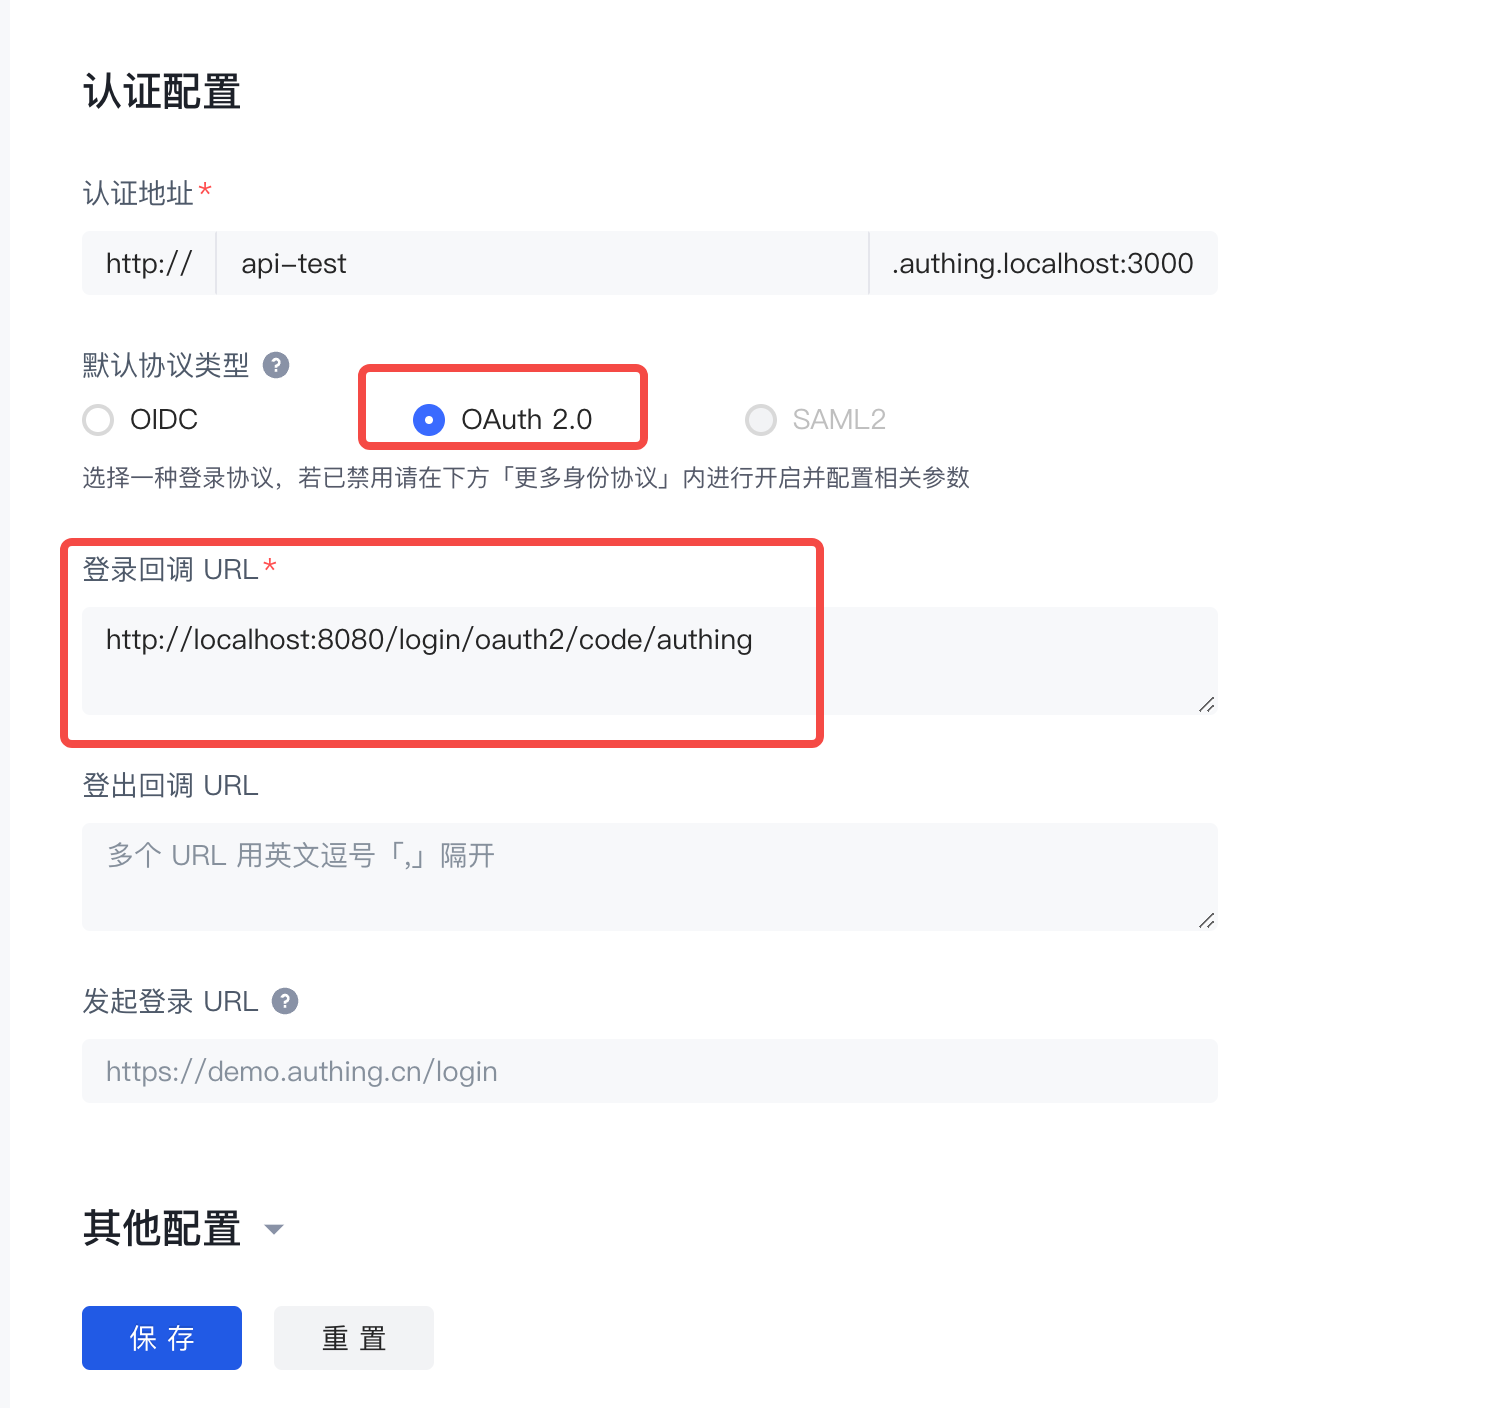
Confirm to enable the OAuth 2.0 service and configure it. 
¶ Spring Boot project construction
This article will introduce two construction methods: Spring Initializr and Maven.
¶ Development environment
- Development tool: IDEA
- Project management tool: Maven
- JDK version: 1.8
¶ Use Spring Initializr to quickly build a project
Open IDEA, click New Project to create a new project, select Spring Initializr to create a Spring Boot project, and enter the project's Group and Artifact information. 
Add Spring Web, Spring Security, and OAuth2 Client dependencies. 
In addition, some other dependency packages need to be added in pom.xml during the integration process, as follows:
<dependency>
<groupId>org.springframework.security</groupId>
<artifactId>spring-security-config</artifactId>
</dependency>
<dependency>
<groupId>org.springframework.security</groupId>
<artifactId>spring-security-oauth2-client</artifactId>
</dependency>
<dependency>
<groupId>org.springframework.security</groupId>
<artifactId>spring-security-oauth2-jose</artifactId>
</dependency>
<dependency>
<groupId>cn.hutool</groupId>
<artifactId>hutool-http</artifactId>
<version>5.7.11</version>
</dependency>
<!-- LATEST_VERSION can be found in the maven repository: https://mvnrepository.com/search?q=cn.authing -->
<dependency>
<groupId>cn.authing</groupId>
<artifactId>java-core</artifactId>
<version>{LATEST_VERSION}</version>
</dependency>
¶ Use maven to build a project
Open IDEA, click New Project to create a new project, select maven to create a maven project, then click Next, fill in the project name, and finally Finish. 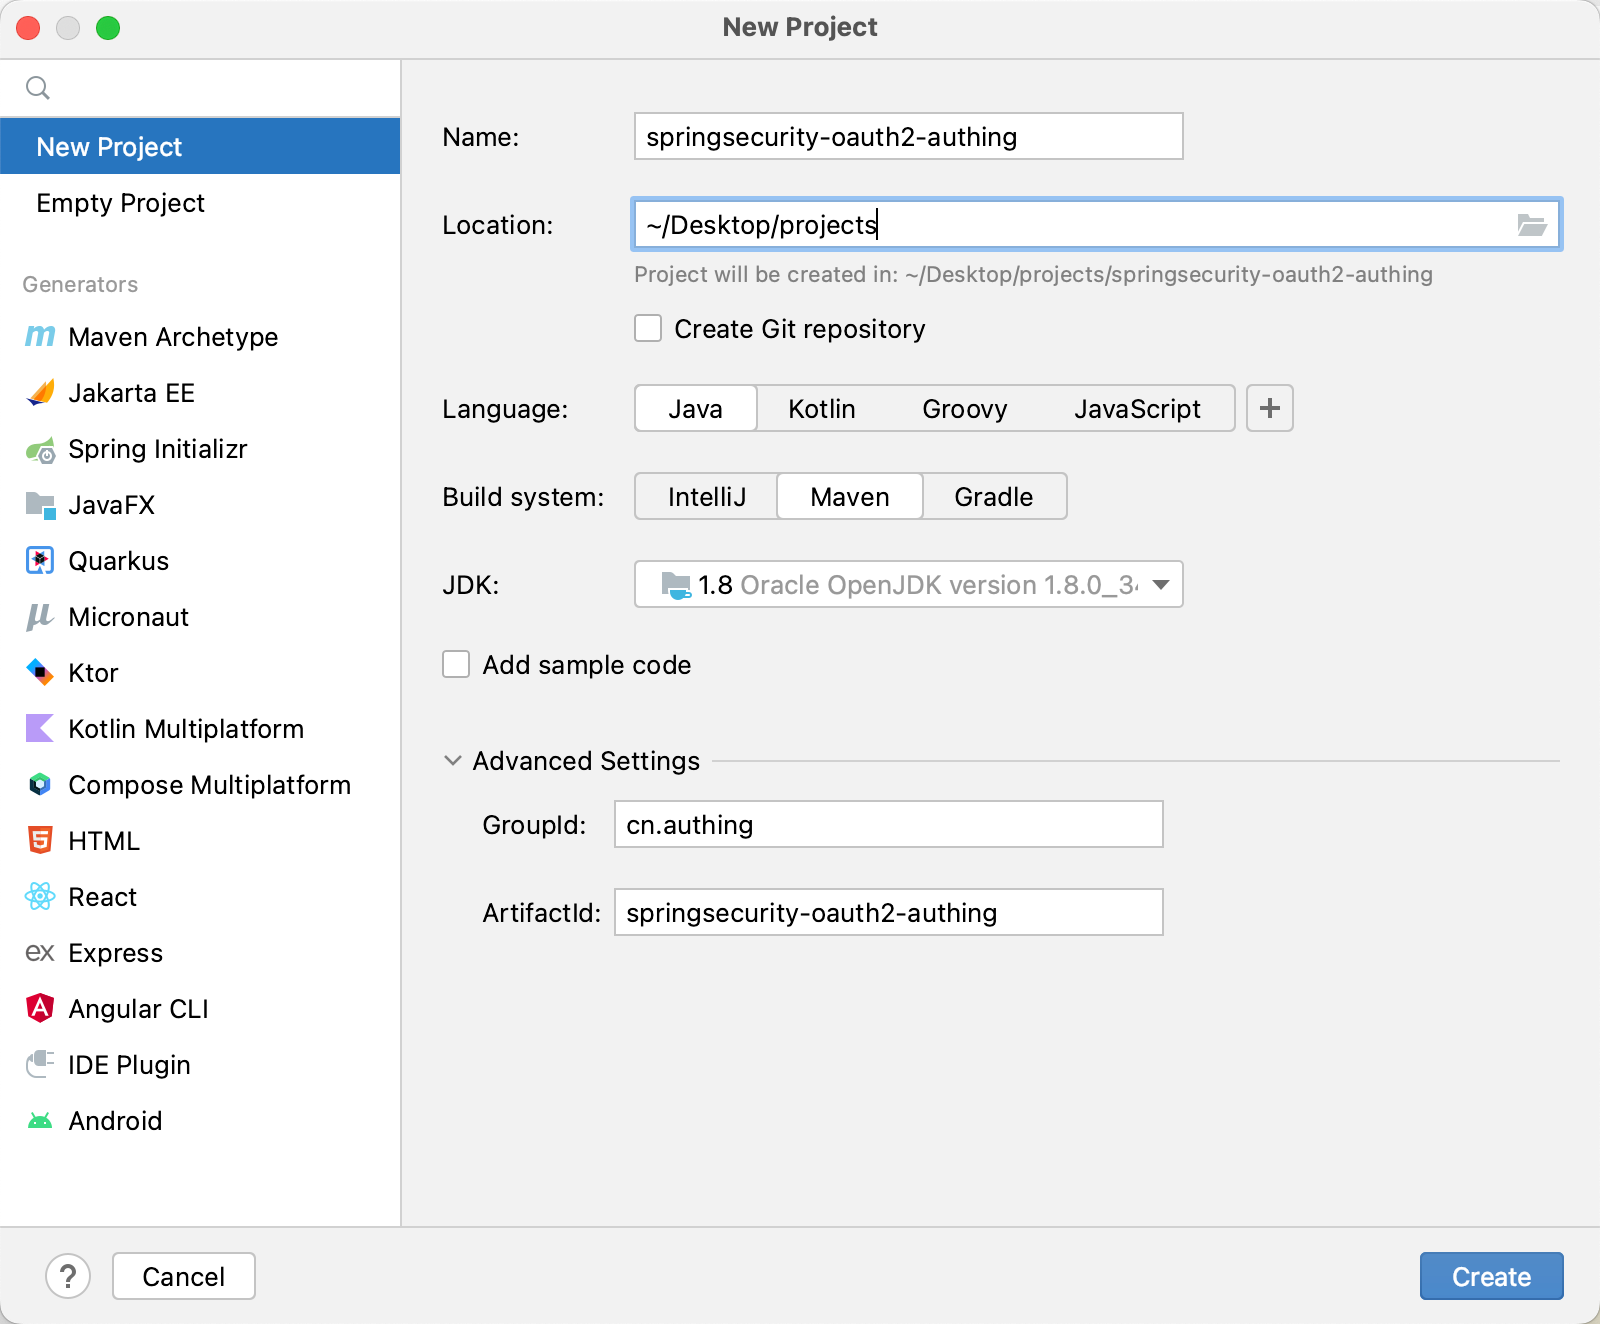
Next, add the parent project dependency and other dependency packages required during the integration process in pom.xml.
<dependency>
<groupId>cn.authing</groupId>
<artifactId>java-core</artifactId>
<version>{LATEST_VERSION}</version>
</dependency>
🎉🎉🎉 So far, you have completed the project building using Spring Initializr and Maven. Please choose a method that suits your project development.
The following will introduce the four single sign-on methods: Authorization code mode, password mode, client mode, and simplified mode.
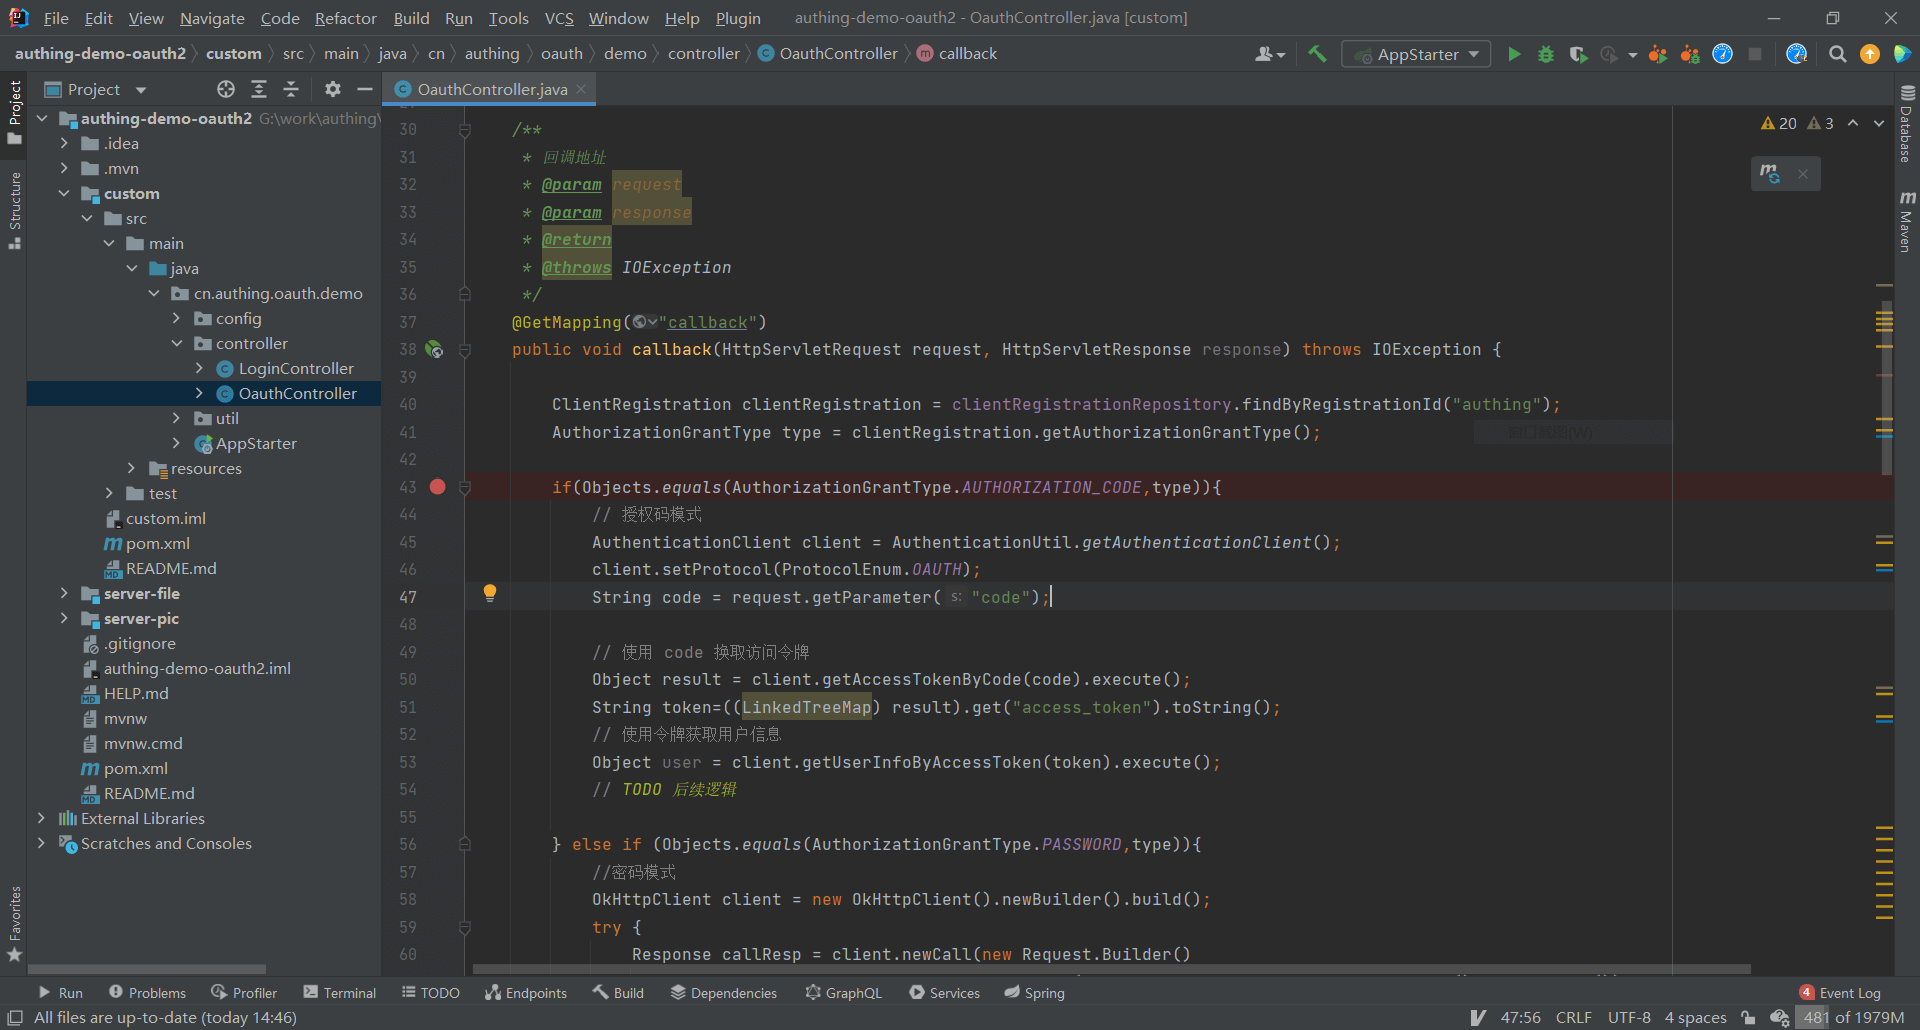
¶ Authorization code mode
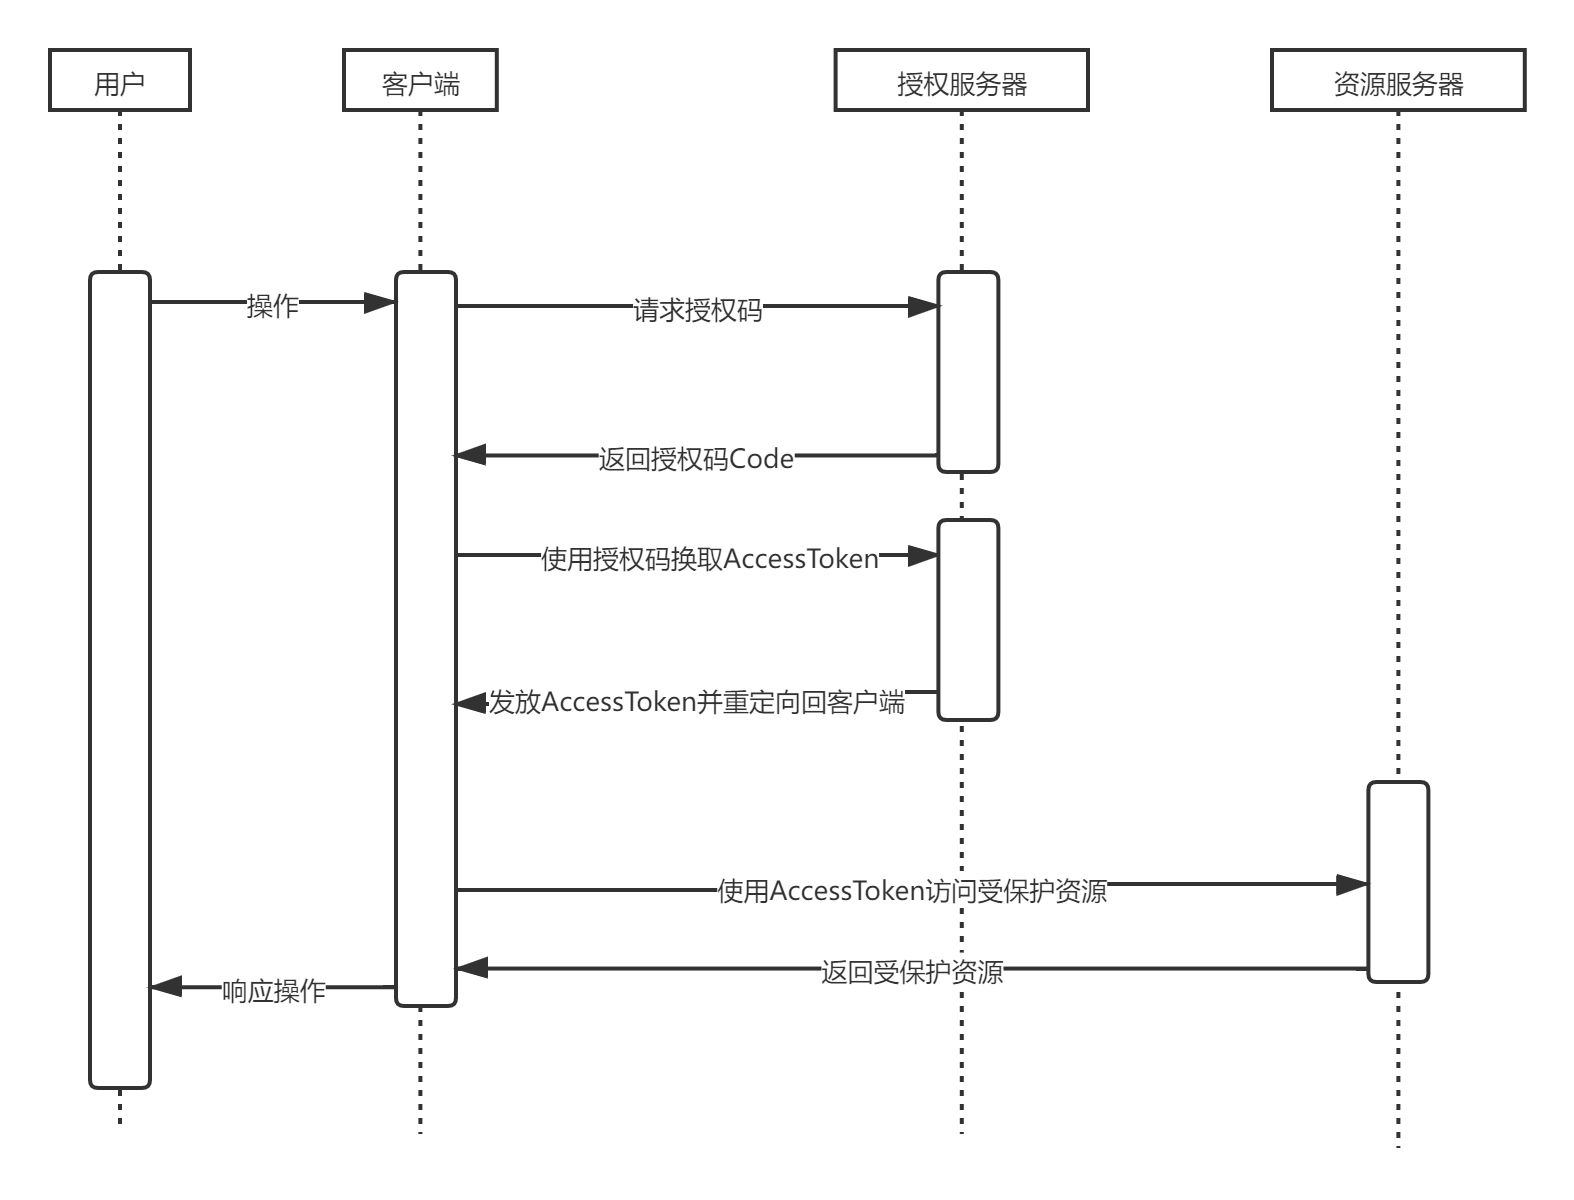
¶ Authorization code mode workflow
The user accesses the client, and the client redirects the user to the authorization server.
The authorization server authenticates the resource owner, redirects to the client after successful authentication, and returns the authorization code.
The client exchanges access tokens** with the authorization server through the **authorization code**.
The client uses the access token to access the resource server.
The resource server verifies the access token and returns protected data.
The execution flow chart is as follows
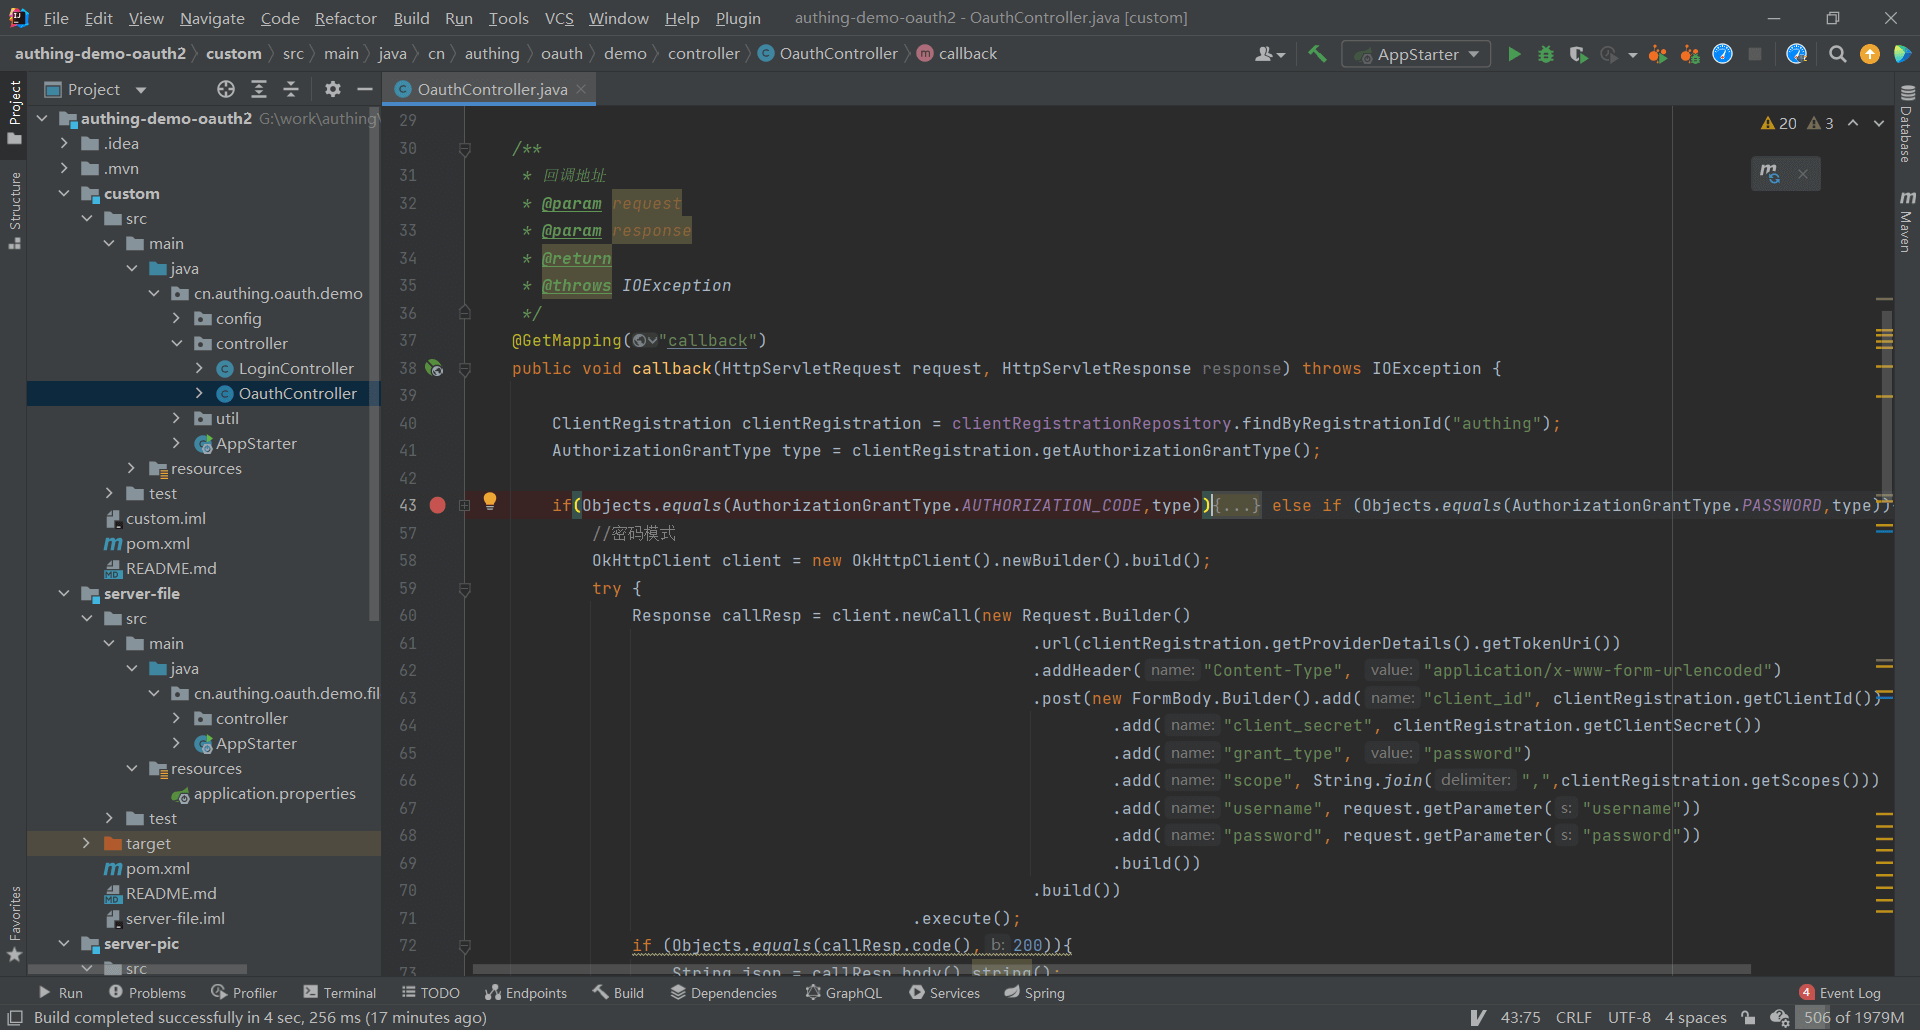
¶ Modify the project configuration file
Find src/main/resources/application.properties and fill in the project information:
server.port=8081
spring.security.oauth2.client.registration.authing.client-id={replace with your App ID, such as: 5e72d72e379xxxxx3e1d57b13}
spring.security.oauth2.client.registration.authing.client-name=authing
spring.security.oauth2.client.registration.authing.client-secret={replace with your App ID, such as: 5e72d72e379xxxxx3e1d57b13} Secret such as: 931f19ce216xxxxx2f586c706ee6} spring.security.oauth2.client.registration.authing.authorization-grant-type=authorization_code spring.security.oauth2.client.registration.authing.client-authentication-method=POST spring.security.oauth2.client.registration.authing.redirect-uri={Replace with your redirect-uri such as: http://localhost:8080/login/oauth2/code/authing} spring.security.oauth2.client.registration.authing.scope=profile spring.security.oauth2.client.provider.authing .user-info-authentication-method=form spring.security.oauth2.client.provider.authing.authorization-uri=https://{replace with your Issuer, such as: authing-net-sdk-demo}.genauth.ai/oauth/auth spring.security.oauth2.client.provider.authing.user-name-attribute=username spring.security.oauth2.client.provider.authing.token-uri=https://{replace with your Issuer, such as: authing-net-sdk-demo}.genauth.ai/oauth/token spring.security.oauth2.client.provider.authing.user-info-uri=https://core.genauth.ai/oauth/me
You need to replace {client-id}, {client-secret}, {redirect-uri}, {authorization-uri}, {token-uri} with the actual information in the previous step "Application Configuration".
¶ Password mode
¶ Modify the project configuration file
Find src/main/resources/application.properties and fill in the project information:
server.port=8081
spring.security.oauth2.client.registration.authing.client-id={replace with your App ID, such as: 5e72d72e379xxxxx3e1d57b13}
spring.security.oauth2.client.registration.authing.client-name=authing
spring.security.oauth2.client.registration.authing.client-secret={replace with your App Secret such as: 931f19ce216xxxxx2f586c706ee6}
spring.security.oauth2.client.registration.authing.authorization-grant-type=password
spring.security.oauth2.client.registration.authing.client-authentication-method=POST
spring.security.oauth2.client.registration.authing.scope=profile
spring.security.oauth2.client.provider.authing.token-uri=https://{replace with your Issuer, such as: authing-net-sdk-demo}.genauth.ai/oauth/token
You need to replace {client-id}, {client-secret}, {token-uri} here with the actual information in the previous step "Application Configuration".
¶ Business side processing
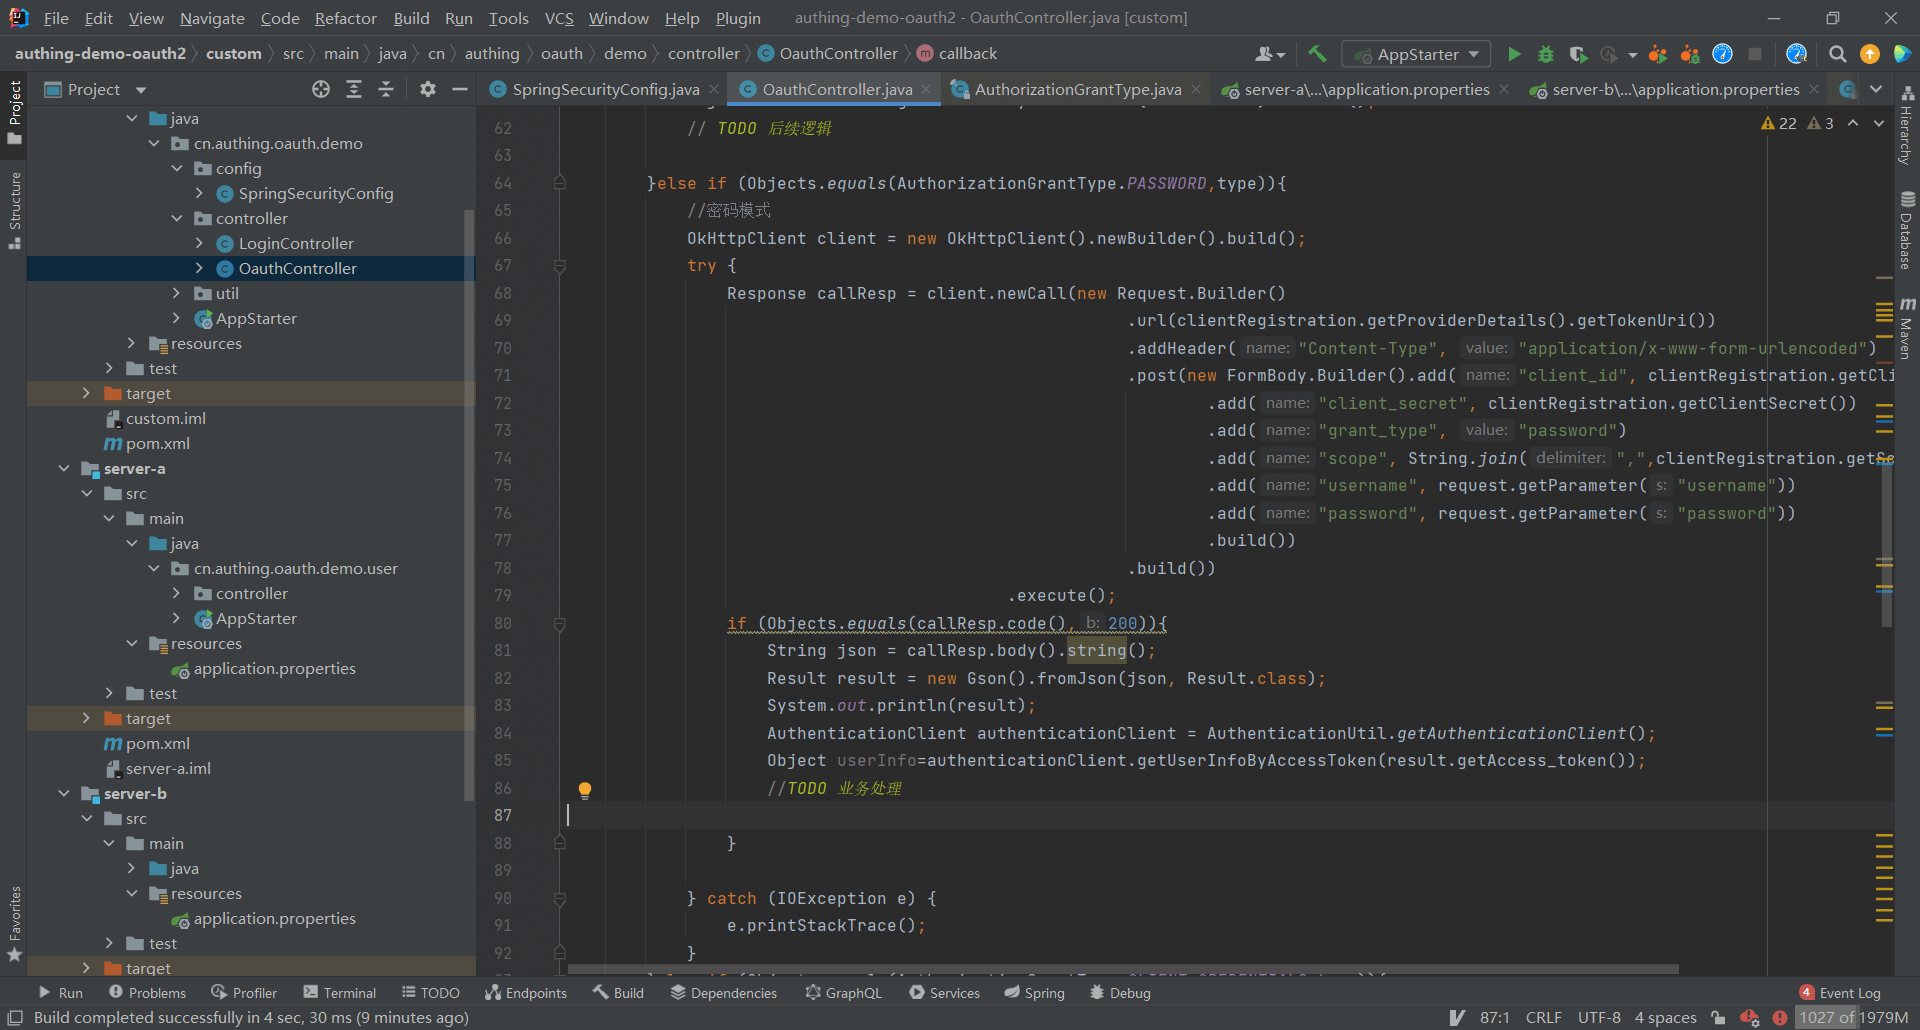
Password mode is to directly exchange the token with the username and password
Authentication address https://{domain name}.genauth.ai/oauth/token?username={user name}&password={password}&grant_type=password&scope={Scope}&client_id={client ID}&client_secret={client secret key}
¶ Client mode
¶ Modify the project configuration file
Find src/main/resources/application.properties and fill in the project information:
server.port=8081
spring.security.oauth2.client.registration.authing.client-id={replace with your App ID, such as: 5e72d72e379xxxxx3e1d57b13}
spring.security.oauth2.client.registration.authing.client-name=authing
spring.security.oauth2.client.registration.authing.client-secret={replace with your App Secret such as: 931f19ce216xxxxx2f586c706ee6}
spring.security.oauth2.client.registration.authing.authorization-grant-type=client_credentials
spring.security.oauth2.client.registration.authing.client-authentication-method=POST
spring.security.oauth2.client.registration.authing.scope=profile
spring.security.oauth2.client.provider.authing.token-uri=https://{replace with your Issuer, such as: authing-net-sdk-demo}.genauth.ai/oauth/token
You need to replace {client-id}, {client-secret}, {token-uri} here with the actual information in the previous step "Application Configuration".
¶ Business-side processing
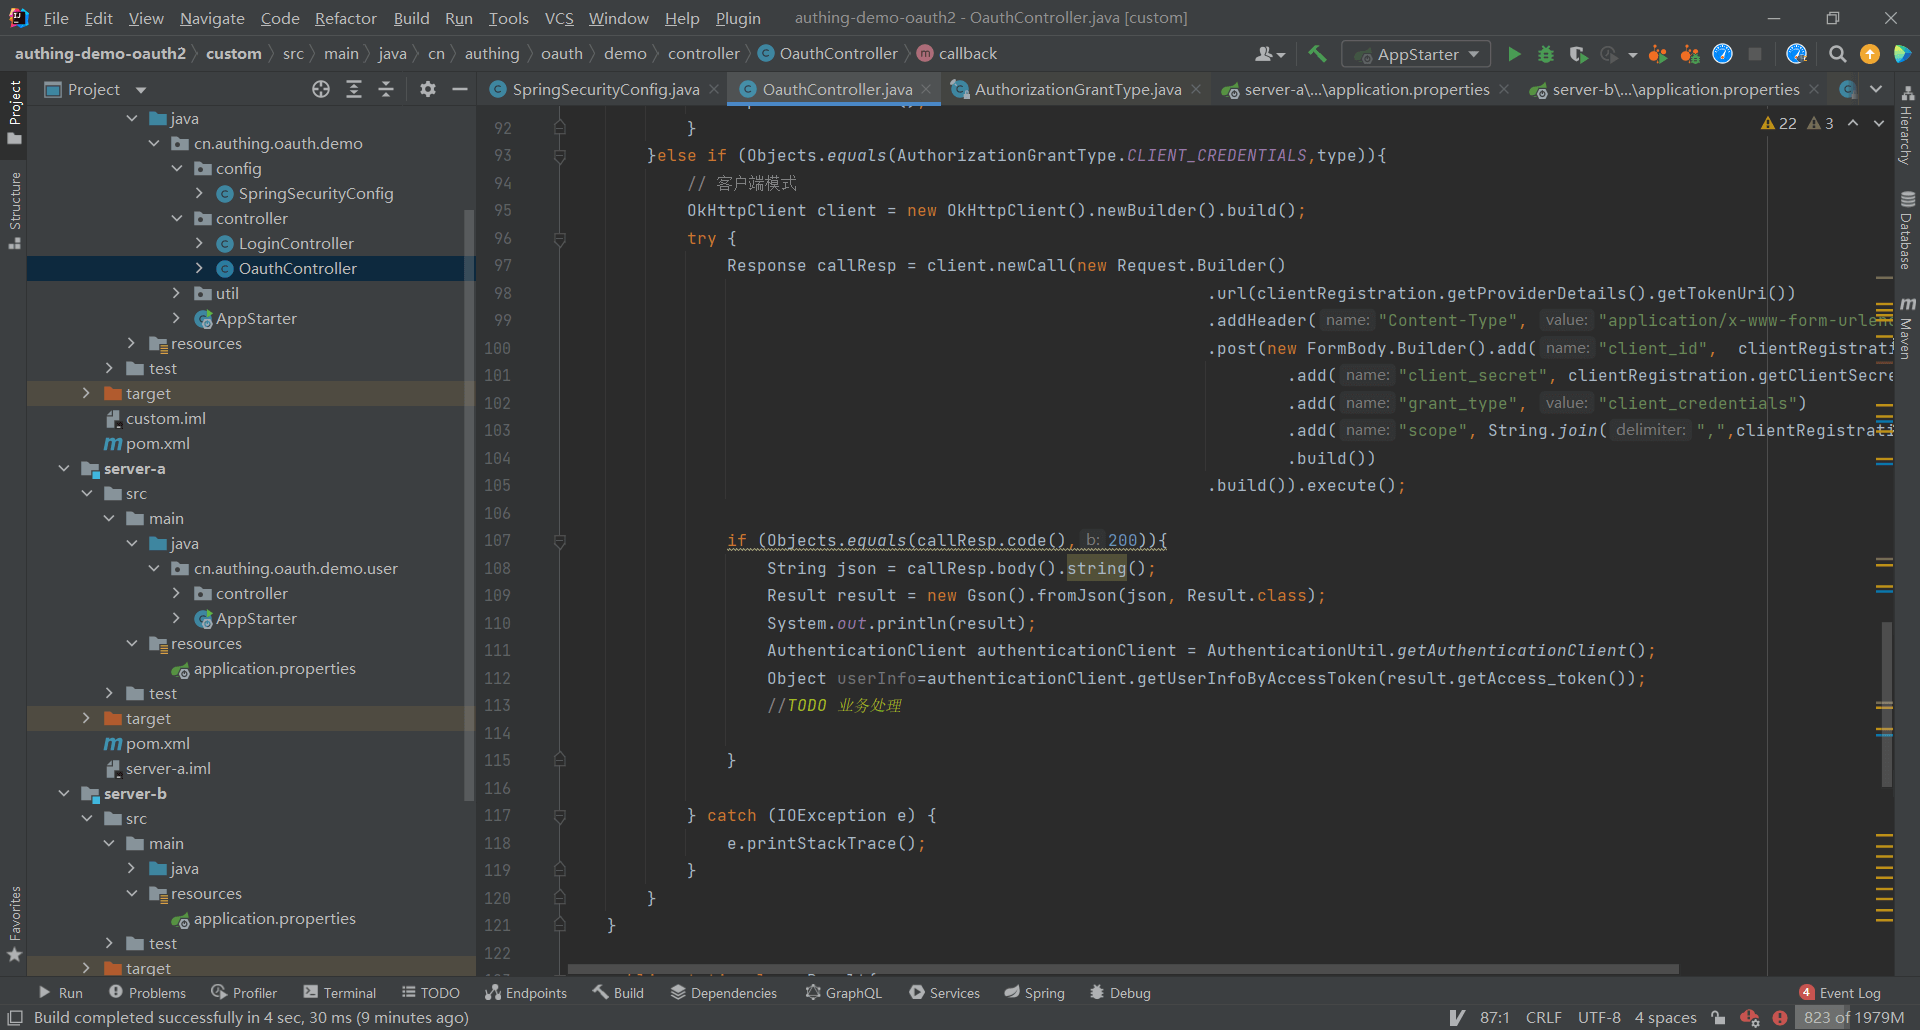
Client mode is similar to password mode, and tokens are exchanged through application ID and application secret key.
Authentication address https://{domain name}.genauth.ai/oauth/token?grant_type=client_credentials&scope={Scope}&client_id={client ID}&client_secret={client secret key}
¶ Simplified mode
¶ Modify the project configuration file
Find src/main/resources/application.properties and fill in the project information:
server.port=8080
spring.security.oauth2.client.registration.authing.client-id={replace with your App ID, such as: 5e72d72e379xxxxx3e1d57b13}
spring.security.oauth2.client.registration.authing.client-name=authing
spring.security.oauth2.client.registration.authing.client-secret={replace with your App Secret such as: 931f19ce216xxxxx2f586c706ee6}
spring.security.oauth2.client.registration.authing.authorization-grant-type=implicit
spring.security.oauth2.client.registration.authing.client-authentication-method=POST
spring.security.oauth2.client.registration.authing.redirect-uri={replace with your redirect-uri such as: http://localhost:8080/login/oauth2/code/authing}
spring.security.oauth2.client.registration.authing.scope=profile
spring.security.oauth2.client.provider.authing.token-uri=https://{replace with your Issuer, such as: authing-net-sdk-demo}.genauth.ai/oauth/token
You need to change the following here Replace {client-id}, {client-secret}, {token-uri}, and {redirect-uri} with the actual information in the "Application Configuration" step.
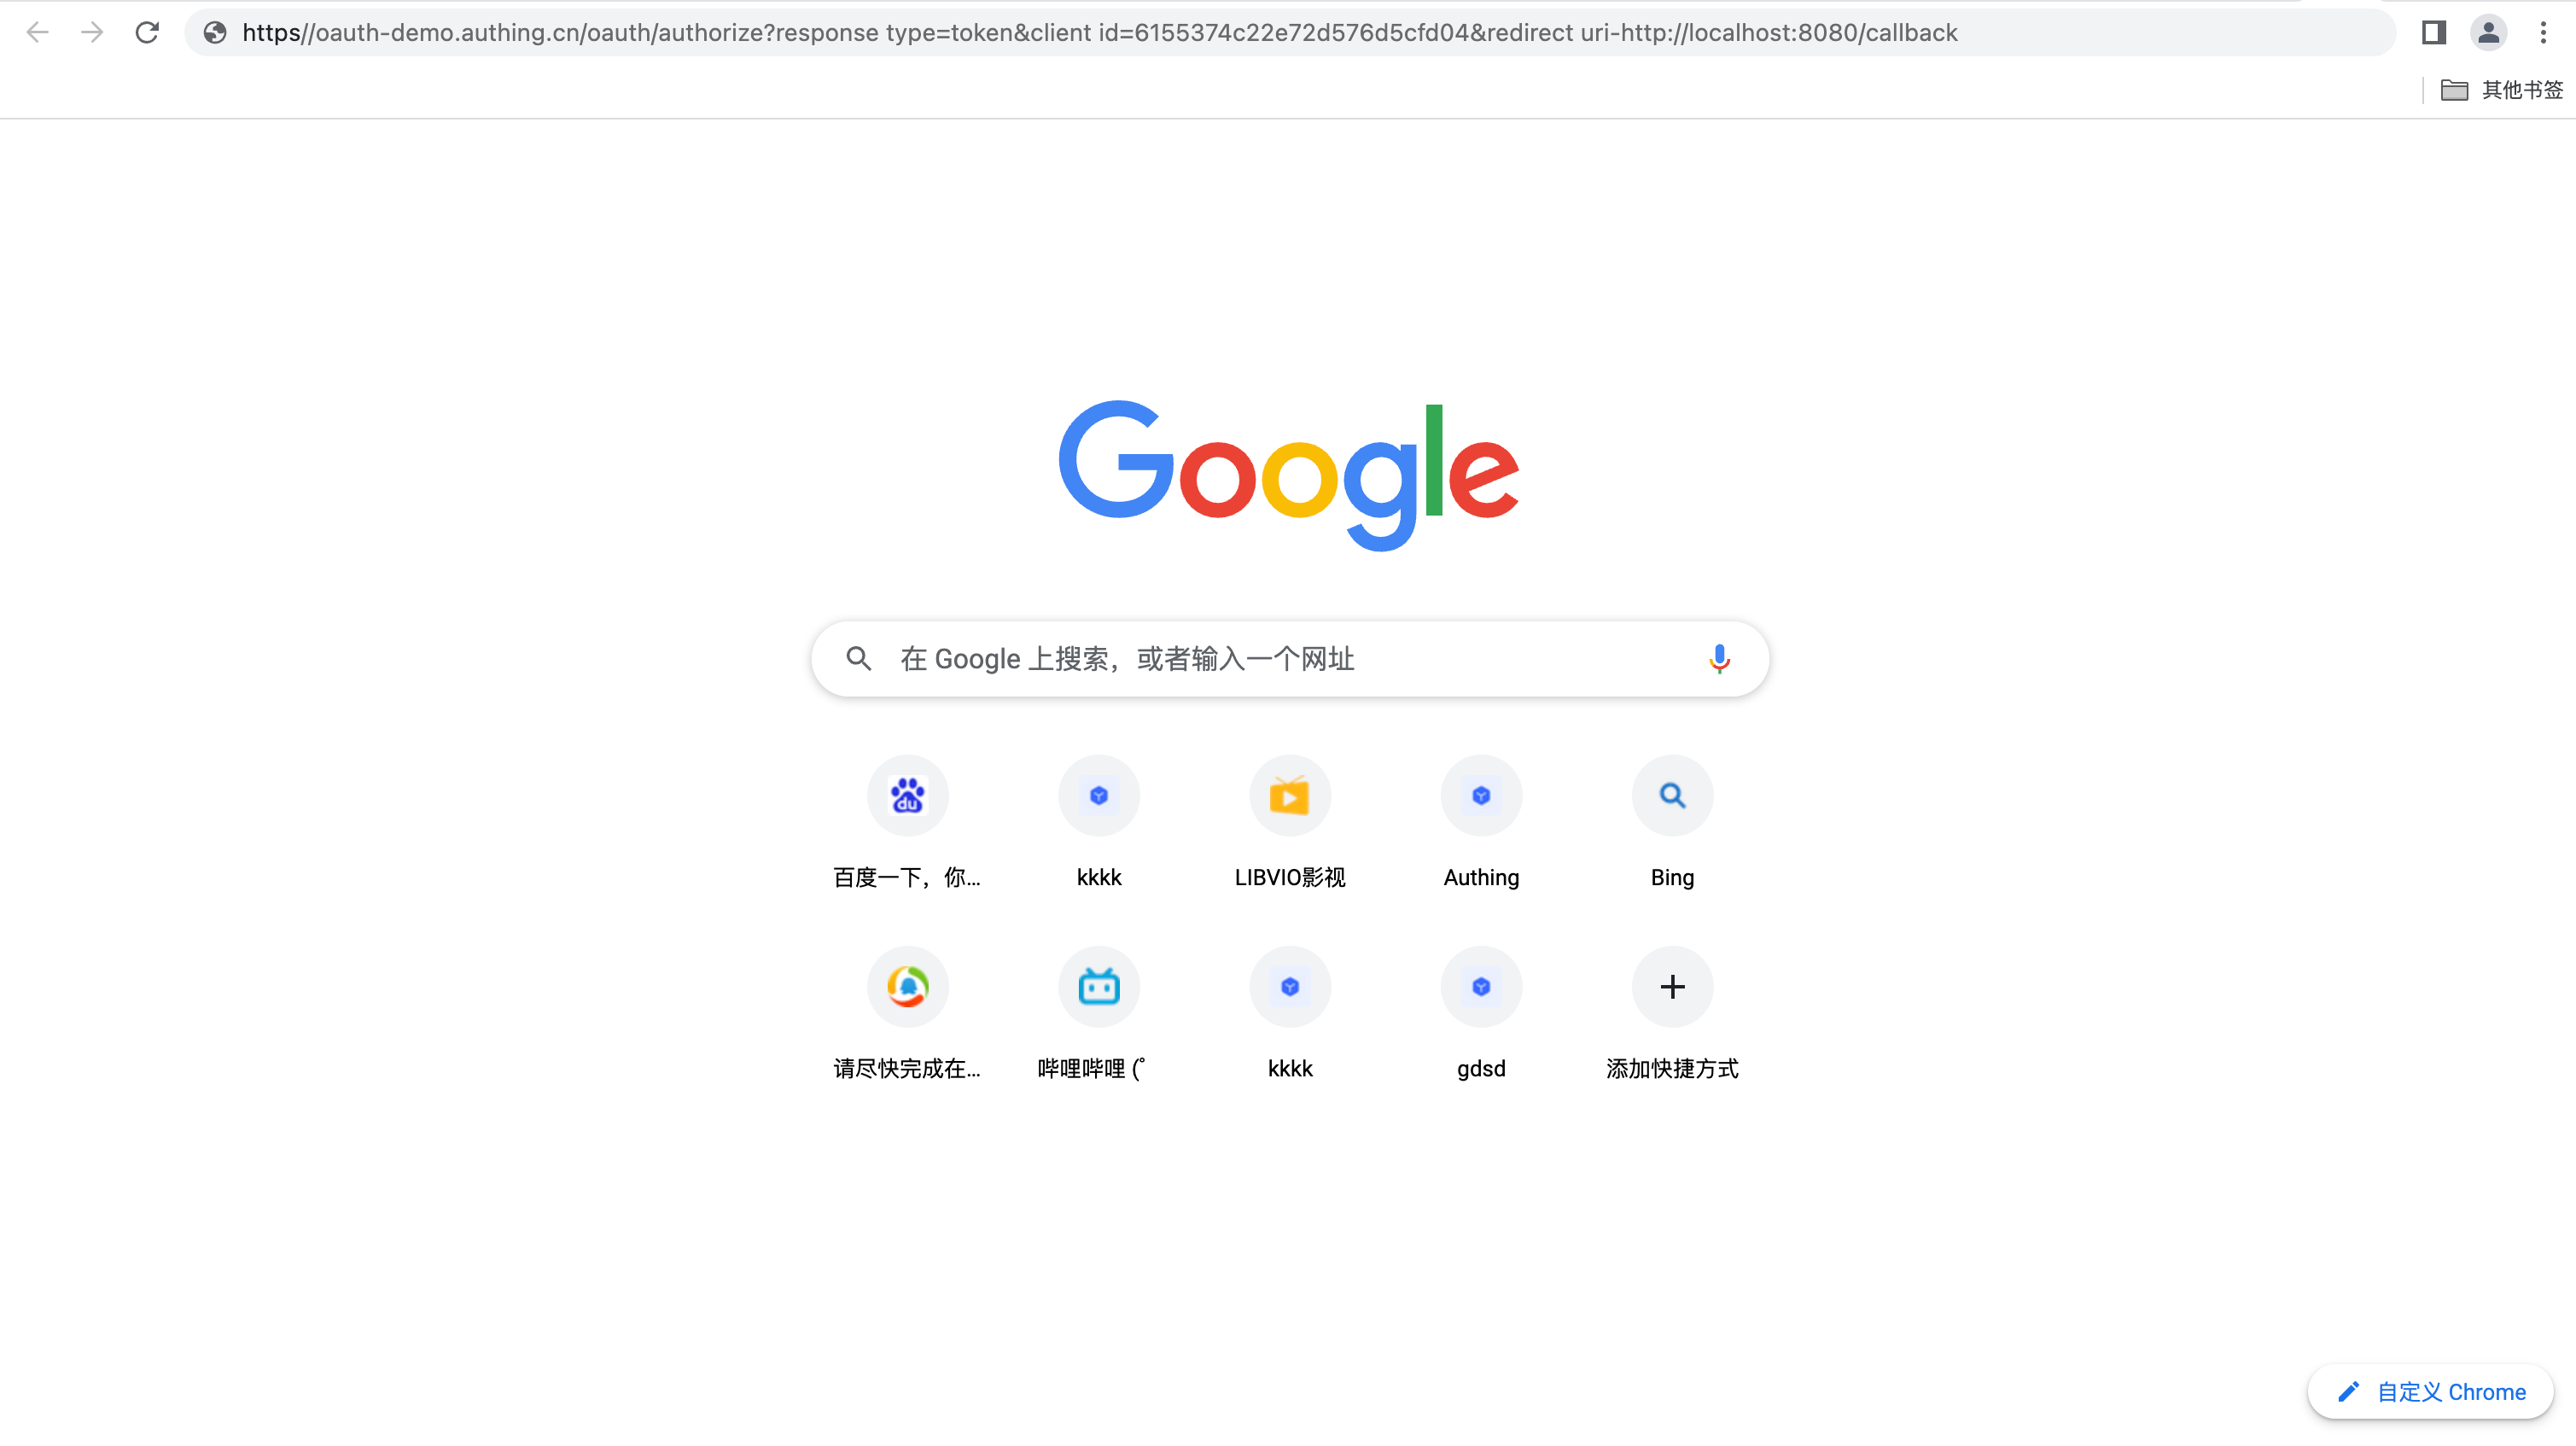
In simplified mode, users directly initiate token exchange operations through the browser without the need for backend participation.
Authentication address https://{domain name}.genauth.ai/oauth/authorize?response_type=token&client_id={client ID}&redirect_uri={callback address}&scope={SCOPE}&state={state}
After authentication and authorization, the browser redirects to the callback address and carries the access token. 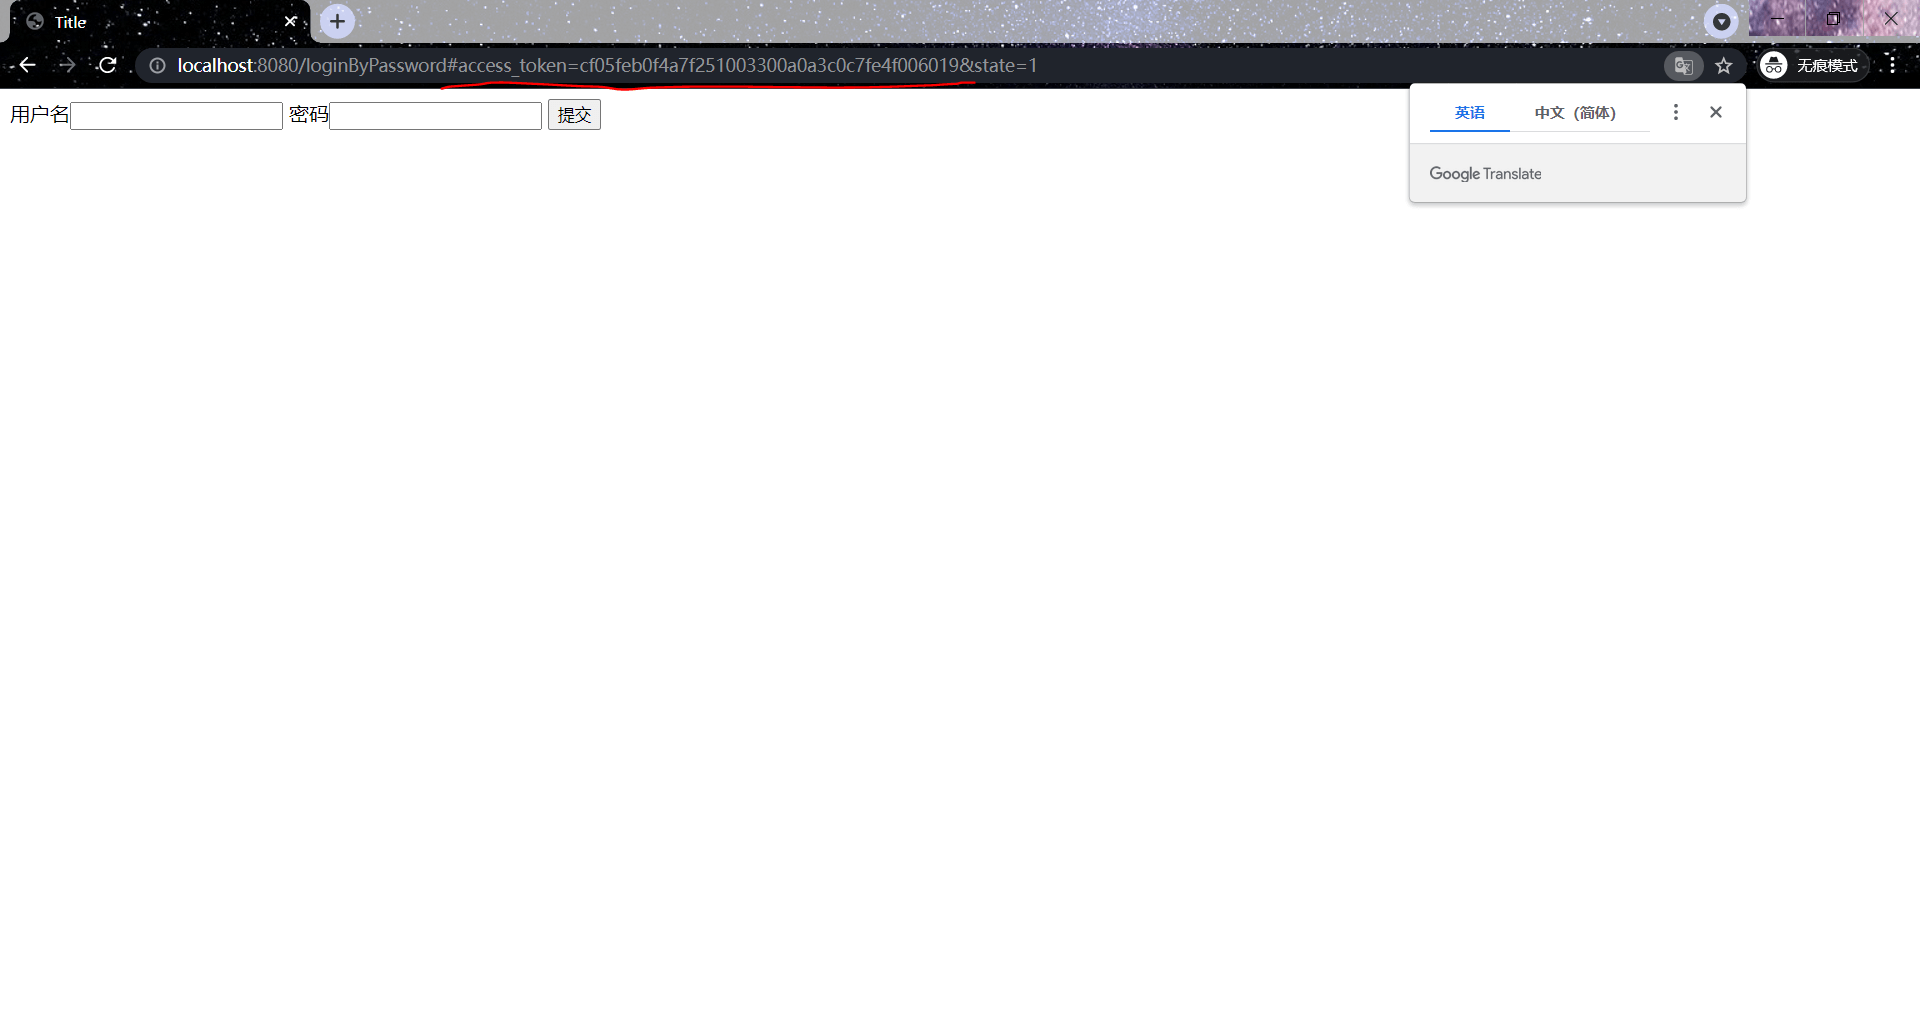
¶ Single sign-on
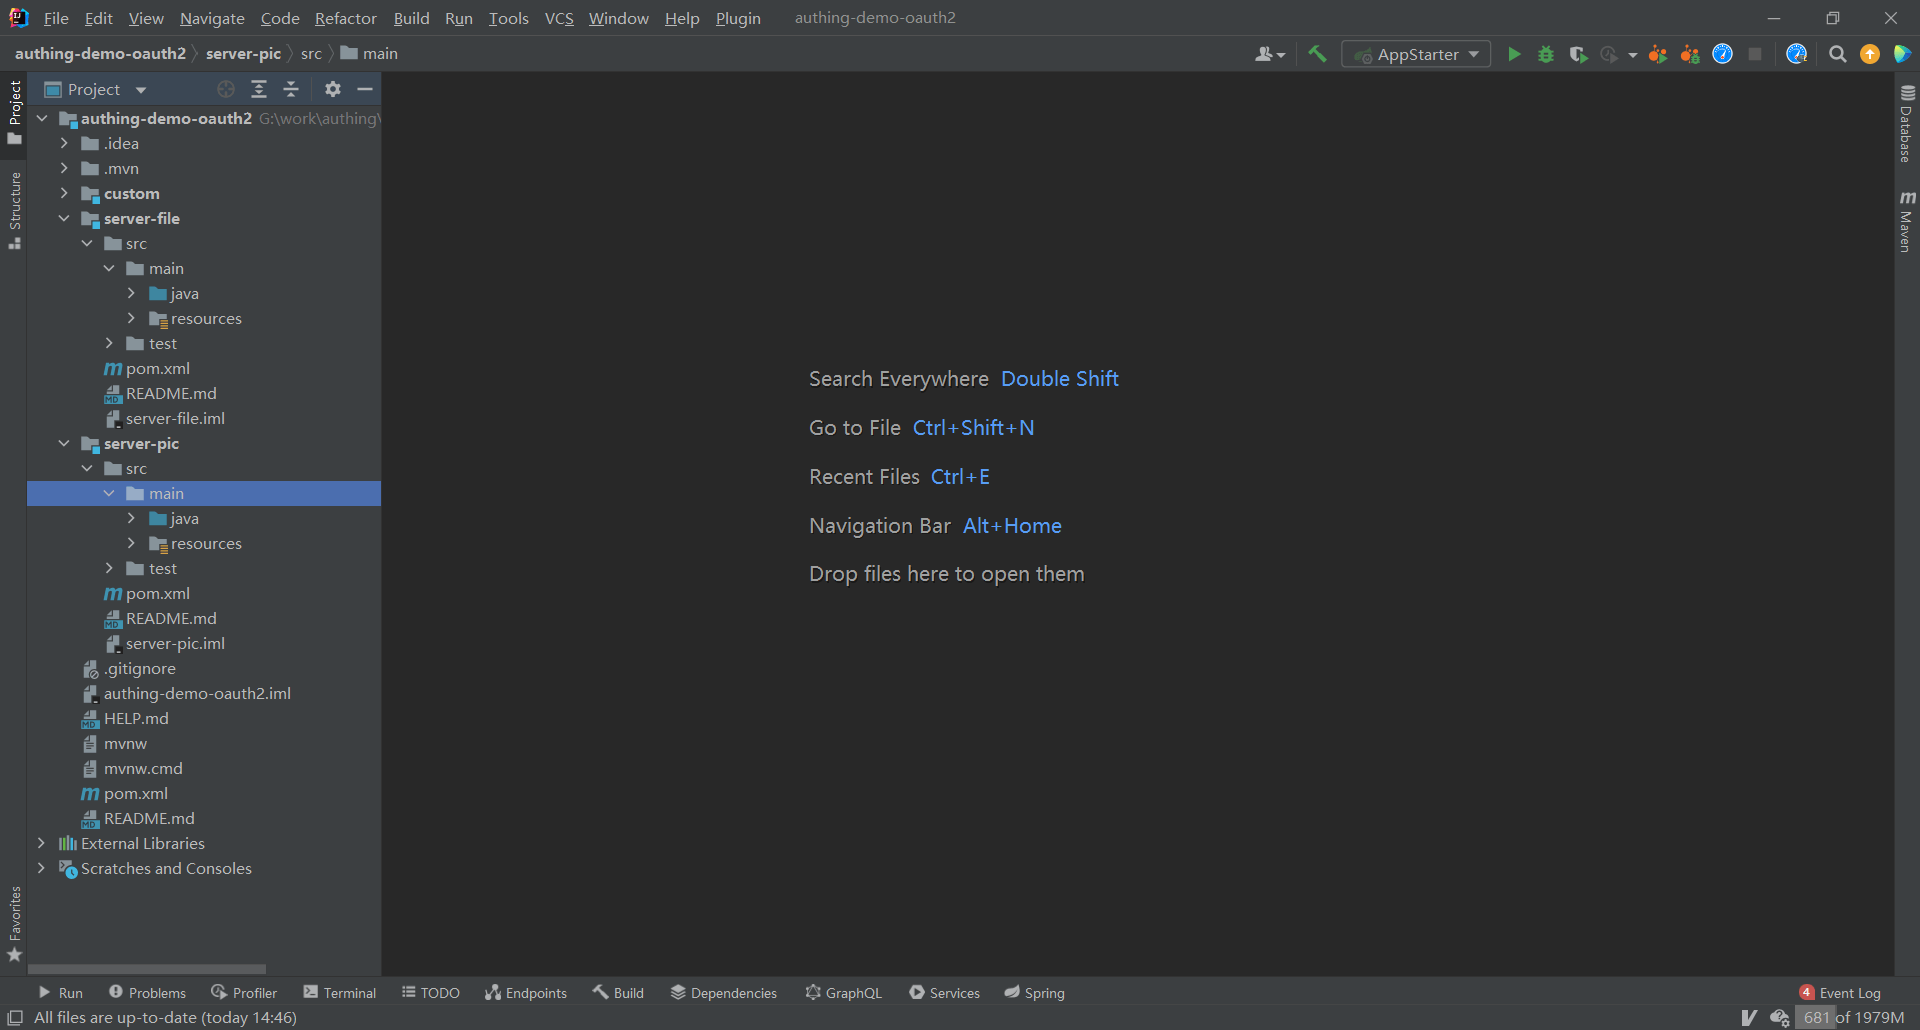
¶ Create projects server-file, server-pic
¶ Modify project configuration files
server-file
server.port=8081
spring.security.oauth2.client.registration.authing.client-id={Replace with your App ID such as: 5e72d72e379xxxxx3e1d57b13}
spring.security.oauth2.client.registration.authing.client-name=authing
spring.security.oauth2.client.registration.authing.client-secret={Replace with your App Secret such as: 931f19ce216xxxxx2f586c706ee6} spring.security.oauth2.client.registration.authing.authorization-grant-type=authorization_code spring.security.oauth2.client.registration.authing.client-authentication-method=POST spring.security.oauth2.client.registration.authing.redirect-uri={Replace with your redirect-uri such as: http://localhost:8080/login/oauth2/code/authing} spring.security.oauth2.client.registration.authing.scope=profile spring.security.oauth2.client.provider.authing.use r-info-authentication-method=form spring.security.oauth2.client.provider.authing.authorization-uri=https://{replace with your Issuer, such as: authing-net-sdk-demo}.genauth.ai/oauth/auth spring.security.oauth2.client.provider.authing.user-name-attribute=username spring.security.oauth2.client.provider.authing.token-uri=https://{replace with your Issuer, such as: authing-net-sdk-demo}.genauth.ai/oauth/token spring.security.oauth2.client.provider.authing.user-info-uri=https://core.genauth.ai/oauth/me ```

> server-pic

```properties
server.port=8082
spring.security.oauth2.client.registration.authing.client-id={replace with your App ID, such as: 5e72d72e379xxxxx3e1d57b13}
spring.security.oauth2.client.registration.authing.client-name=authing
spring.security.oauth2.client.registration.authing.client-secret={replace with your App Secret such as: 931f19ce216xxxxx2f586c706ee6} spring.security.oauth2.client.registration.authing.authorization-grant-type=authorization_code spring.security.oauth2.client.registration.authing.client-authentication-method=POST spring.security.oauth2.client.registration.authing.redirect-uri=http://localhost:${server.port}/login/oauth2/code/authing spring.security.oauth2.client.registration.authing.scope=profile spring.security.oauth2.client.provider.authing.user-info -authentication-method=form
spring.security.oauth2.client.provider.authing.authorization-uri=https://{replace with your Issuer, such as: authing-net-sdk-demo}.genauth.ai/oauth/auth
spring.security.oauth2.client.provider.authing.user-name-attribute=username
spring.security.oauth2.client.provider.authing.token-uri=https://{replace with your Issuer, such as: authing-net-sdk-demo}.genauth.ai/oauth/token
spring.security.oauth2.client.provider.authing.user-info-uri=https://core.genauth.ai/oauth/me
¶ Add callback address in GenAuth console
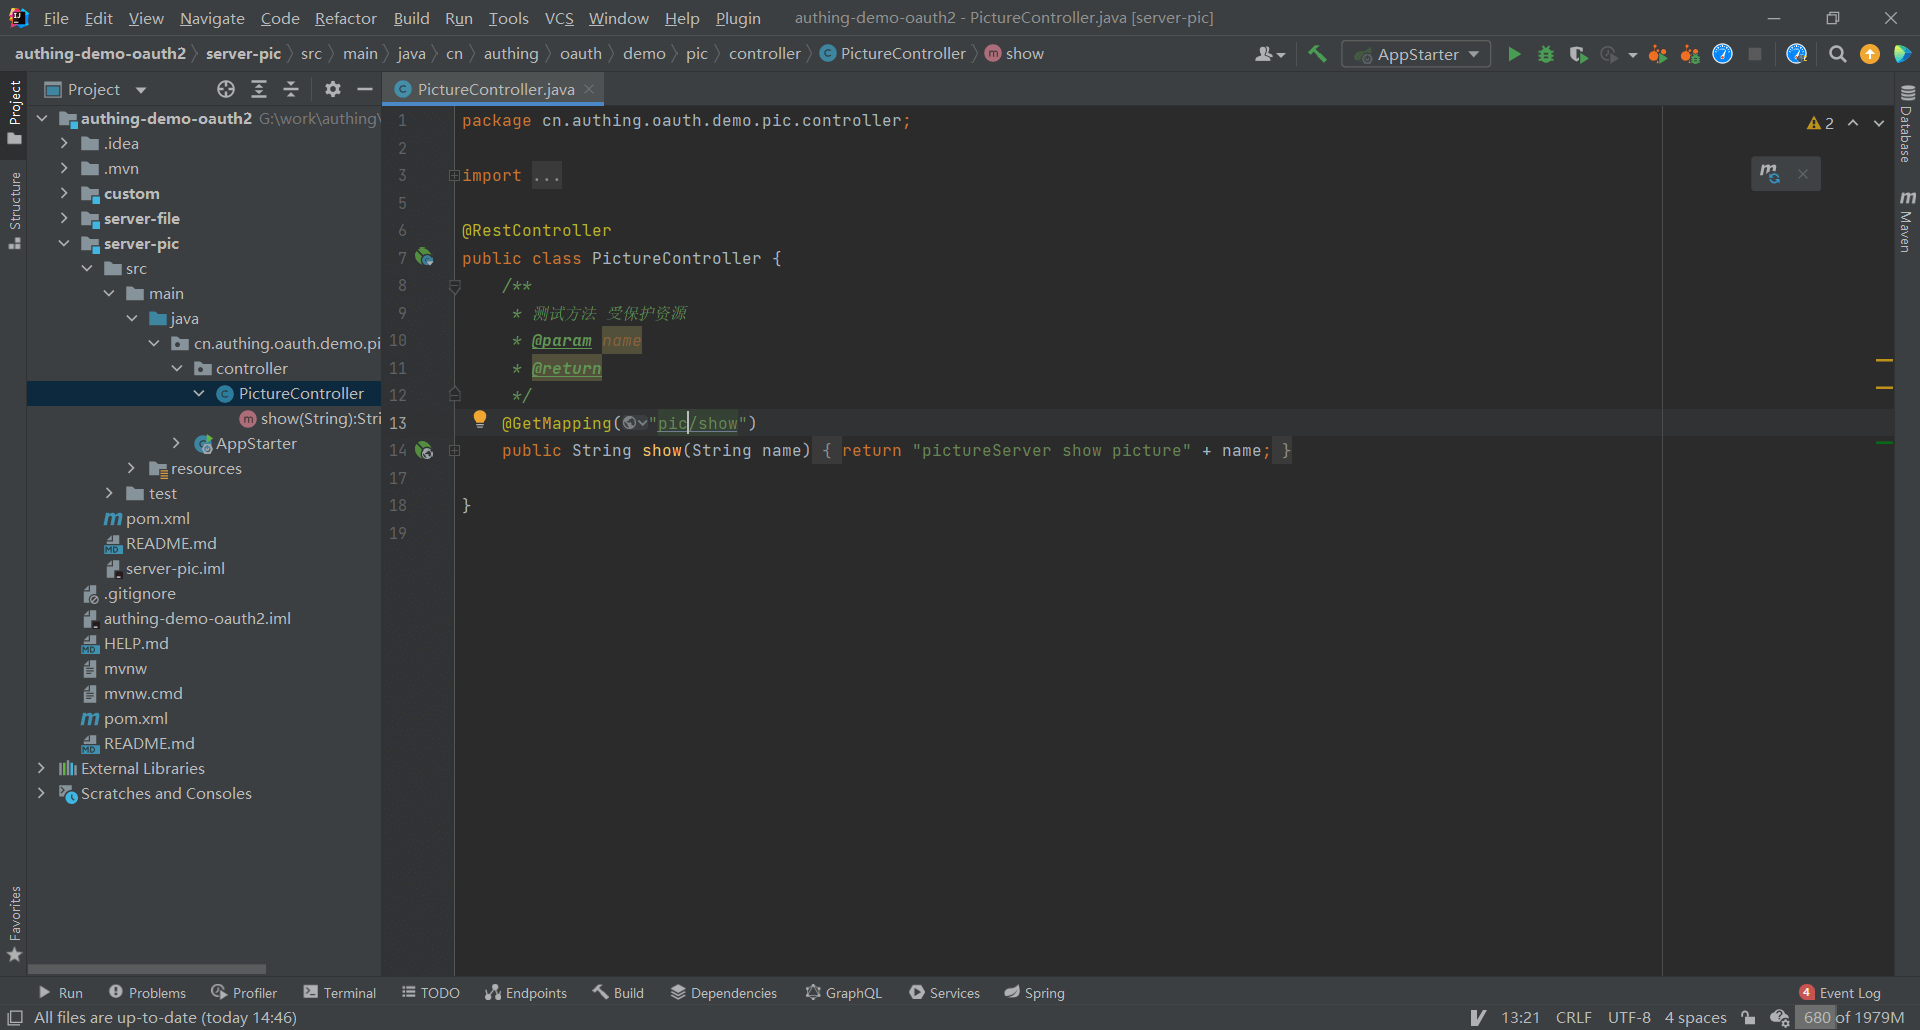
¶ Set project server-file protected resources
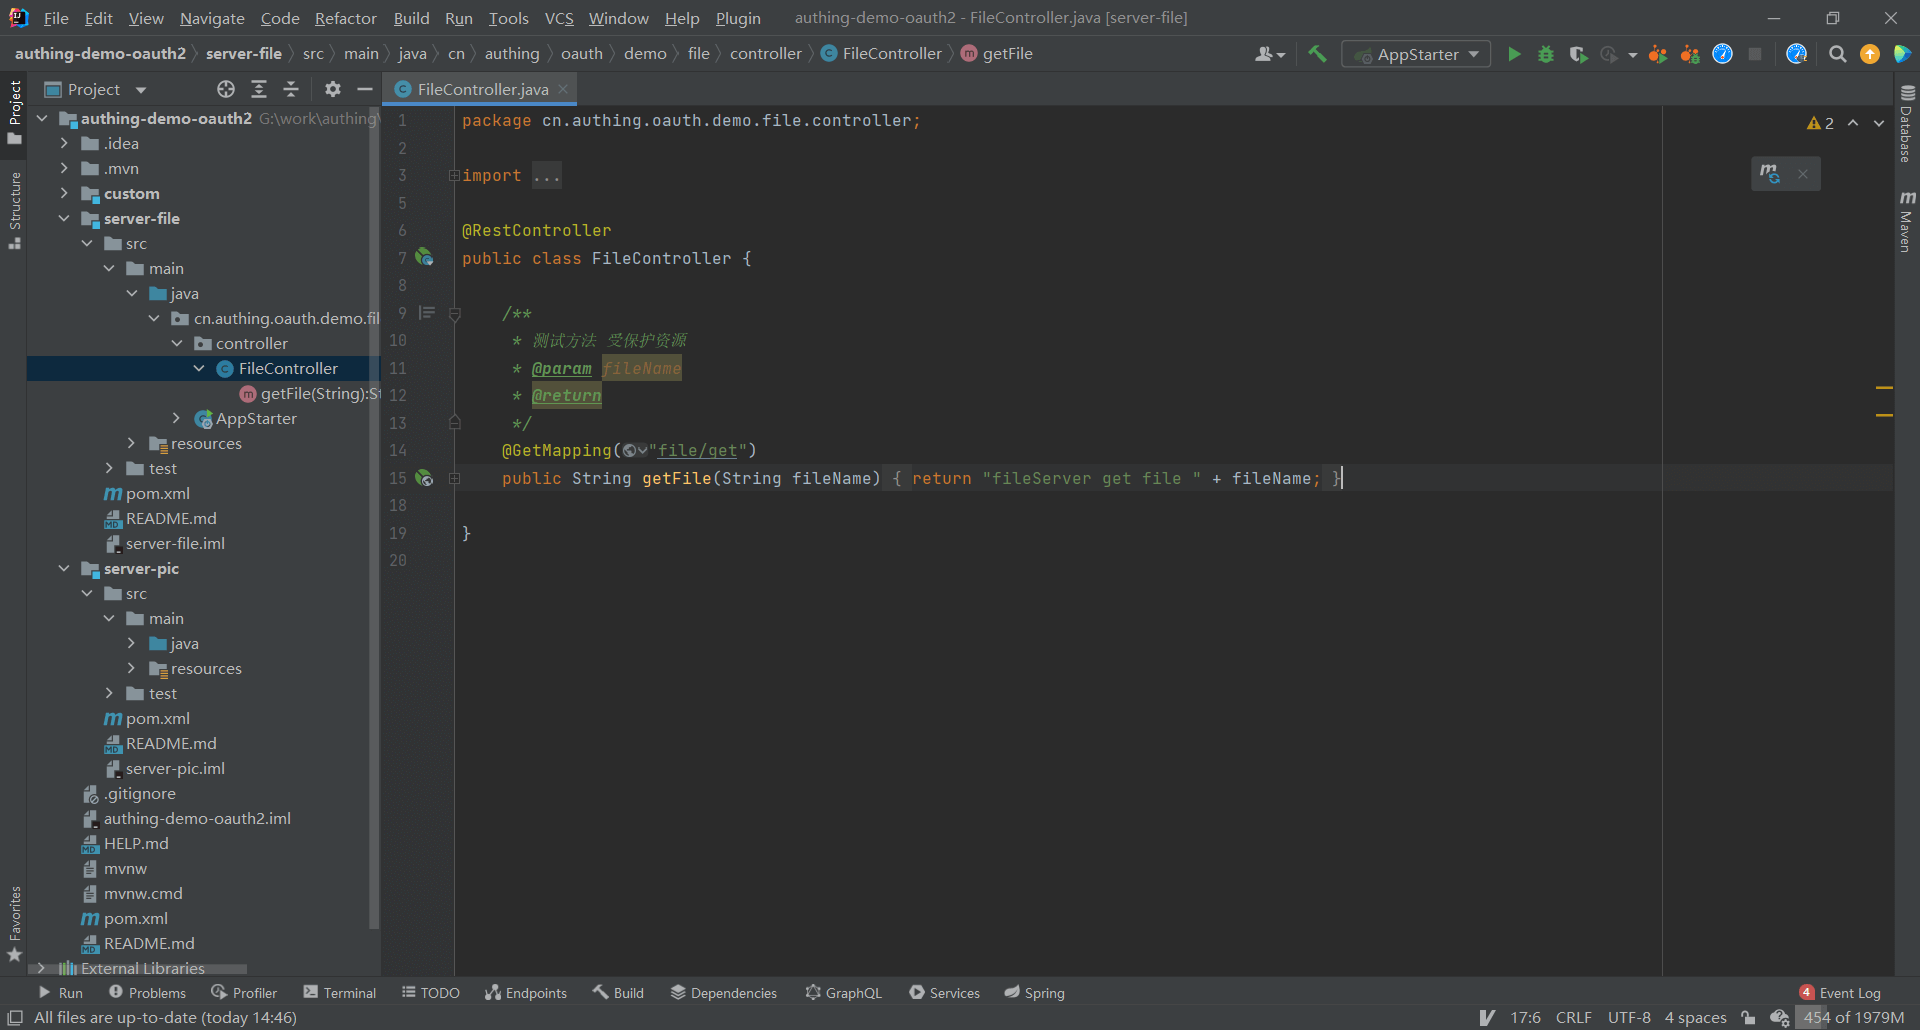
¶ Set project server-pic protected resources
¶ Verify the single sign-on effect
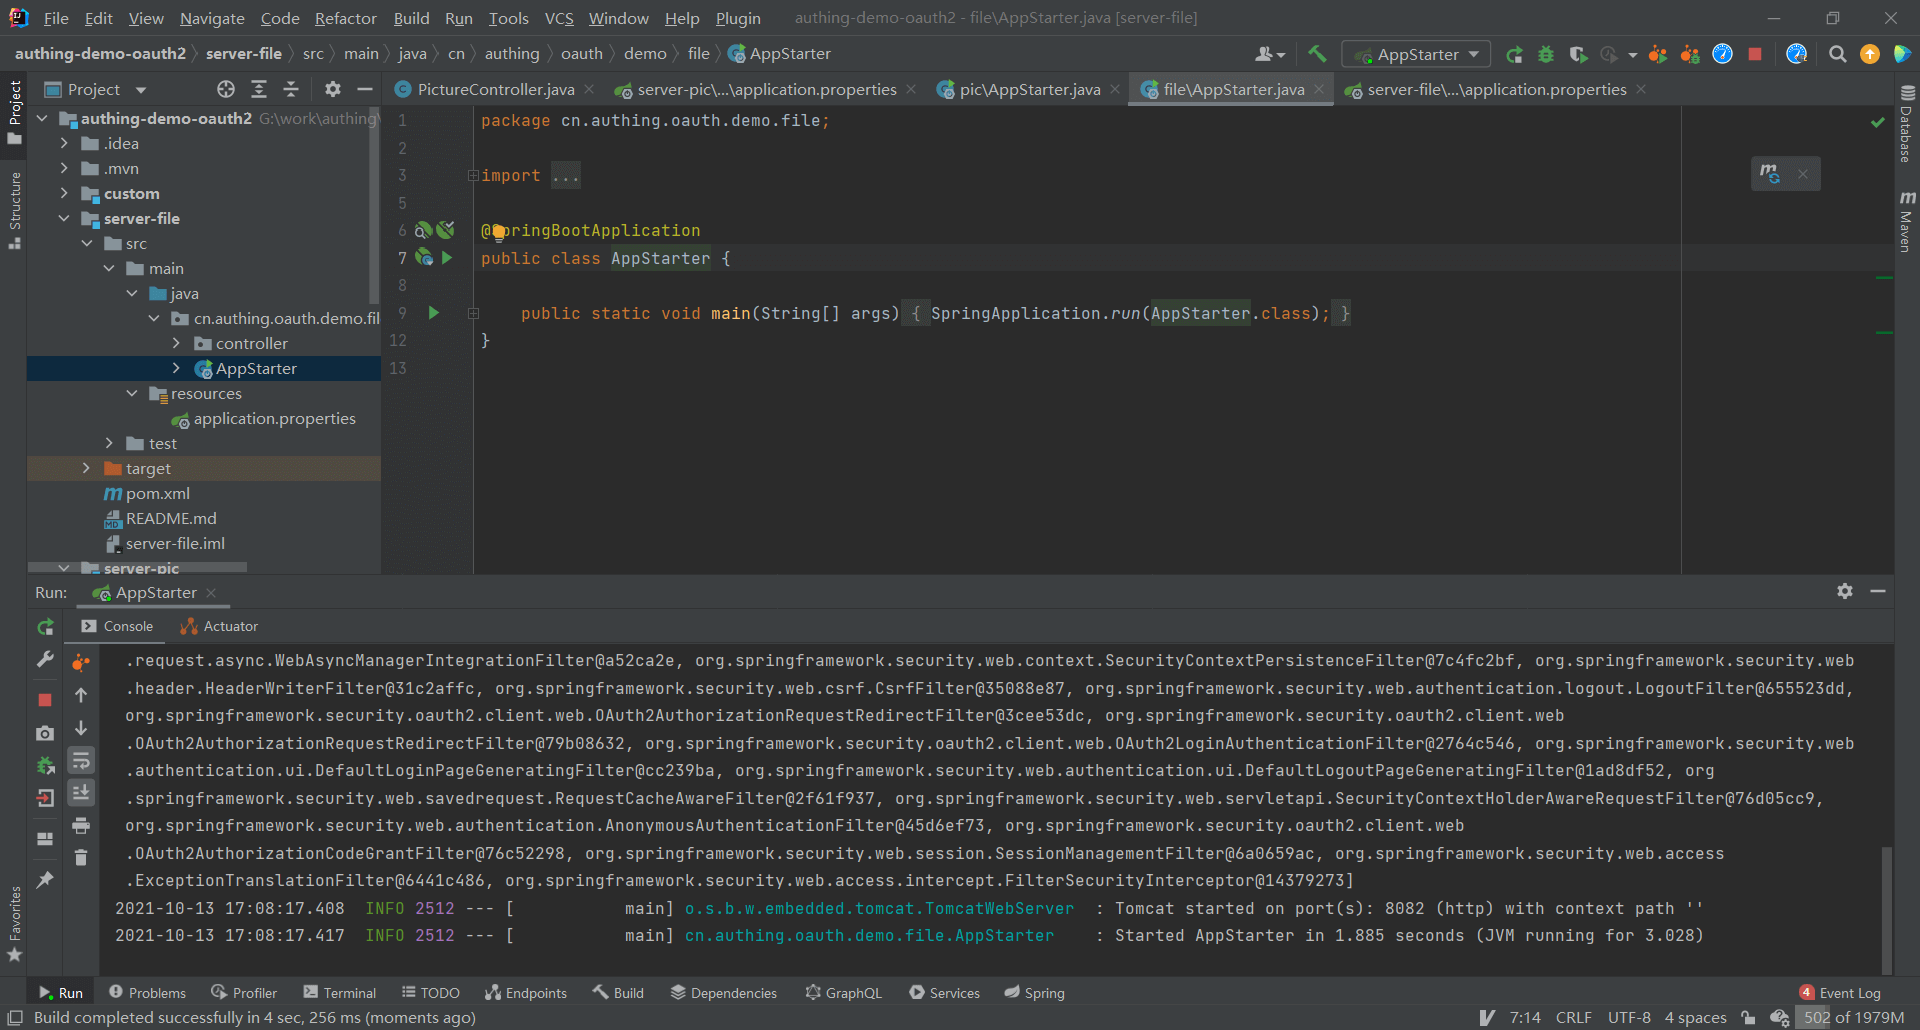
¶ Start the projects separately server-file, server-pic

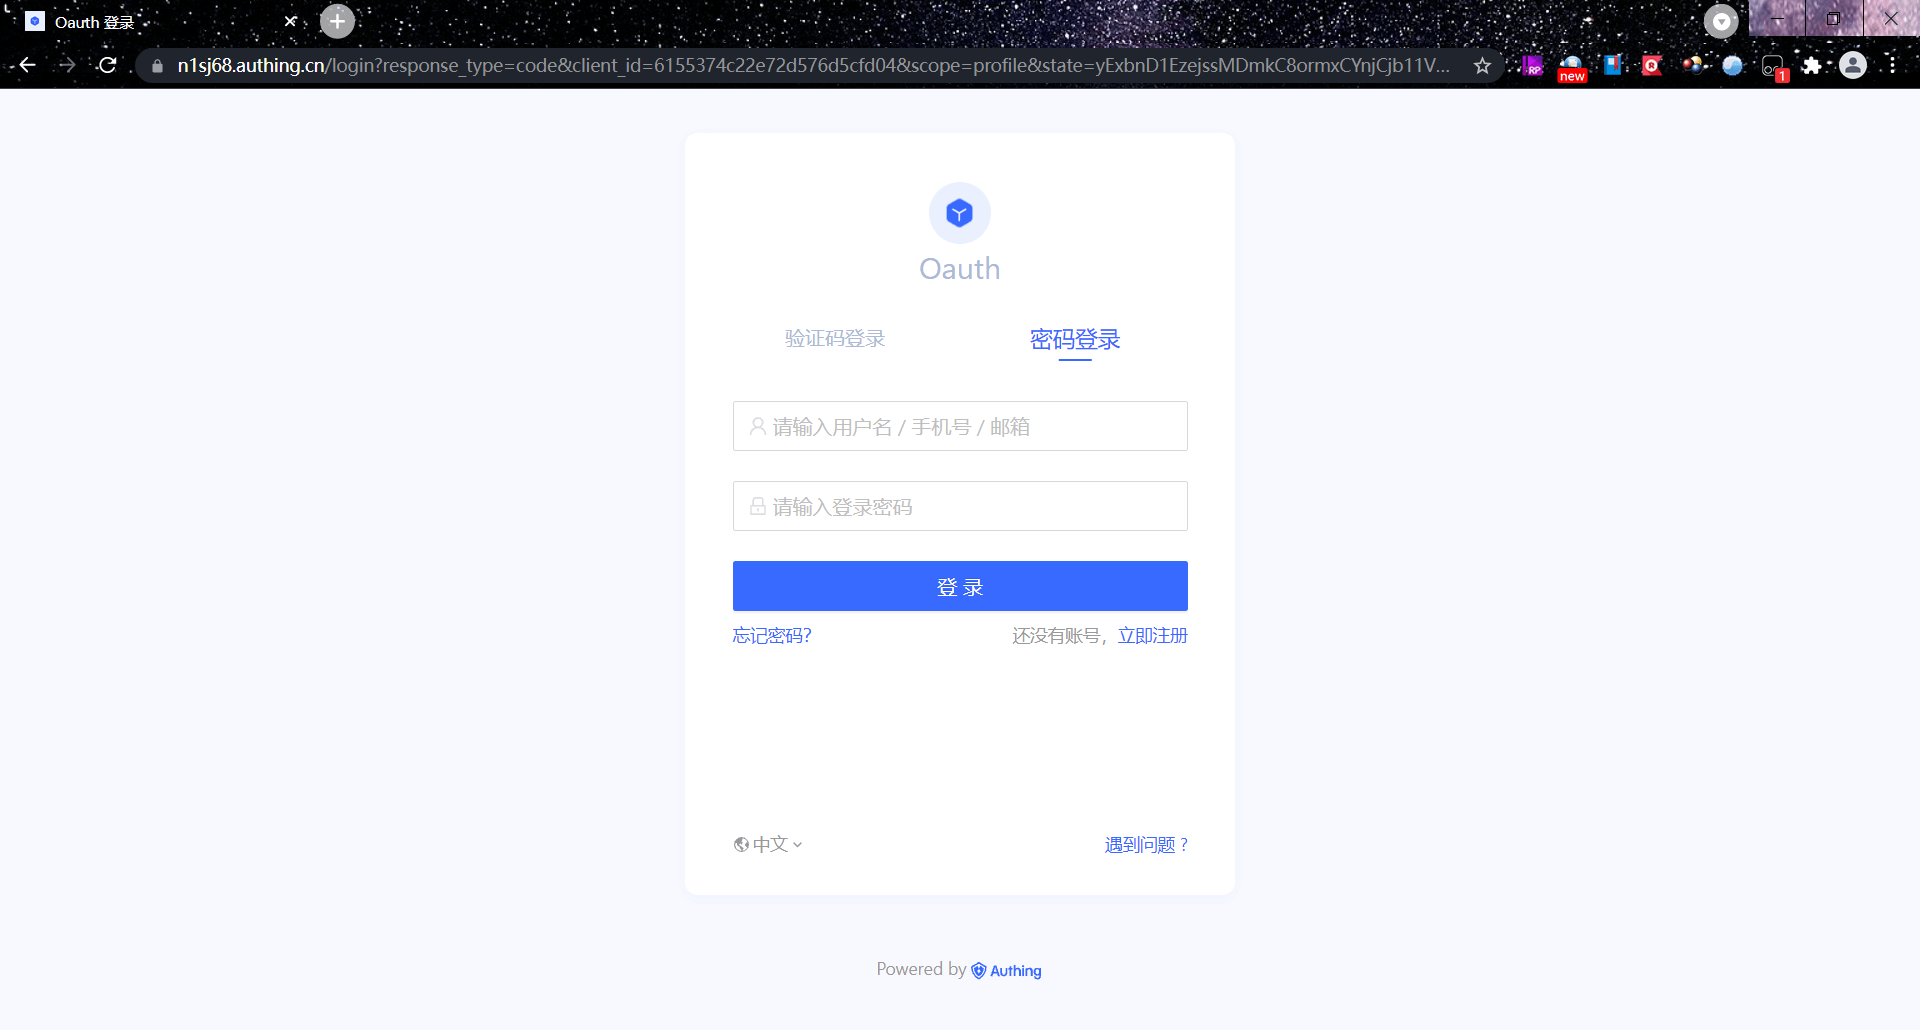
¶ Access protected resources
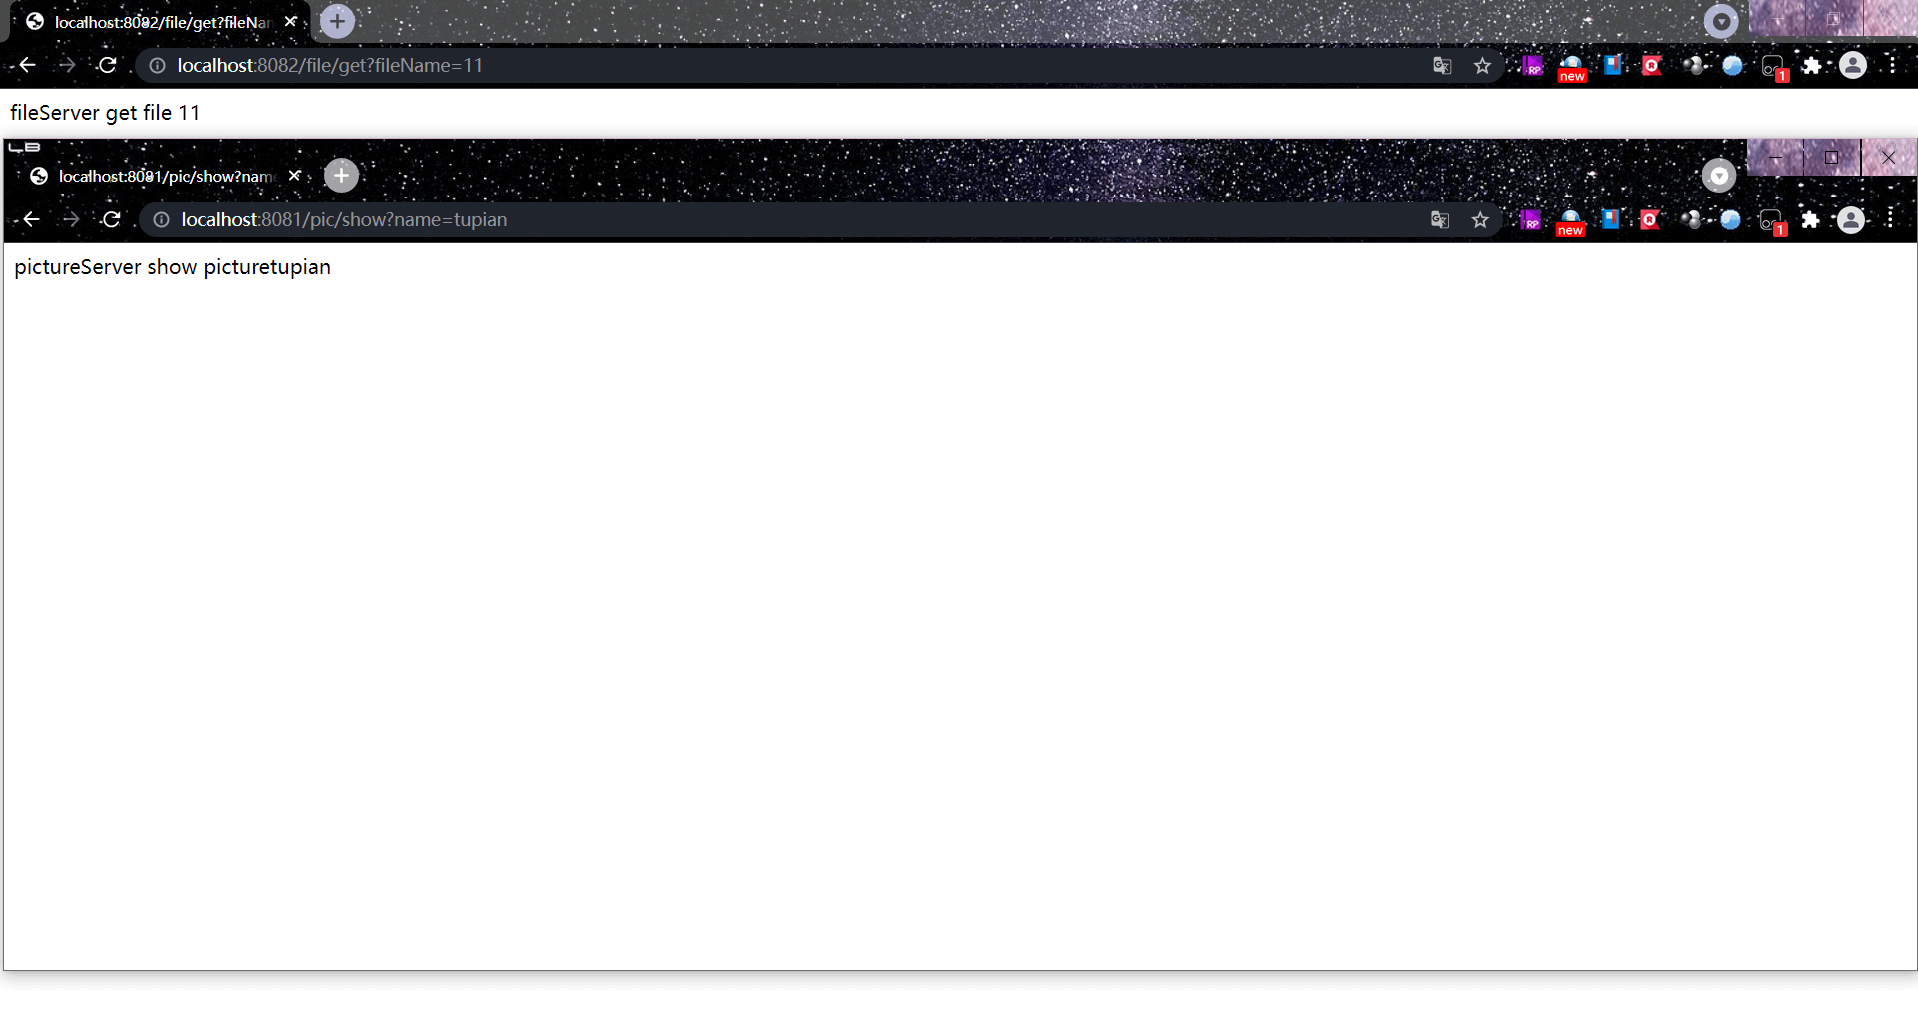
At this time, whether accessing server-file or server-pic will be redirected to the GenAuth authentication page.
¶ Access protected resources after login
After completing the login, directly accessing the resources of server-pic does not require re-authentication, and the response result can be directly returned.
¶ Extend based on Spring Security
¶ Configure the created Spring Security project

¶ Add the project callback address at the login callback URL
¶ Introduce GenAuth SDK for custom extension
<dependency>
<groupId>cn.authing</groupId>
<artifactId>java-core</artifactId>
<!-- LATEST_VERSION can be found from the maven repository: https://mvnrepository.com/search?q=cn.authing -->
<version>{LATEST_VERSION}</version>
</dependency>
¶ Next you may need
Use Spring Security to integrate OIDC
Resources on this pageExpress learning
Express Integration OIDC Single Sign-On GuideUse Spring Security to integrate CAS
Resources on this page