¶ Spring Security integrated with GenAuth OIDC to get started quickly
This article takes Spring Security 5 (opens new window), which is used to provide authentication and access control in the Spring ecosystem, as an example to introduce in detail how Spring Security 5 (opens new window) can be connected to GenAuth OIDC.
Spring Security is a security framework that provides secure access control solutions. It provides a set of beans that can be configured in the Spring application context, making full use of Spring IOC (inversion of control), DI (dependency injection) and AOP (aspect-oriented programming) functions to provide declarative security access control functions for application systems, enhancing the security of enterprise systems, and reducing the burden of writing a lot of duplicate code.
The main functions of Spring Security mainly include:
Authentication (authentication is about verifying your credentials, such as username/mobile number/email and password, to verify the identity of the visitor.)
Authorization (authorization occurs after the system completes identity authentication, and ultimately grants you full access to resources, which determines your ability to access the system and the extent to which you can do so.)
Attack protection (used to prevent and resist malicious attacks on the network.)
¶ Integration Introduction
GenAuth OIDC allows clients to verify the identity of end users based on the authentication performed by the authorization server, and obtain basic profile information about end users in an interoperable and REST-like manner. Allows all types of clients, including web-based, mobile, and JavaScript clients, to request and receive information about authenticated sessions and end-users. The specification suite is extensible, allowing participants to use optional features when it makes sense for them, such as encryption of identity data, discovery of OpenID providers, and session management. Allows application and site developers to authenticate users without taking on the responsibility of storing and managing passwords, as the Internet is rife with people who would try to compromise user accounts for their own gain. It's simple, reliable, secure, and frees them from the difficult and dangerous job of storing and managing other people's passwords. As an added benefit, it also makes the user registration process easier, thereby reducing the user bounce rate (opens new window). Use the GenAuth OIDC service as the unified entrance to the user authentication center, so that all logins are done by the OIDC service. In simple terms, it is to strip out the parts that need to be user authenticated and hand them over to the OIDC authentication center to complete.
Taking the OIDC service provided by GenAuth as an example, the method of integrating GenAuth OIDC single sign-on using Spring Security 5 will be introduced in detail.
¶ Spring Boot project construction
This article will introduce two construction methods: Spring Initializr and maven.
¶ Development environment
- Development tool: IDEA
- Project management tool: Maven
- JDK version: 1.8
¶ Use Spring Initializr to quickly build a project
Open IDEA, click New Project to create a new project, select Spring Initializr to create a Spring Boot project, and enter the project's Group and Artifact information. 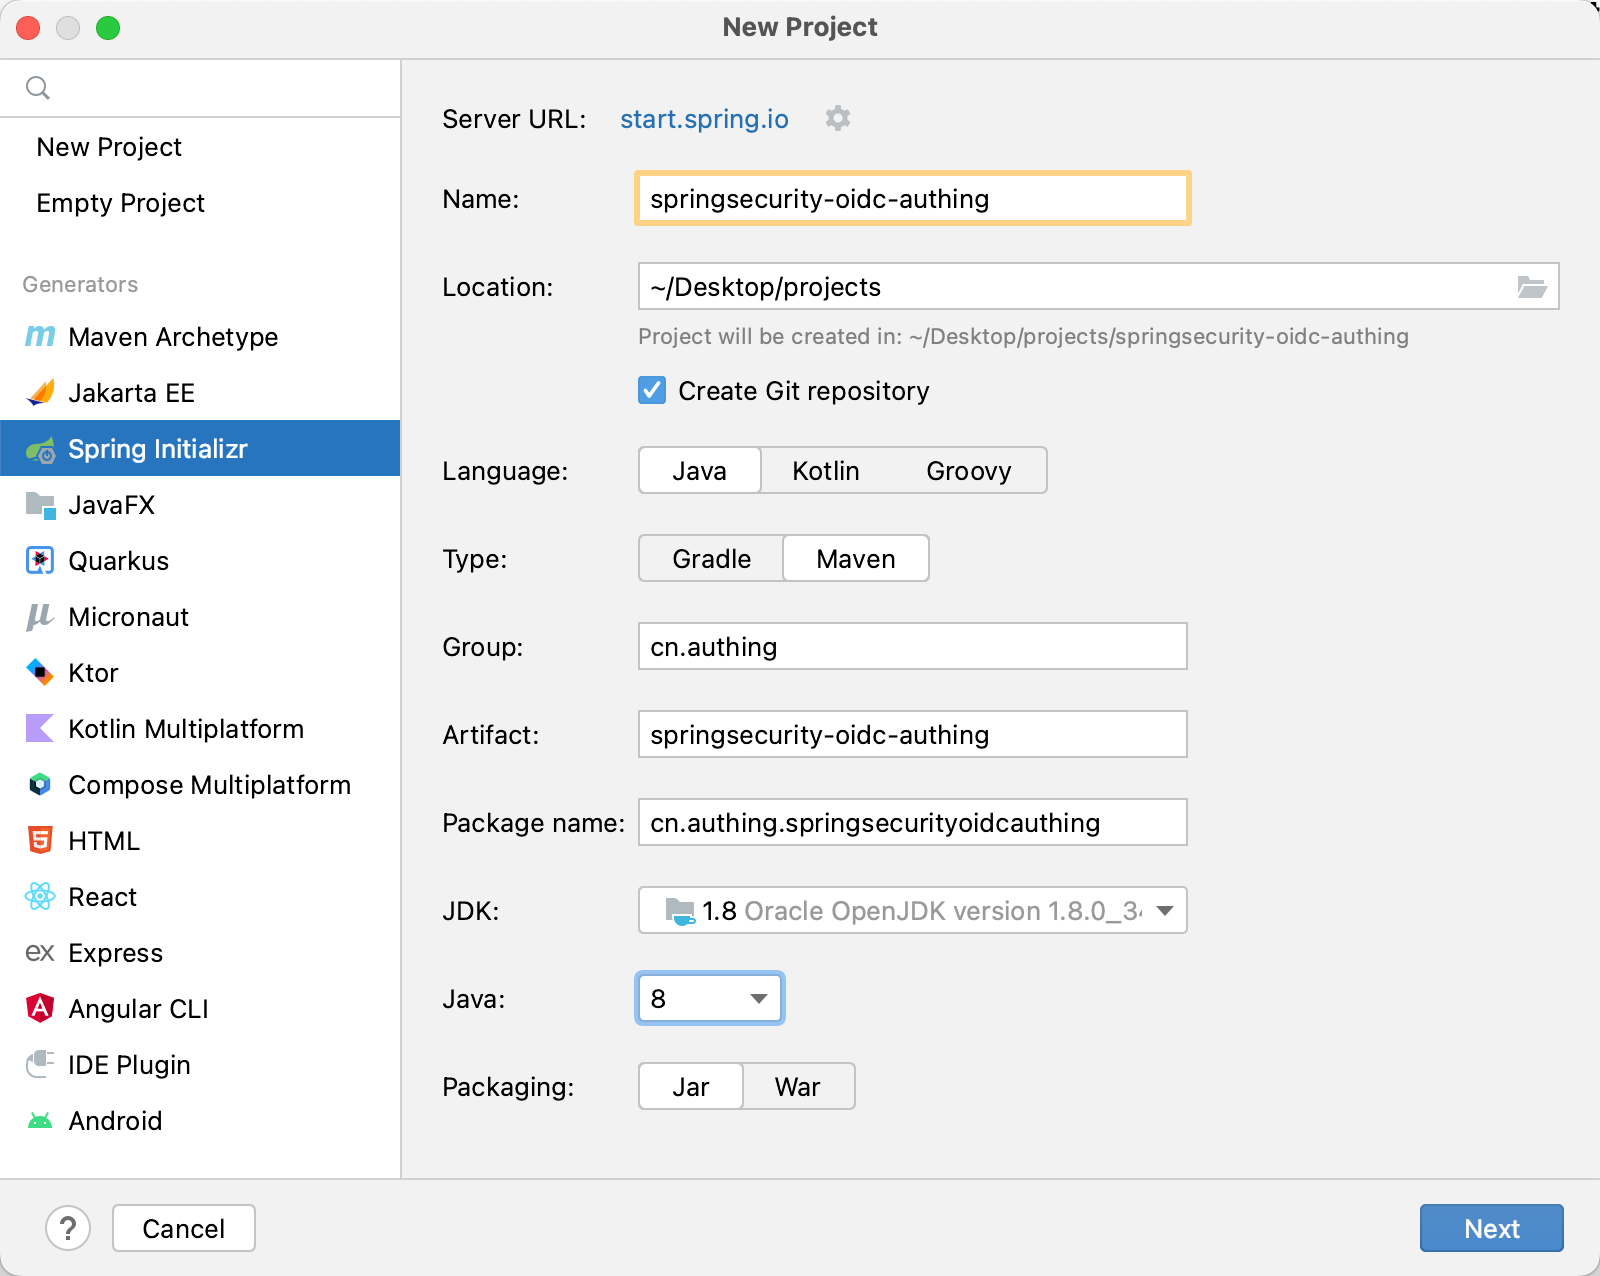
Add Spring Web and Spring Security dependencies. 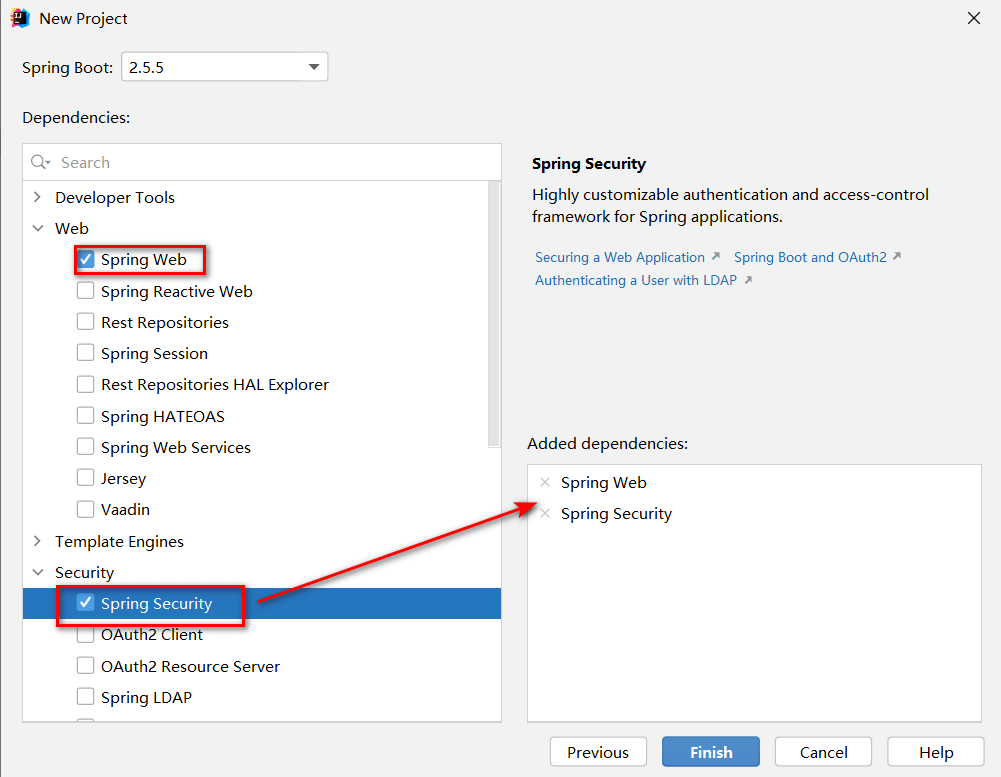
In addition, some other dependency packages need to be added to pom.xml during the integration process, as follows:
<dependency>
   <groupId>org.springframework.security</groupId>
   <artifactId>spring-security-config</artifactId>
</dependency>
<dependency>
   <groupId>org.springframework.security</groupId>
   <artifactId>spring-security-oauth2-client</artifactId>
</dependency>
<dependency>
   <groupId>org.springframework.security</groupId>
   <artifactId>spring-security-oauth2-jose</artifactId>
</dependency>
<dependency>
    <groupId>cn.hutool</groupId>
    <artifactId>hutool-http</artifactId>
    <version>5.7.11</version>
</dependency>
¶ Use Maven to build a project
Open IDEA, click New Project to create a new project, select Maven to create a Maven project, then click Next, fill in the project name, and finally Finish. 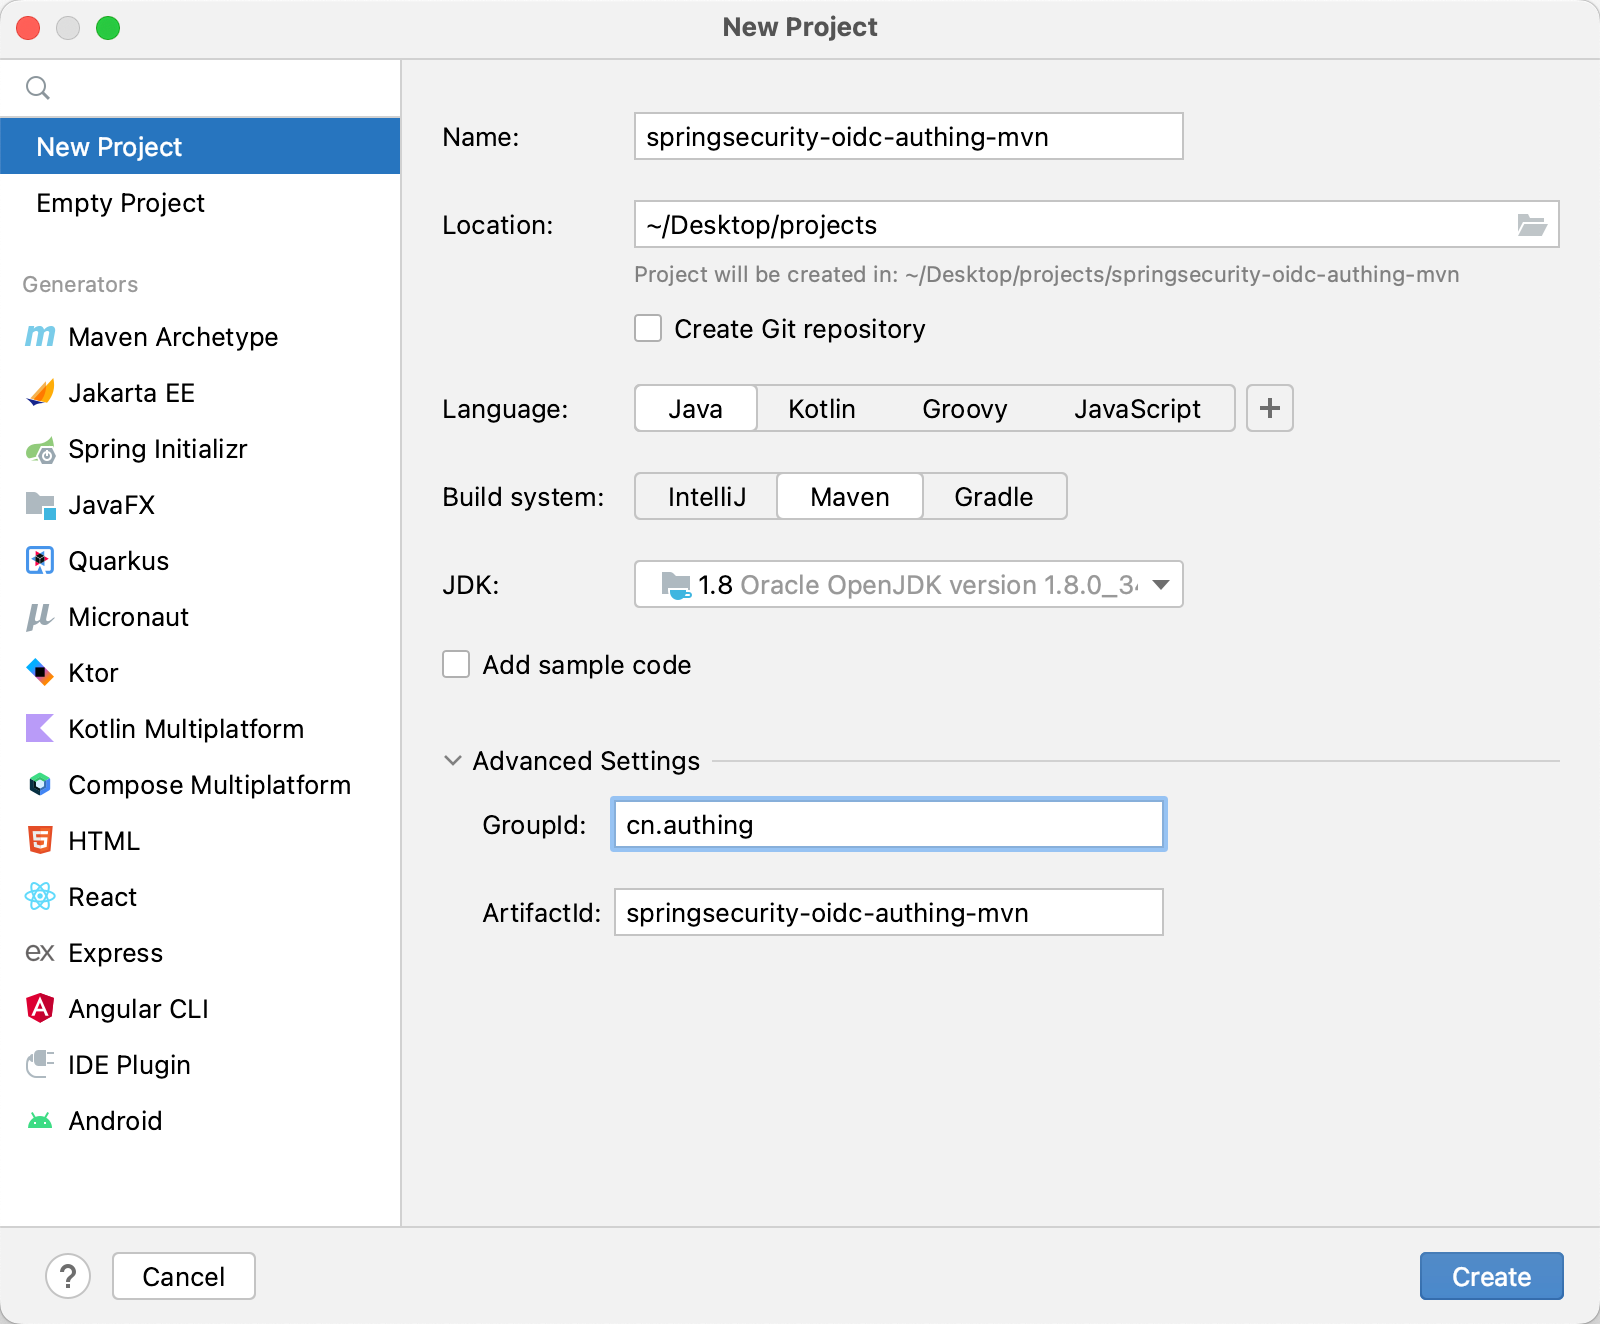
Next, add the parent project dependency and other dependency packages required during the integration process in pom.xml.
    <parent>
        <groupId>org.springframework.boot</groupId>
        <artifactId>spring-boot-starter-parent</artifactId>
        <version>2.5.5</version>
        <relativePath/> <!-- lookup parent from repository -->
    </parent>

        <dependency>
            <groupId>org.springframework.boot</groupId>
            <artifactId>spring-boot-starter-security</artifactId>
        </dependency>
        <dependency>
            <groupId>org.springframework.boot</groupId>
            <artifactId>spring-boot-starter-web</artifactId>
        </dependency>
        <dependency>
            <groupId>org.springframework.security</groupId>
            <artifactId>spring-security-test</artifactId>
            <scope>test</scope>
        </dependency>
        <dependency>
            <groupId>org.springframework.security</groupId>
            <artifactId>spring-security-config</artifactId>
        </dependency>
        <dependency>
            <groupId>org.springframework.security</groupId>
            <artifactId>spring-security-oauth2-client</artifactId>
        </dependency>
        <dependency>
            <groupId>org.springframework.security</groupId>
            <artifactId>spring-security-oauth2-jose</artifactId>
        </dependency>
        <dependency>
            <groupId>cn.hutool</groupId>
            <artifactId>hutool-http</artifactId>
            <version>5.7.11</version>
        </dependency>
🎉🎉🎉 So far, you have completed the project building using Spring Initializr and Maven. Please choose a method that suits your project development.
¶ Test project
After creating the project, run the project in IDEA.
After the project is running, use the browser to access http://localhost:8080, which will automatically jump to the /login route. You can see that a basic login form appears on the page, indicating that the project is initialized successfully. 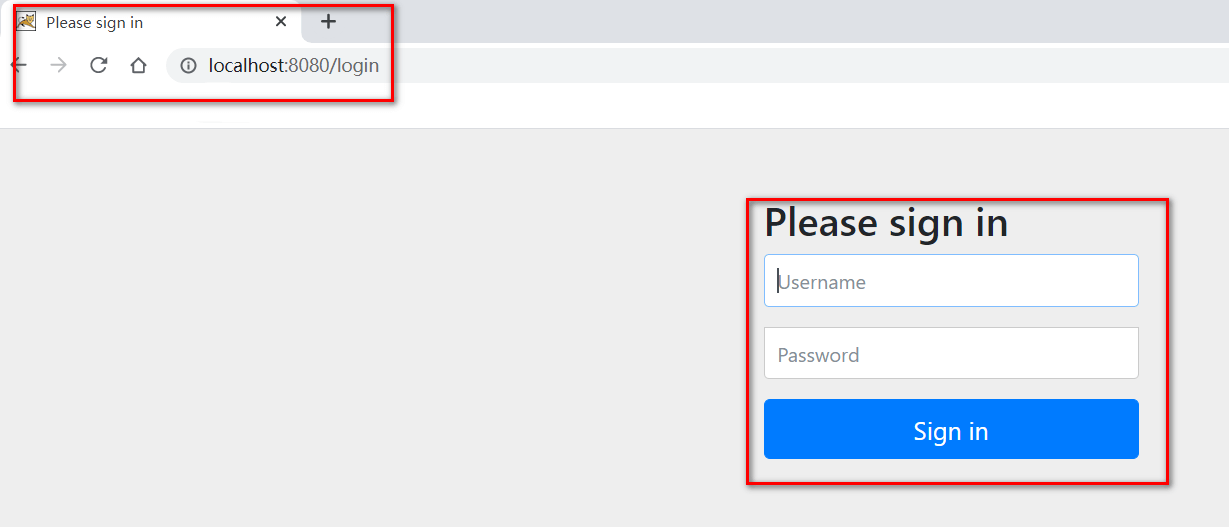
¶ Configure GenAuth
Configure the self-built application in the GenAuth console.
¶ Get GenAuth platform information
First, register an account in GenAuth, then enter the console and follow the guided steps to create a new user pool.
Click the "App" menu item on the left, select an existing application or Manually create an application (opens new window) and click in.
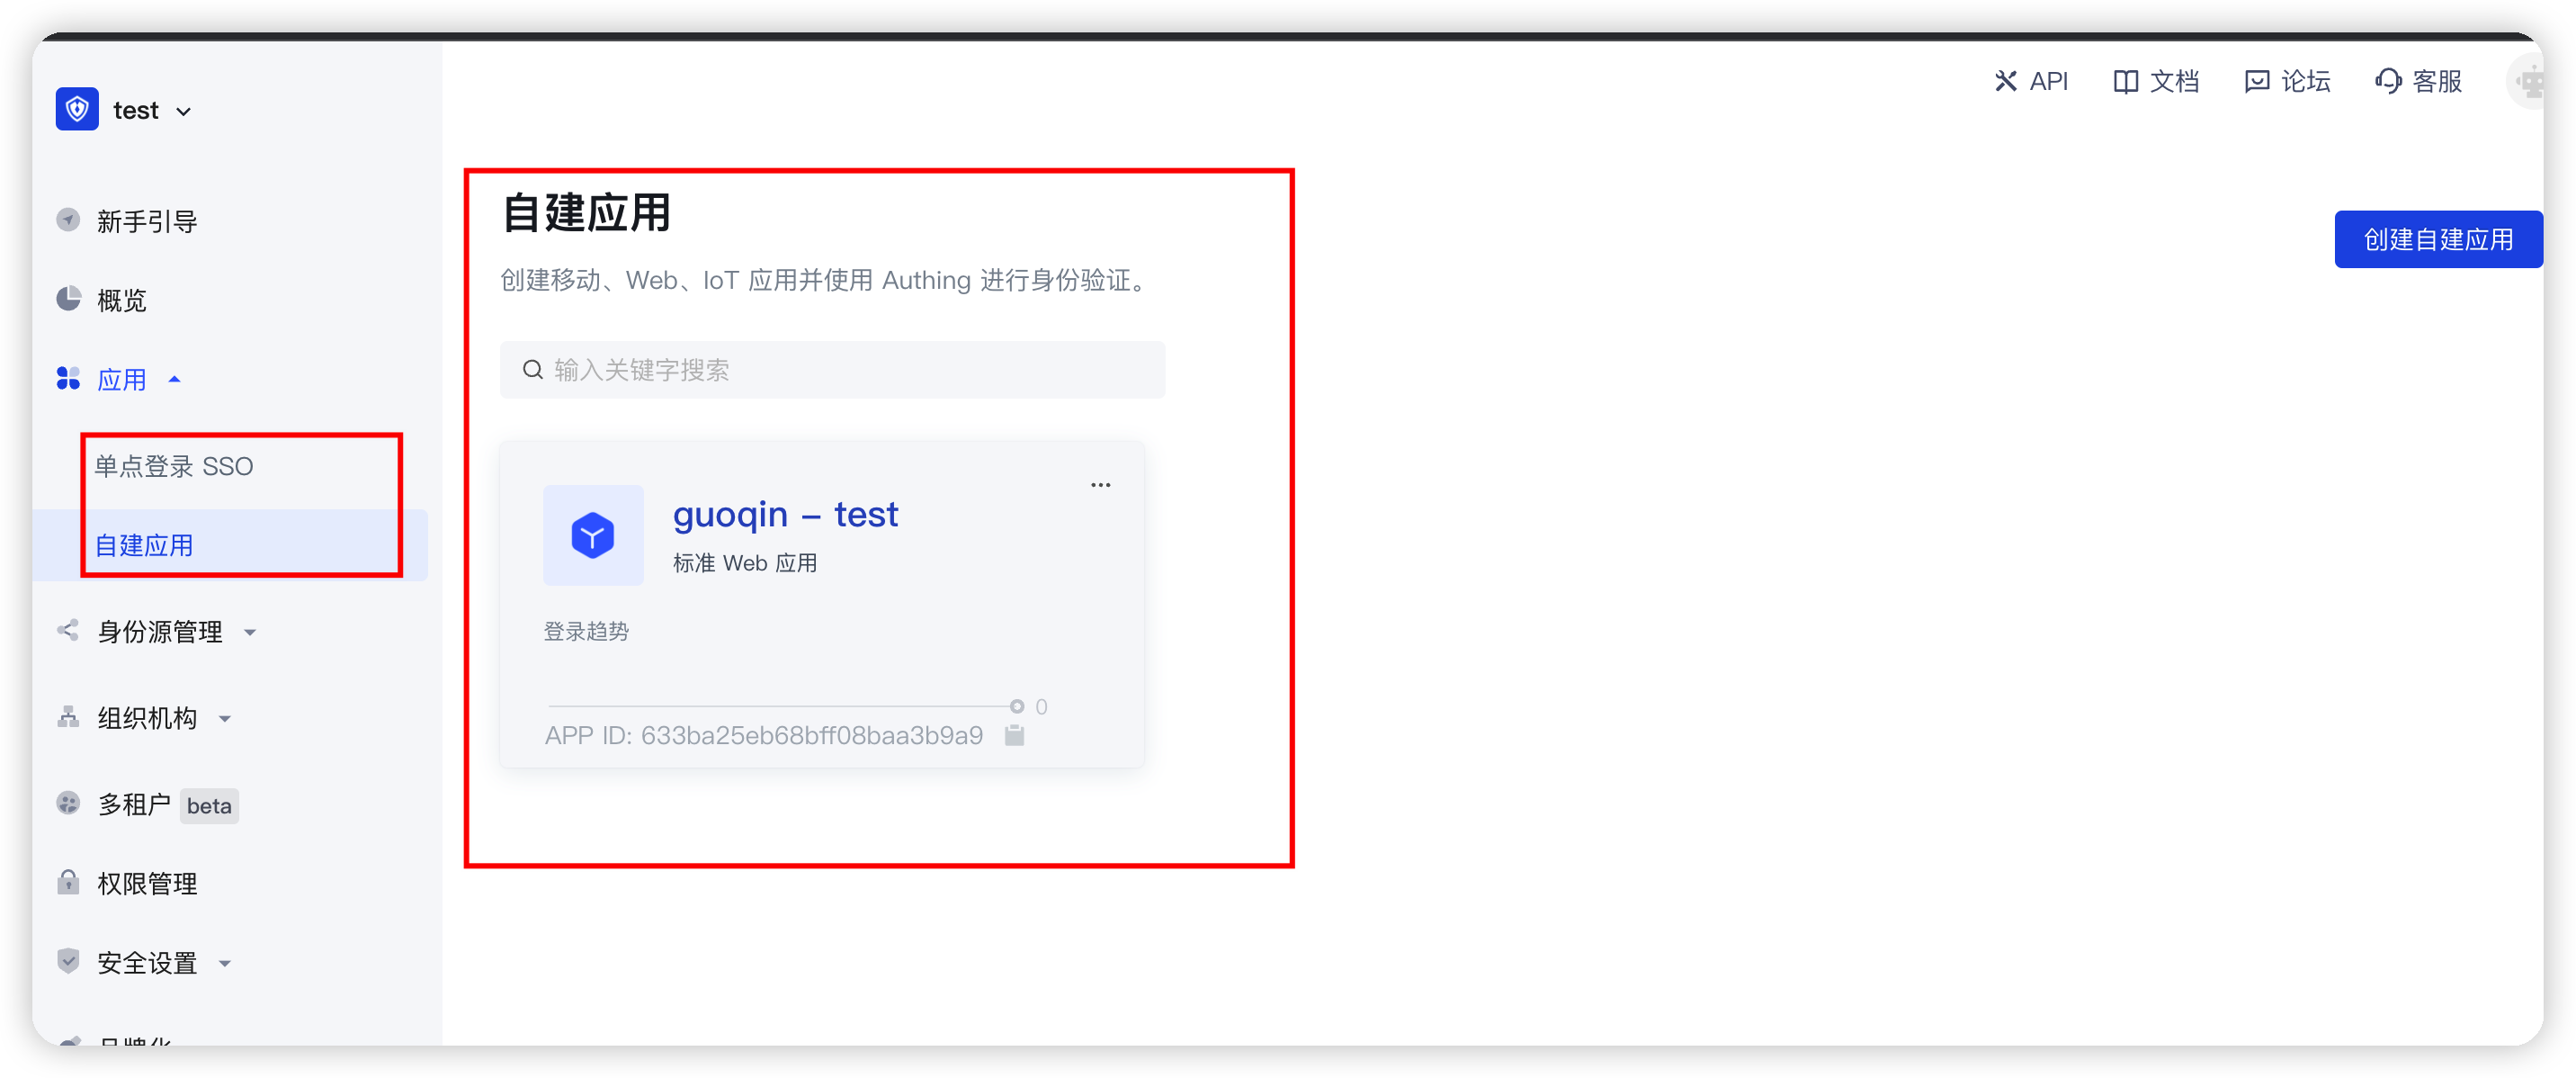
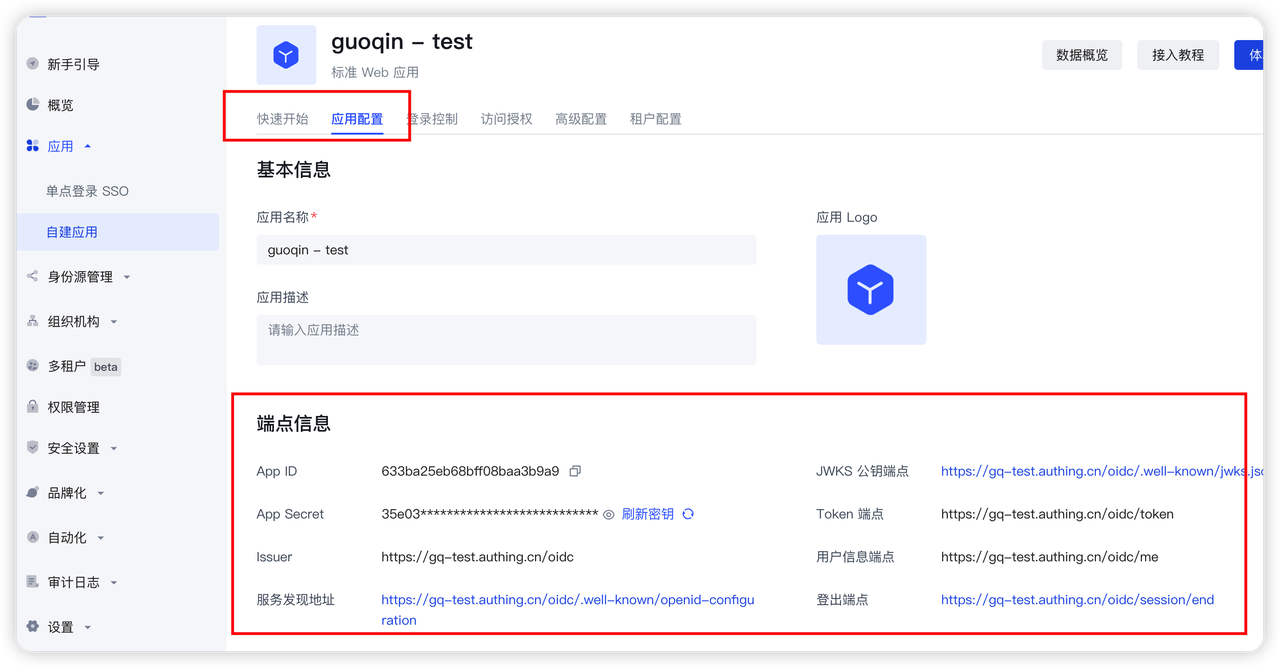
You will see the App ID, App Secret, Issuer url and Token endpoint. Please save them properly as they will be used later.
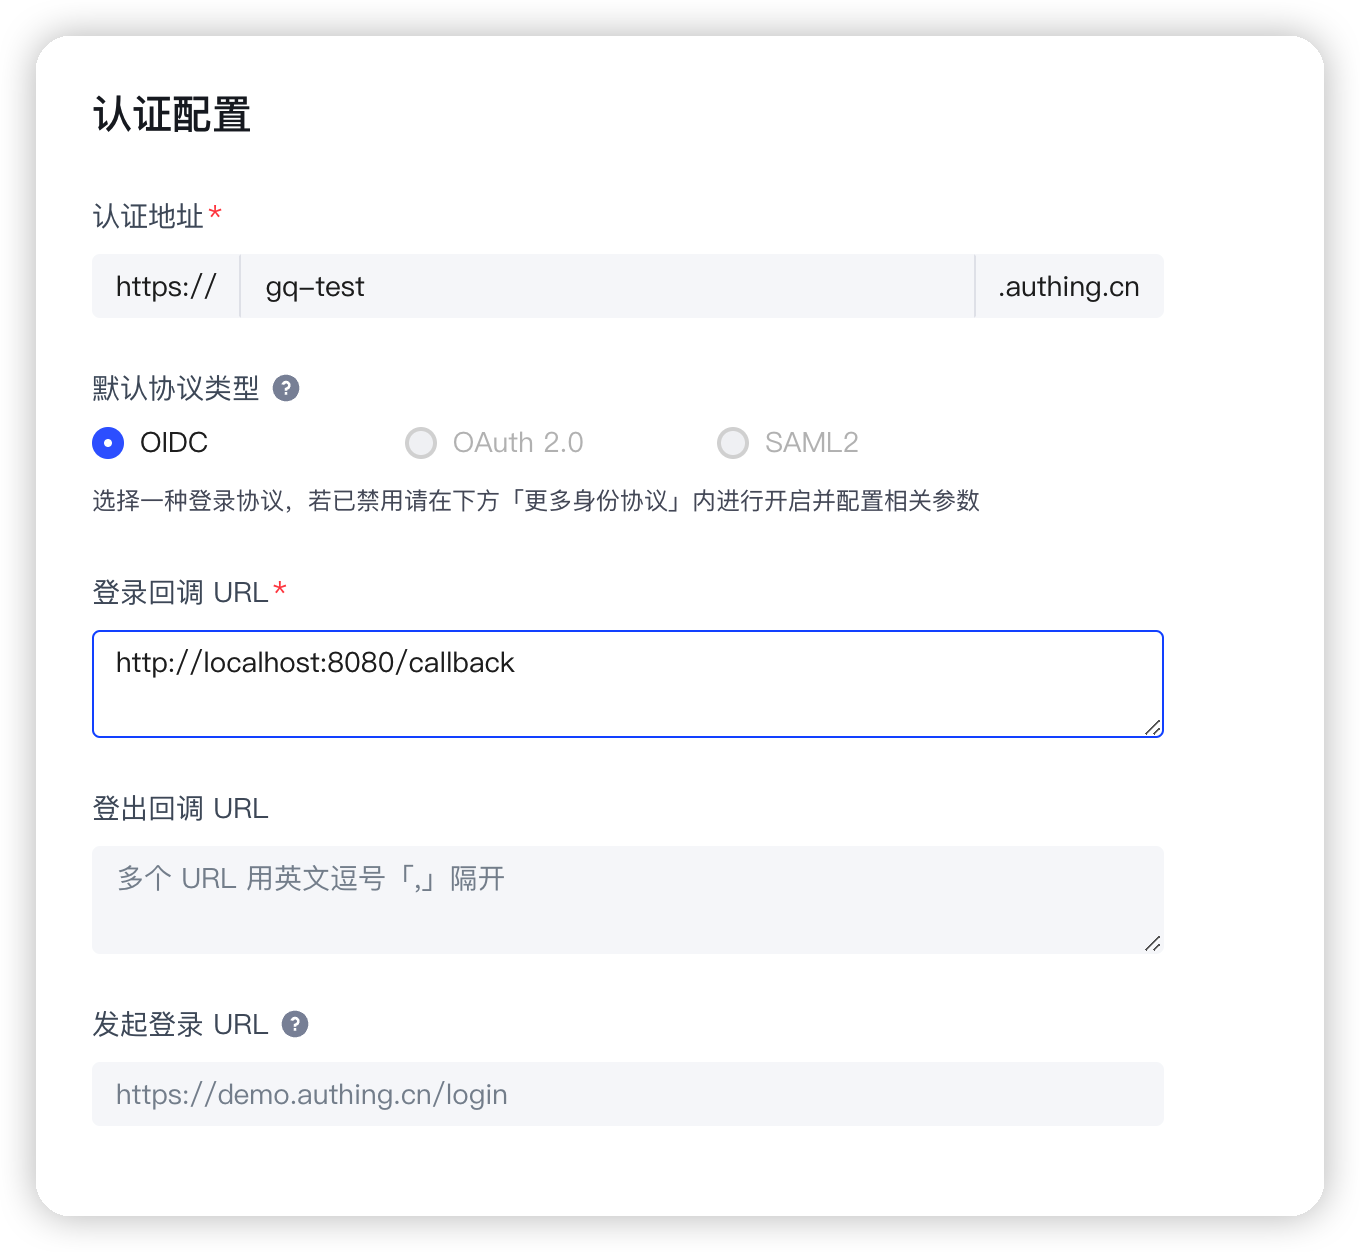
Then you need to add http://localhost:8080/callback to the login callback URL. The options after that should be consistent with the following figure.
Finally, you need to check the following configuration in the authorization configuration to ensure the authorization mode supported by the application and the security configuration of the token. 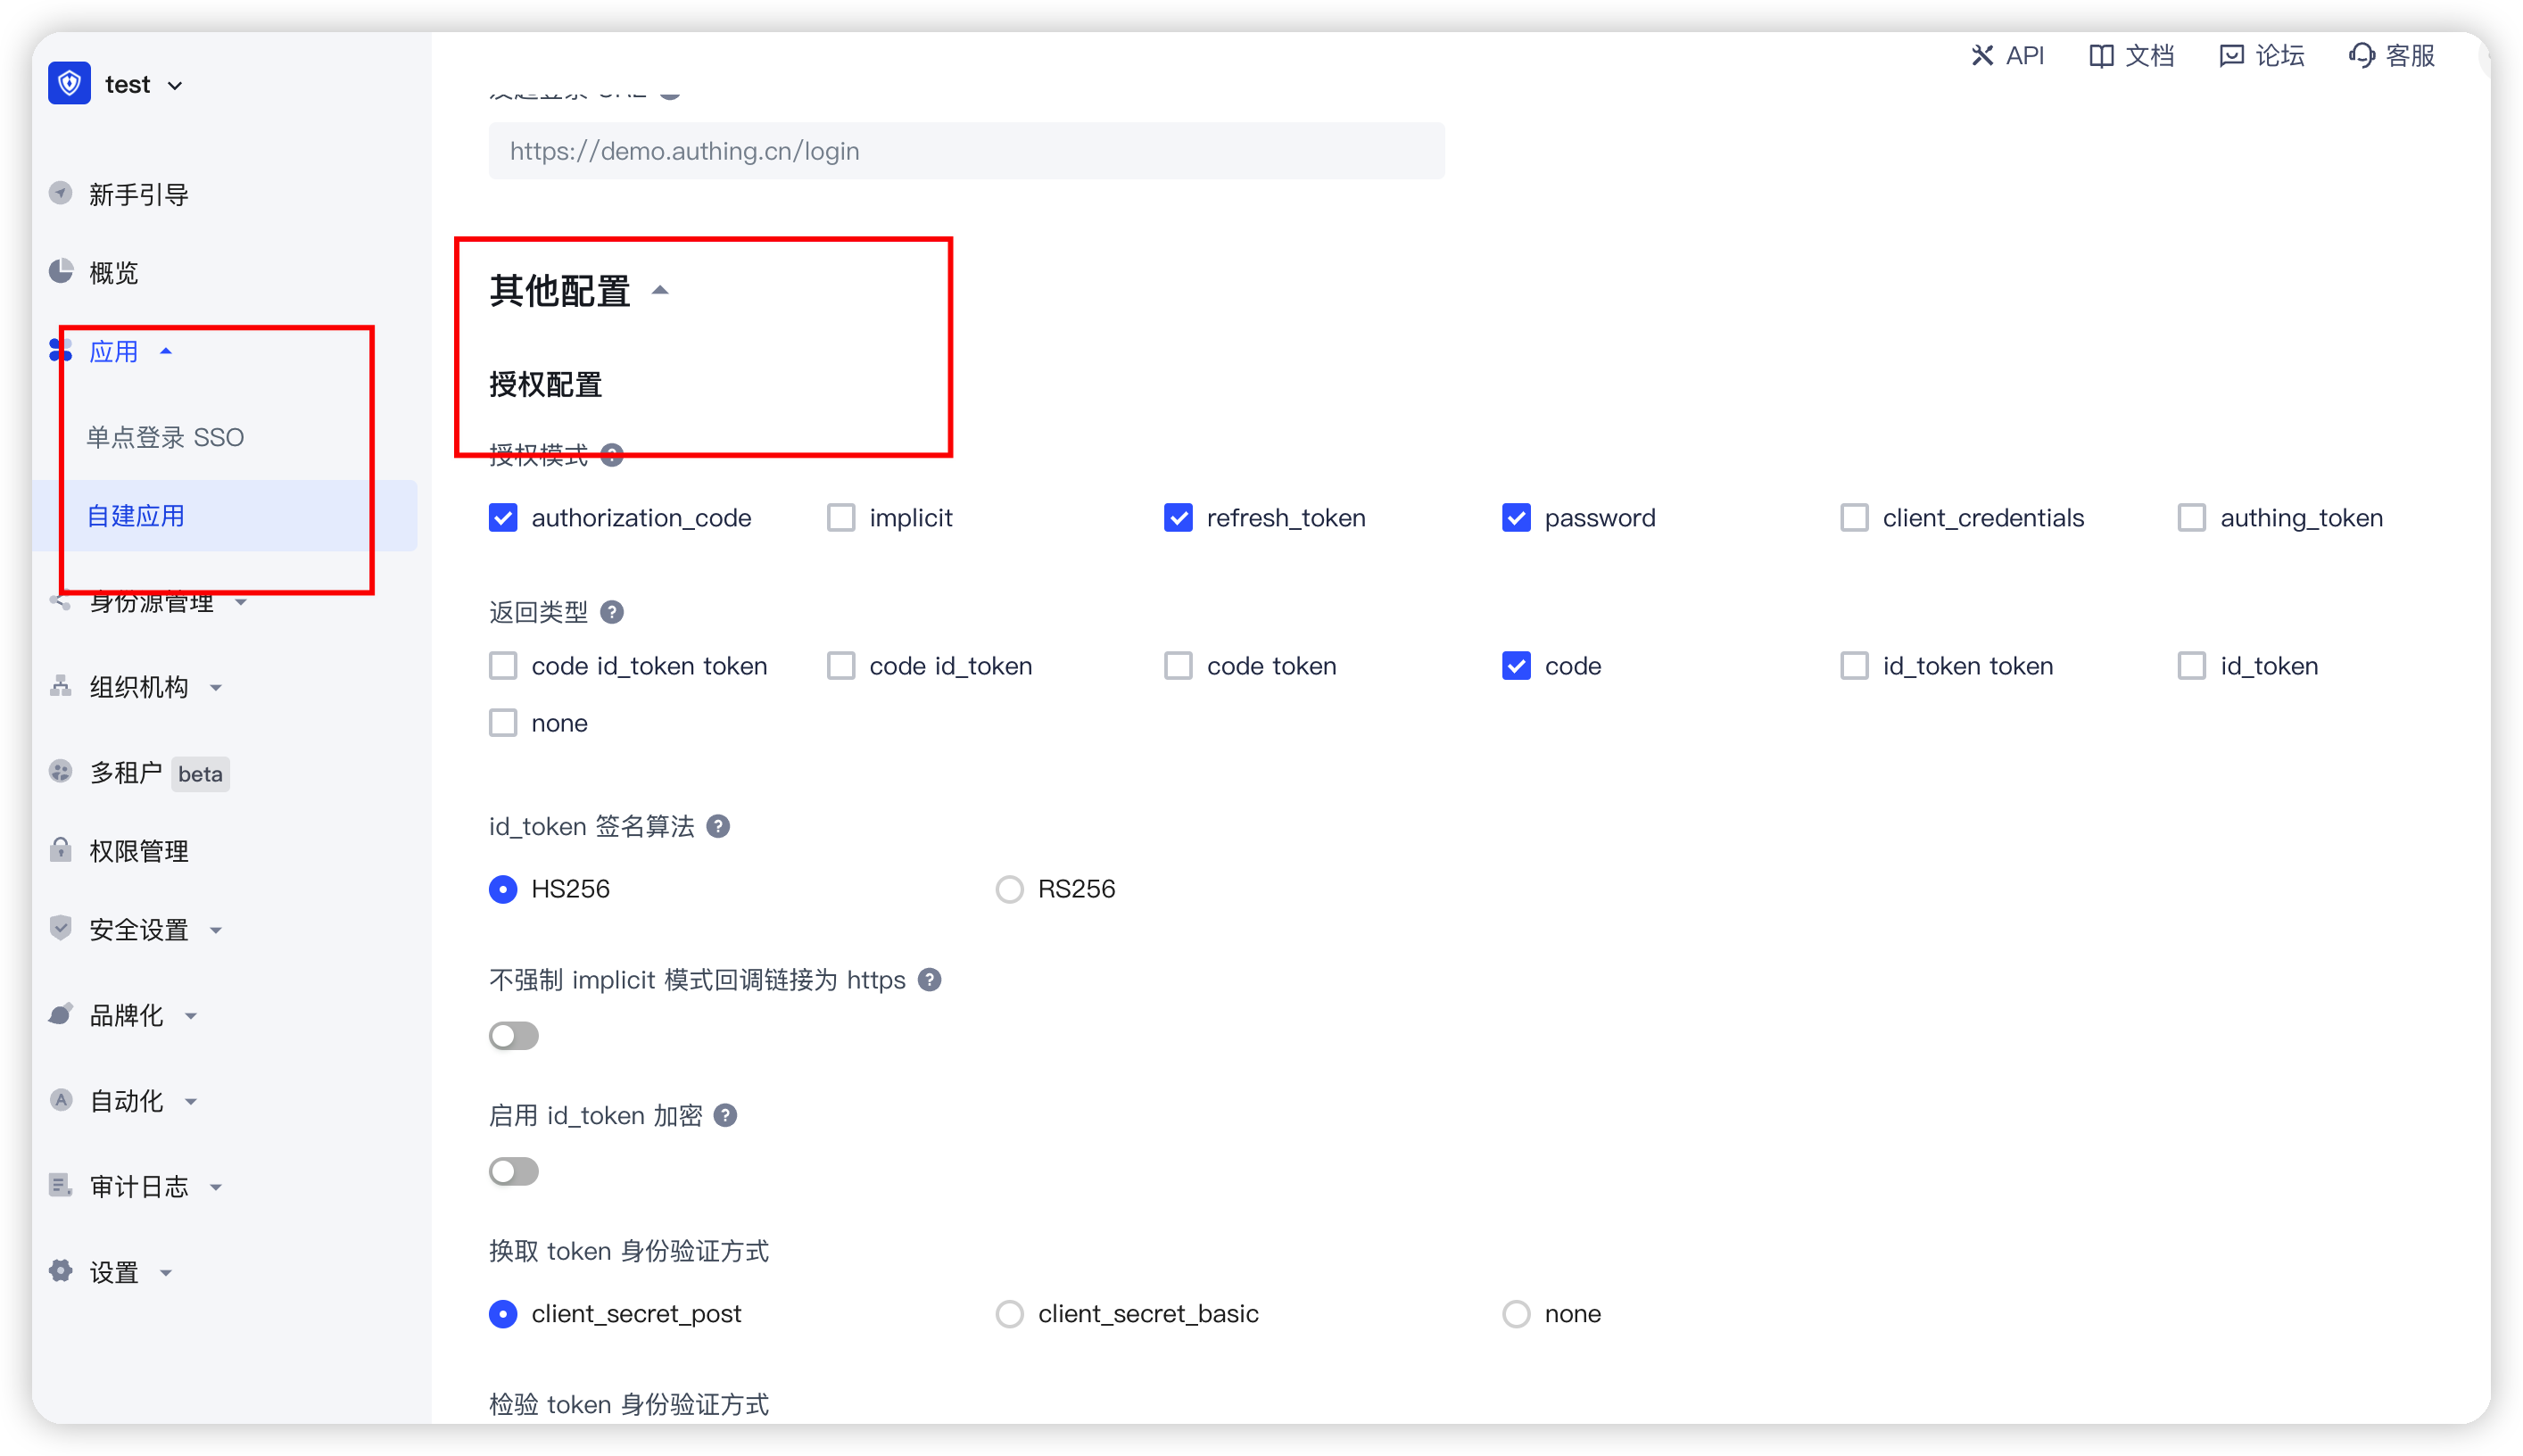
¶ Configure the configuration file in the project
Find src/main/resources/application.properties, rename it to application.yml, and add the following content:
spring:
  security:
    oauth2:
      client:
        registration:
          authing:
            client-id: { Replace with your App ID:61319680eaxxxxxxca9ca071 }
            client-secret:
              {
                Replace it with your App Secret,
                such as::cc8a53d7e22cxxxxxxxd6cc5d9f2,
              }
            redirect-uri:
              {
                Replace with the login callback address such ashttp://localhost:8080/callback,
              }
            client-authentication-method: post
            scope:
              - openid
              - profile
        provider:
          authing:
            issuer-uri:
              {
                Replace with your Issuer,
                such as:https://authing-net-sdk-demo.genauth.ai/oidc,
              }
            user-name-attribute: preferred_username
You need to replace {client-id}, {client-secret}, {redirect-uri}, and {issuer-uri} with the actual information in the previous step "Application Configuration".
¶ Automatic callback interface coding
Before writing the callback interface, we need to configure a configuration class first, because the Spring Security framework will intercept all interfaces by default. We need to configure the interface we call back to be unblocked and released, so as to process the interface callback.
Create a config package under the package where the Application class is located, and then create a SpringSecurityConfig class. The function of this configuration class is to release the specified interface.
package cn.authing.springsecurityoidcauthing.config;
import org.springframework.security.config.annotation.web.builders.HttpSecurity;
import org.springframework.security.config.annotation.web.configuration.EnableWebSecurity;
import org.springframework.security.config.annotation.web.configuration.WebSecurityConfigurerAdapter;
import static org.springframework.security.config.Customizer.withDefaults;
@EnableWebSecurity(debug = true)
public class SpringSecurityConfig extends WebSecurityConfigurerAdapter {
    @Override
    protected void configure(HttpSecurity http) throws Exception {
        //Note that callback here is the suffix of the callback address configured on the official website
        http.formLogin().disable();
        http.csrf().and().cors().disable();
        http.authorizeRequests()
                .mvcMatchers("/callback")
                .permitAll()
                .anyRequest().authenticated();
        // Authorization code mode callback
         http.oauth2Login(withDefaults());
        // Password mode and client mode
        // http.oauth2Login().loginPage("/loginByPassword").loginProcessingUrl("callback");
    }
}
Next, create another controller package, and then create a CallBackController class. Its function is to call back the callback address configured in the GenAuth console after successful login to obtain the user Token information. Note that the following parameters are all GenAuth OIDC standards and are also stipulated in the standard protocol (if you want to modify them, please follow the OIDC protocol standard to modify them). The values corresponding to the parameters are those previously configured in the GenAuth platform application.
package cn.authing.springsecurityoidcauthing.controller;
import cn.hutool.http.HttpUtil;
import org.springframework.web.bind.annotation.GetMapping;
import org.springframework.web.bind.annotation.RestController;
import java.util.HashMap;
import java.util.Map;
@RestController
public class CallBackController {
    @GetMapping("/callback")
    public String getTokenByCode(String code){
        Map<String,Object> paramMap = new HashMap<>();
        paramMap.put("code",code);
        paramMap.put("client_id","{Replace with your app_id such as:61319680eaxxxxxxca9ca071}");
        paramMap.put("client_secret","{Replace with your app_secret such as:cc8a53d7e22cxxxxxxxd6cc5d9f2}");
        paramMap.put("grant_type","authorization_code");
        paramMap.put("redirect_uri","{Replace with your redirect-uri such ashttp://localhost:8080/callback}");
        String result = HttpUtil.post("{Replace with your Token endpoint such ashttps://cjtjls-demo.genauth.ai/oidc/token}", paramMap);
        return result;
    }
}
¶ Run the project
Everything is ready. Now start the project and visit http://localhost:8080, you can see the GenAuth login window.
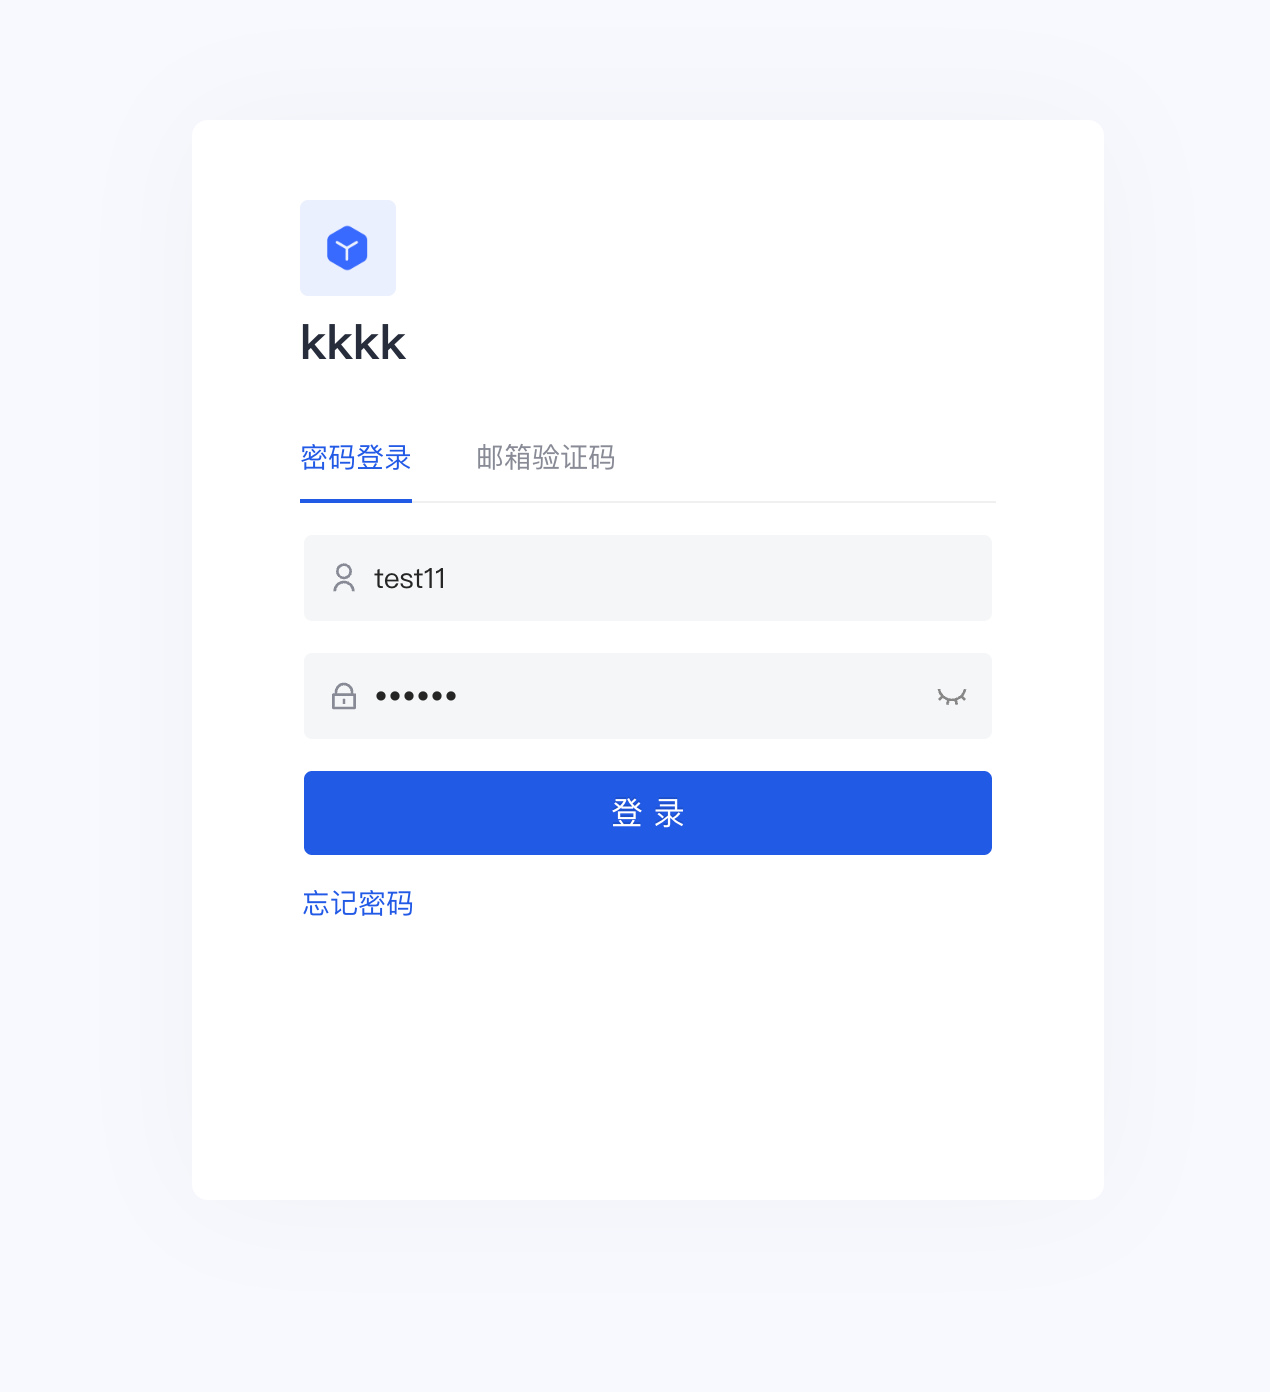
Spring Security will protect the homepage by default. When accessing the homepage, authentication will be performed. Unauthenticated access requests will jump to /login. After registering and logging in (if you do not see the registration option in the login box, go to the console "Organization" "Member Management" to configure it), you will jump back to the homepage. At this time, you can see that the welcome message on the page shows the username of the currently logged in user.
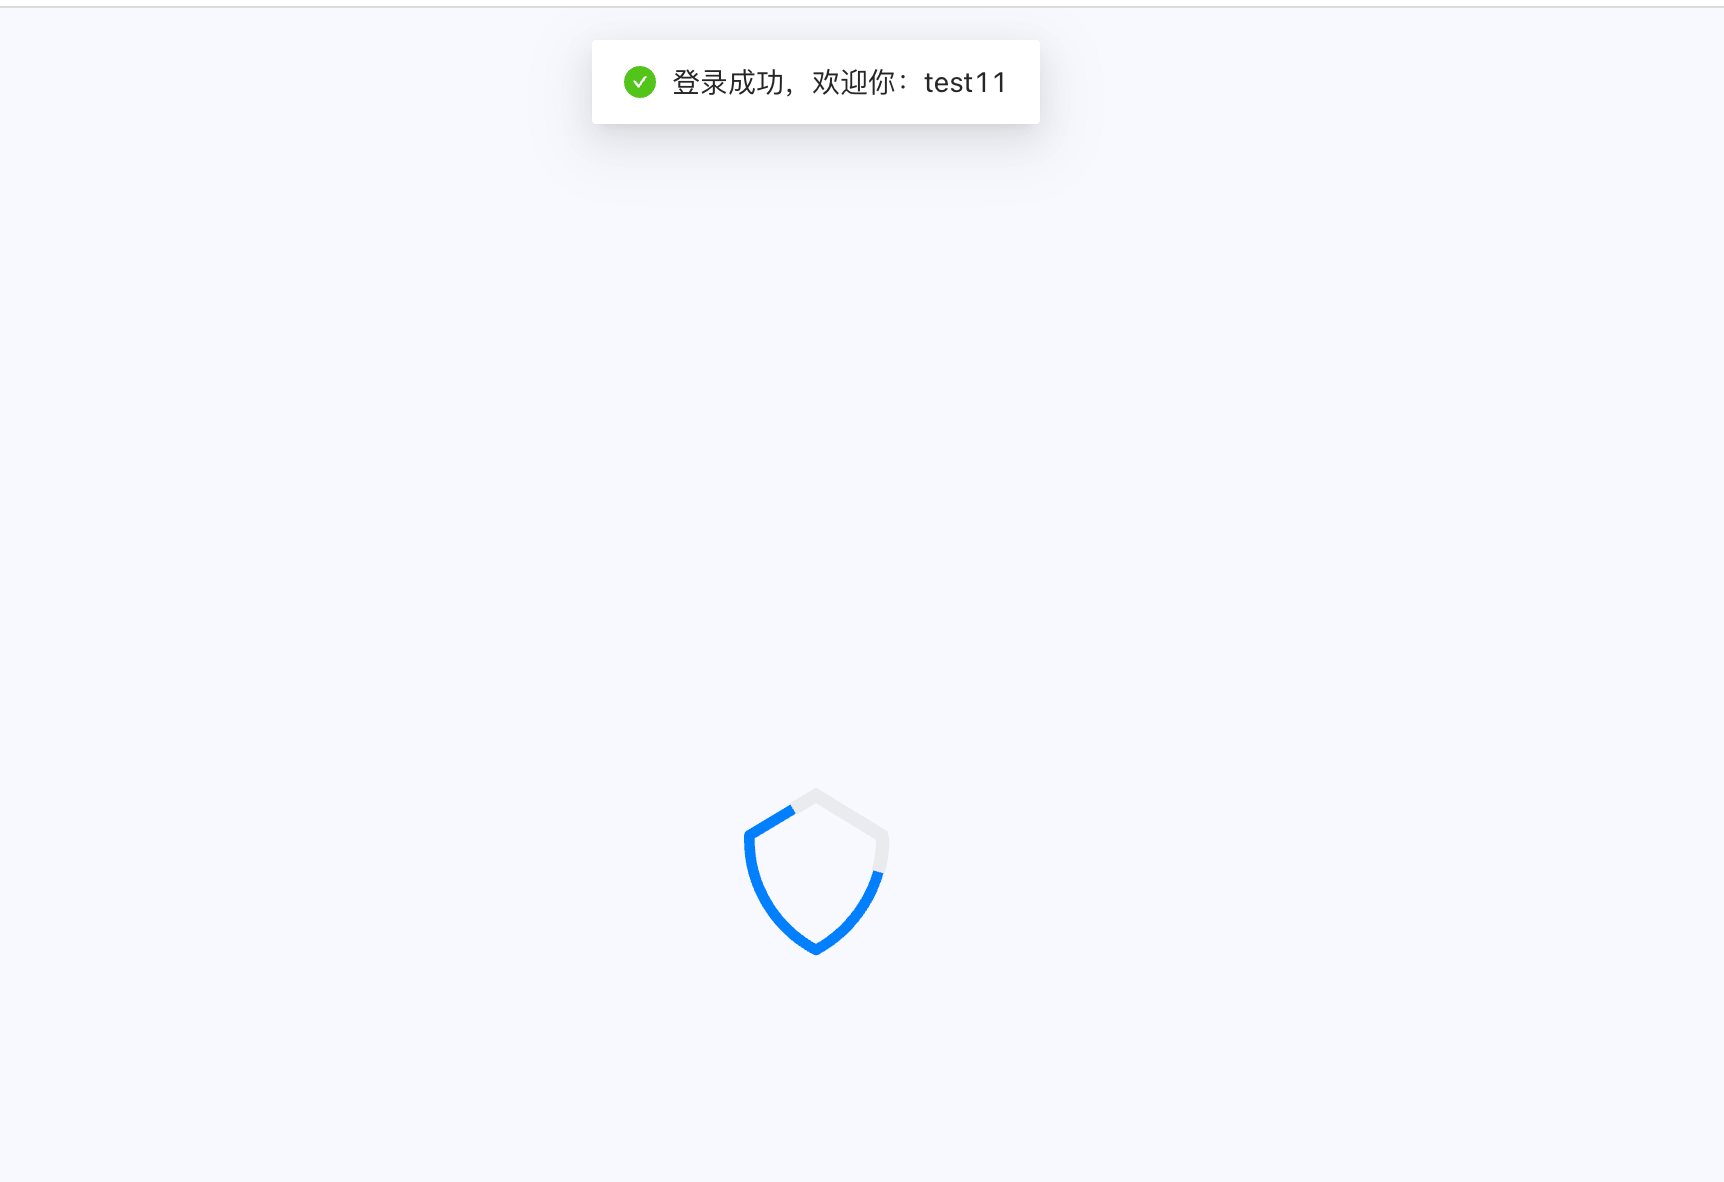
After successful login, it will automatically call back to our previous callback address (that is, the CallbackController we wrote above), and GenAuth will return the following information.

Congratulations 🎉, so far you have learned Spring Security 5 integrated GenAuth OIDC authentication and authorization.
¶ Other knowledge learning
¶ What is OIDC
Take a look at the official introduction http://openid.net/connect/ (opens new window)
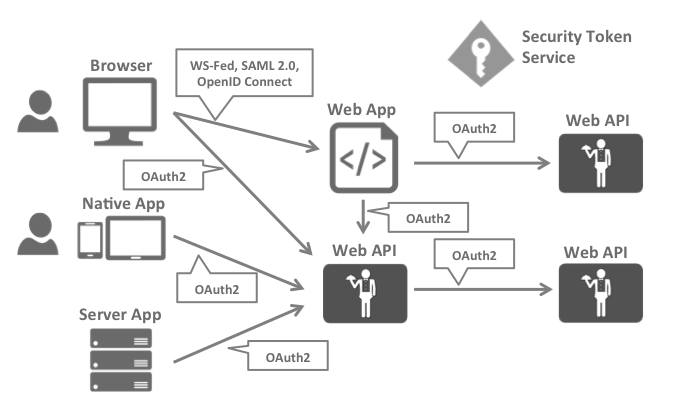
OpenID Connect 1.0 is a simple identity layer on top of the OAuth 2.0 protocol. It allows Clients to verify the identity of the End-User based on the authentication performed by an Authorization Server, as well as to obtain basic profile information about the End-User in an interoperable and REST-like manner.
OpenID Connect allows clients of all types, including Web-based, mobile, and JavaScript clients, to request and receive information about authenticated sessions and end-users. The specification suite is extensible, allowing participants to use optional features such as encryption of identity data, discovery of OpenID Providers, and session management, when it makes sense for them. Simply put: OIDC is the abbreviation of OpenID Connect, OIDC = (Identity, Authentication) + OAuth 2.0. It builds an identity layer on OAuth and is a standard authentication protocol based on the OAuth protocol. We all know that OAuth is an authorization protocol, which cannot provide a complete authentication function. OIDC uses the OAuth authorization server to provide user authentication for third-party clients and pass the corresponding authentication information to the client. It can be applied to various types of clients (such as server applications, mobile apps, JS applications), and is fully compatible with OAuth, which means that after you build an OIDC service, you can also use it as an OAuth service. The application scenario is as shown in the figure:
¶ OIDC protocol family
OIDC itself is composed of multiple specifications, including a core specification and multiple optional specifications to provide extended support. Let's take a look at them briefly:
Core: Required. Defines the core functions of OIDC, builds identity authentication on top of OAuth 2.0, and how to use Claims to pass user information.
Discovery: Optional. Discovery service allows clients to dynamically obtain metadata description information related to OIDC services (such as which specifications are supported, what is the interface address, etc.).
Dynamic Registration: Optional. Dynamic registration service allows clients to dynamically register with OIDC OP (this abbreviation will be explained later).
OAuth 2.0 Multiple Response Types: Optional. Provides several new response_types for the extension of OAuth 2.0.
OAuth 2.0 Form Post Response Mode: Optional. For the extension of OAuth 2.0, OAuth 2.0 returns information to the client through the querystring and fragment of the URL. This extension standard provides a mechanism to post data to the client based on the form.
Session Management: Optional. Session management is used to regulate how the OIDC service manages session information.
Front-Channel Logout: Optional. Based on the front-end logout mechanism, the RP (this abbreviation will be explained later) can log out without using the OP's iframe.
Back-Channel Logout: Optional. Based on the back-end logout mechanism, it defines how the RP and OP communicate directly to complete the logout.
¶ OIDC Core Concepts
OAuth 2.0 provides Access Token to solve the problem of authorizing third-party clients to access protected resources. On this basis, OIDC provides ID Token to solve the problem of third-party client identification user authentication. The core of OIDC is to provide the user's identity authentication information (ID Token) to the third-party client in the OAuth 2.0 authorization process. The ID Token is packaged in the JWT format. Thanks to JWT's self-contained, compact and tamper-proof mechanism, the ID Token can be safely passed to the third-party client program and easily verified. In addition, the UserInfo interface is provided for users to obtain more complete information about the user.
¶ OIDC main terms
Introduction to main terms and concepts
EU: a human user
RP: used to refer to the trusted client in OAuth 2.0, the consumer of identity authentication and authorization information
OP: a service capable of providing EU authentication (such as the authorization service in OAuth 2.0), used to provide EU identity authentication information to RP
ID Token: data in JWT format, containing EU identity authentication information
UserInfo Endpoint: user information interface (protected by OAuth 2.0), when RP uses Access Token to access, it returns the information of the authorized user, this interface must use HTTPS
¶ OIDC workflow
From an abstract perspective, the OIDC process consists of the following 5 steps:
RP sends an authentication request to OP
OP authenticates EU and then provides authorization
OP returns ID Token and Access Token (if necessary) to RP
RP uses Access Token to send a request UserInfo EndPoint
UserInfo EndPoint returns EU's Claims

¶ Next you may need
Integrate OAuth 2.0 with Spring Security
Resources on this pageExpress Learning
Express Integration OIDC Single Sign-On GuideIntegrate CAS with Spring Security
Resources on this page